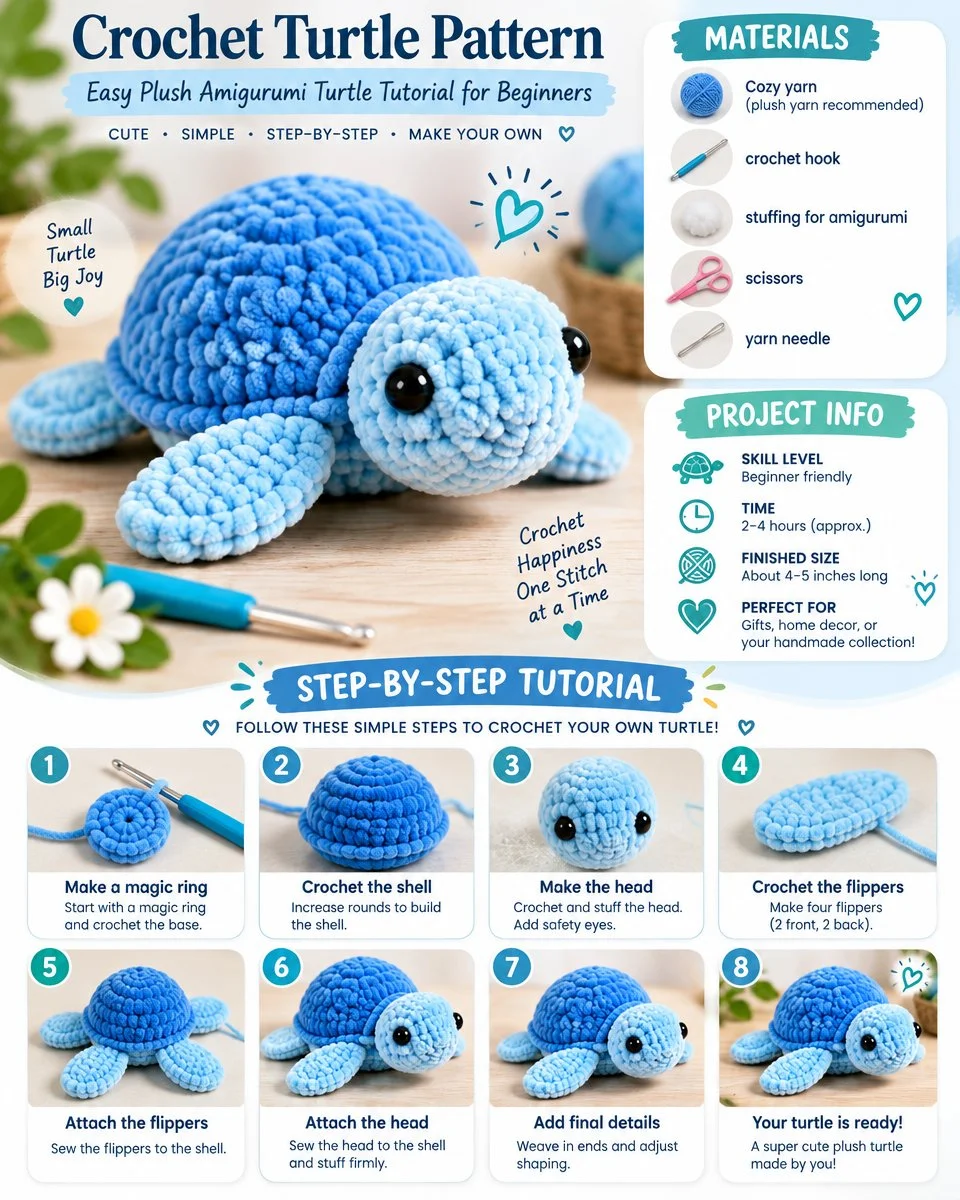
Small turtle, big joy! This cute plush turtle is worked in simple rounds with basic stitches, so it is a perfect first amigurumi. In about 2 to 4 hours you will have a squishy little friend, about 4 to 5 inches (10 to 13 cm) long, that makes a lovely gift, a cosy piece of home decor or a sweet addition to your handmade collection.
Project Info
- Skill level: Beginner friendly
- Time: 2 to 4 hours (approx.)
- Finished size: About 4 to 5 inches (10 to 13 cm) long
- Perfect for: Gifts, home decor or your handmade collection
Materials
- Cozy plush (chenille) yarn. Use a dark blue for the shell and a light blue for the head and flippers, or any colours you love.
- Crochet hook. About 5 to 6 mm for jumbo plush yarn. Check your yarn label.
- Stuffing for amigurumi
- Scissors
- Yarn needle
- Safety eyes, 10 to 12 mm. Use embroidered eyes for babies and children under 3.
Optional but helpful: a stitch marker.
Abbreviations
- MR: magic ring
- sc: single crochet
- inc: 2 sc in the same stitch
- dec: single crochet decrease (2 sc together)
- ( )x6: repeat the instructions in brackets 6 times
- Numbers in brackets at the end of a round are your total stitches.
All pieces are worked in continuous rounds, so do not join. Mark the first stitch of every round.
Step-by-Step Tutorial
Step 1: Make a Magic Ring
Start with a magic ring and crochet the base. Every piece of this turtle begins with a magic ring, so it is worth practising it once. Pull the tail tight so there is no hole in the centre.
Step 2: Crochet the Shell
Use your dark yarn.
- R1: 6 sc in MR (6)
- R2: inc x6 (12)
- R3: (sc, inc) x6 (18)
- R4: (2 sc, inc) x6 (24)
- R5: (3 sc, inc) x6 (30)
- R6: (4 sc, inc) x6 (36)
- R7 to R10: sc in each stitch around (36)
- R11: (4 sc, dec) x6 (30)
Fasten off and leave a long tail for sewing.
Shell base (light yarn): work R1 to R5 exactly as above to make a flat circle of 30 stitches. Stuff the shell firmly, then use the base to close the opening. Sew it in place or crochet the two pieces together with a round of sc.
Step 3: Make the Head
Use your light yarn.
- R1: 6 sc in MR (6)
- R2: inc x6 (12)
- R3: (sc, inc) x6 (18)
- R4: (2 sc, inc) x6 (24)
- R5 to R8: sc in each stitch around (24)
Insert the safety eyes between R5 and R6, about 6 to 7 stitches apart, and secure the backs. Then continue:
- R9: (2 sc, dec) x6 (18)
Stuff the head firmly.
- R10: (sc, dec) x6 (12)
- R11: dec x6 (6)
Fasten off, close the hole and weave in the end.
Step 4: Crochet the Flippers
Make four flippers: 2 front and 2 back. Use your light yarn.
- R1: 6 sc in MR (6)
- R2: inc x6 (12)
- R3 to R6: sc in each stitch around (12)
- R7: dec x6 (6)
Fasten off, leaving a tail. Flippers do not need stuffing. Flatten each one so it forms a soft oval.
Tip: make the two back flippers one round shorter (omit R6) if you would like them a little smaller than the front ones.
Step 5: Attach the Flippers
Pin the flippers to the shell before you sew. Place the front pair near the front edge and the back pair near the back, with a little space between each pair. When the turtle looks balanced, sew the flippers to the shell with small, even stitches.
Step 6: Attach the Head
Sew the head to the front of the shell, with the face looking forward. Add a little extra stuffing if needed, then sew all the way around so the head is firmly attached and does not wobble.
Step 7: Add Final Details
Weave in all ends. Gently adjust the shape of the shell and the flippers. If you wish, add a few embroidered stitches for a smile or little shell markings.
Step 8: Your Turtle Is Ready!
You have made a super cute plush turtle! Place it on a shelf, give it to someone special or start a whole turtle family.
Tips for Plush Yarn
Plush yarn is very soft but the stitches are harder to see. These tips help:
- Use a stitch marker in the first stitch of every round.
- Count your stitches at the end of each round.
- Work the stitches loosely enough to get your hook into them, but keep the fabric firm so the stuffing does not show.
- Feel for the stitches if you cannot see them. The V on top is easier to find by touch.
- Stuff gradually in small amounts to avoid lumps.
- Pin before you sew, always.
Make It Your Own
- Ocean colours: teal, aqua and navy
- Natural colours: olive, moss and sand
- Bigger or smaller: use thicker or thinner yarn with a matching hook and follow the same pattern
- A turtle family: make three sizes in coordinating colours
Safety Note
Safety eyes should not be used for children under 3. Use embroidered eyes for babies and young children, and always check that every part is securely attached.
Care Instructions
Spot clean or hand wash gently in cool water with mild soap. Do not wring. Press out the water with a towel, reshape and let it air dry flat.
Frequently Asked Questions
Is this turtle really beginner friendly?
Yes. You only need a magic ring, single crochet, increases and decreases.
How long does it take?
About 2 to 4 hours, depending on your speed.
How big is the finished turtle?
About 4 to 5 inches (10 to 13 cm) long with jumbo plush yarn.
Can I use regular yarn?
Yes. The turtle will be smaller and a little less squishy. Use a hook size suited to your yarn.
How do I make my turtle bigger?
Use a thicker yarn and a larger hook.
Can I sell the finished turtles?
If you share or sell your work, please credit the pattern.
Conclusion
With a few simple pieces and eight easy steps, you can crochet a cuddly plush turtle in an afternoon. It is a rewarding way to practise shaping, consistent rounds and tidy assembly, and the finished result makes a lovely gift or a cosy piece of home decor. Share your finished turtle and happy crocheting!
When you are ready for your next project, here are a few more turtle ideas to explore. If you enjoy this design, you can compare it with this beginner-friendly free crochet turtle pattern to see a different approach to the shell and flippers. Crocheters who prefer minimal finishing can try a no-sew turtle amigurumi plush pattern, while this small amigurumi turtle crochet pattern is useful when planning a compact project. For another little character with reduced assembly, try the no-sew crochet baby turtle pattern. Whichever version you choose, careful counting, gradual stuffing and pinned placement will produce the neatest finish.