
The first time I made this strawberry scones recipe, my kitchen smelled like a summer bakery and my first bite made me pause mid-sip of coffee.
These scones strike a careful balance between tender crumb and flaky edges — a quick, elegant bake that feels special but is surprisingly simple.
If you love fruit-forward pastries, these are the kind of scones you’ll make again and again (and maybe tuck into the freezer for emergencies).
Why You’ll Love This Recipe
- Quick assembly with a short chill time for reliable results.
- Light, tender interior with crisp, golden edges.
- Bright strawberry flavor tempered by a sweet lemon glaze.
- Uses pantry-friendly ingredients and a single bowl (plus a measuring cup).
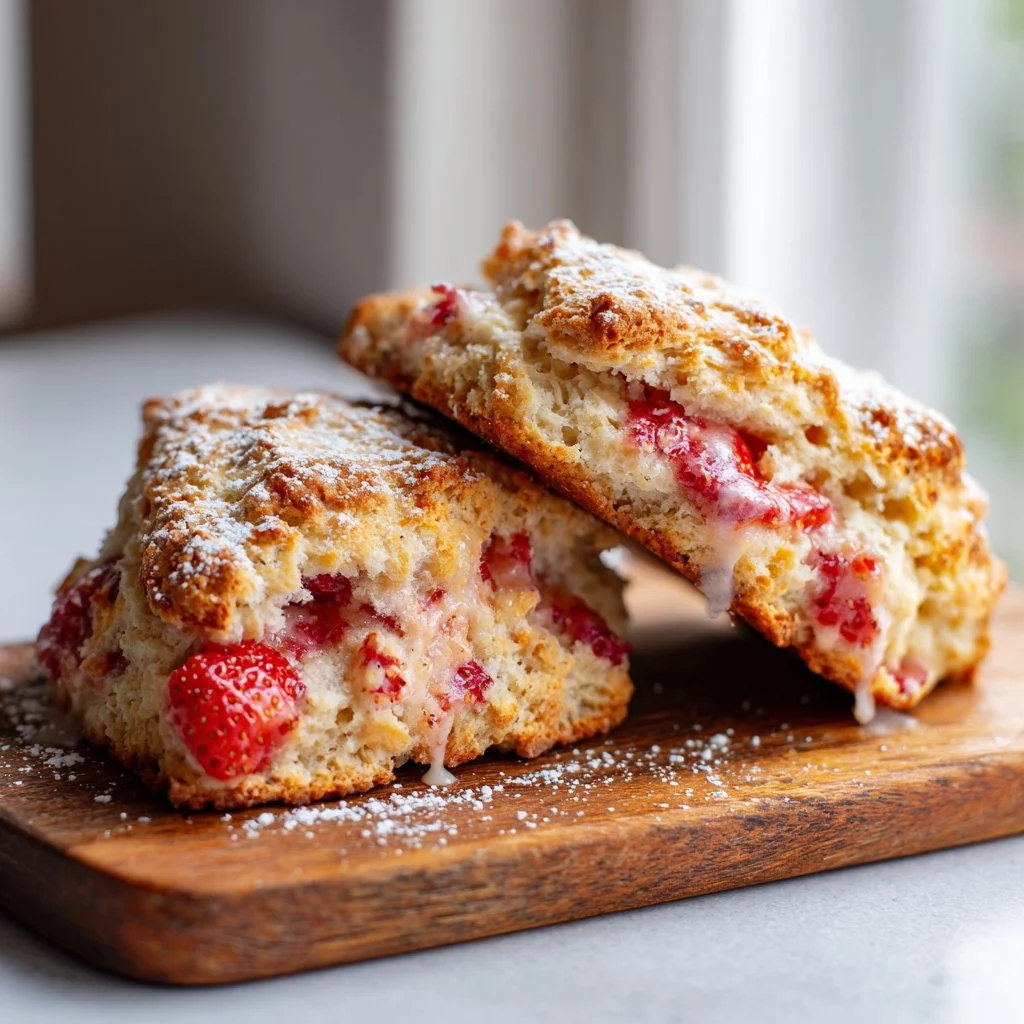
The texture is what sells these scones: buttery layers from the cold butter create delicate pockets, while the buttermilk and egg give a soft, tender crumb that melts on the tongue. The chopped strawberries add juicy bursts without turning the dough soggy, and the lemon-scented glaze cuts through the sweetness with a clean finish.
"I made these for brunch and everyone asked for the recipe. Perfectly tender with just the right amount of strawberry — a new favorite!" — 5★ reader review
Key Ingredients
Buttermilk: The 1/3 cup of buttermilk is critical for tang and tenderness. Its acidity reacts with the baking powder to give a light crumb, and its fat content keeps the scones moist without making them heavy. If you don’t have buttermilk, plain yogurt thinned with a little milk is an acceptable substitute, but the classic tang is hard to beat.
Cold unsalted butter: Six tablespoons of very cold, cubed unsalted butter are what create flaky layers and that buttery bite. Use a high-quality European-style butter if you want a richer flavor; keep it straight from the fridge until it goes into the mixer so you get pea-sized bits instead of melted butter.
All-purpose flour: Two cups of AP flour provide the right structure — enough gluten to hold the scones together but not so much that they become tough. If you prefer a lighter, slightly more tender texture, you can substitute 1/4 cup of the flour with cake flour, but stick to AP for reliable results.
Fresh strawberries: The 1/2 cup of chopped strawberries adds fresh, fruity pockets. Use ripe but firm berries and pat them dry before chopping to avoid excess moisture. If your strawberries are overly soft, toss them in a tablespoon of flour before folding into the dough to prevent bleeding.
Full ingredient list:
- 1/3 cup buttermilk
- 1 large egg (slightly beaten)
- 2 cups all-purpose flour (plus a 1/4 cup or so for working with dough)
- 3 tablespoons granulated sugar
- 2 teaspoons baking powder
- 3/4 teaspoon fine sea salt
- 6 tablespoons cold unsalted butter (cut into small cubes)
- 1/2 cup chopped strawberries
- 1 1/4 cup powdered sugar
- 2 tablespoons fresh-squeezed lemon juice (or milk, if desired)
Step-by-Step Instructions
Step 1: Combine wet ingredients
Whisk together the buttermilk and the slightly beaten egg in a large measuring pitcher until smooth.
Set that mixture aside while you prepare the dry ingredients.
Pro Tip: Using a pitcher with a spout makes it easier to drizzle the liquid into the dough without overmixing.
Step 2: Mix dry ingredients and incorporate butter
Add the flour, 2 tablespoons of the granulated sugar, baking powder, and 3/4 teaspoon sea salt to the bowl of a stand mixer fitted with the paddle attachment.
Mix on low until the dry ingredients are evenly combined.
Add the cubed cold butter and increase the mixer to medium; work the dough until the butter pieces resemble peas.
If you don’t have a stand mixer, use a pastry cutter, two knives, or your fingertips to cut the butter into the flour until pea-sized bits remain.
Pro Tip: The visible pea-sized butter pieces are the clue — they steam during baking and create flakiness.
Step 3: Add the wet ingredients and strawberries
Reduce the mixer speed to low and slowly drizzle the buttermilk-and-egg mixture into the bowl.
Stop mixing as soon as the dough just comes together; overmixing tightens the gluten and yields tough scones.
Gently fold in the chopped strawberries on low speed, just until evenly distributed.
Pro Tip: The dough should be shaggy and slightly sticky; if it feels dry, add a teaspoon of cold milk at a time.
Step 4: Shape and chill the dough
Turn the dough out onto a lightly floured work surface. With floured hands, pat or gently roll it into a round about 1 inch thick.
Wrap the dough in plastic wrap and refrigerate for 1–2 hours to firm up the butter and make clean cuts.
Pro Tip: Chilling not only helps with clean wedges but improves oven spring for a taller scone.
Step 5: Preheat and cut
Preheat the oven to 400°F and line a baking sheet with parchment paper or a silicone baking mat.
Unwrap the chilled dough and use a sharp knife or pastry cutter to slice it into 8 wedges. Place the wedges about 2 inches apart on the prepared sheet.
Pro Tip: Dip the knife in flour or warm water between cuts to prevent sticking and keep clean edges.
Step 6: Bake until golden
Bake the scones for 15–18 minutes, or until golden brown and cooked through.
Transfer the scones to a cooling rack and allow them to cool completely before glazing.
Pro Tip: The scones are done when the edges are golden and a toothpick inserted into the center comes out clean or with a few moist crumbs.
Step 7: Make the glaze and finish
Combine the powdered sugar and fresh lemon juice (or milk) in a small bowl and stir until smooth. Add up to 1 more tablespoon of liquid if needed to reach a drizzling consistency.
Drizzle the glaze over the cooled scones and set aside for about an hour to let the glaze set. Serve and enjoy.
Pro Tip: Use a spoon or a small zip-top bag with the corner snipped for controlled drizzling; serve after the glaze is set for the best texture.
Expert Tips for Success
- Keep butter very cold: The success of flaky scones depends on cold butter. Work quickly and return the dough to the fridge if the butter starts to soften. A chilled bowl and chilled paddle (or cold hands) help in warm kitchens.
- Do not overwork the dough: Mix only until the dough comes together. Overworking develops gluten and yields dense, tough scones rather than tender, crumbly ones.
- Measure flour correctly: Spoon flour into the measuring cup and level it off instead of scooping directly from the bag. Scooping packs flour and leads to dry, heavy scones.
- Control strawberry moisture: If your berries are extra juicy, toss them in a teaspoon of flour before folding them in to minimize bleeding into the dough. Pat diced berries dry with a paper towel if needed.
- Chilling matters: A 1–2 hour chill gives better rise and cleaner slices. If you’re short on time, 30 minutes in the freezer works in a pinch but watch for frozen centers.
- Test for doneness by color and sound: Golden edges and a hollow sound when tapped are better indicators than timing alone, since oven hot spots vary.
- Use a stone or heavy baking sheet: A thicker surface helps distribute heat evenly for consistent browning and a better crust.
- Glaze timing: Glaze only when the scones are completely cool. Warm scones will make the glaze run off and create a soggy top.
Storage & Freezing
Fridge storage: Store fully cooled scones in an airtight container in the refrigerator for up to 3 days. If glazed, place parchment between layers to prevent sticking. Reheat in a 325°F oven for 8–10 minutes to refresh the edges and warm the interior.
Freezer storage: For longer storage, freeze unglazed scones in a single layer on a baking sheet until solid, then transfer to a freezer-safe bag for up to 3 months. To freeze glazed scones, flash-freeze first and then wrap individually to protect the glaze. Thaw at room temperature and reheat briefly in a low oven.
Reheating: Reheat frozen or refrigerated scones in a 325°F oven for 10–12 minutes (cover loosely if glazing to prevent melting). Avoid microwaving for more than 10–15 seconds; it softens the edges and can make scones rubbery. A few minutes under a broiler can revive a browned top if needed — watch closely.
Variations & Substitutions
- Lemon-strawberry: Add 1 teaspoon lemon zest to the dough and increase the lemon in the glaze to 3 tablespoons for a brighter, citrusy scone.
- Chocolate-strawberry twist: Fold in 1/3 cup mini semisweet chocolate chips with the berries for a dessert-like scone. A choc-strawberry pairing is irresistible; try the chocolate-strawberry cupcakes style for inspiration via chocolate-strawberry cupcakes.
- Dairy-free swap: Use a plant-based butter substitute chilled and swap buttermilk with a mixture of almond milk and 1 teaspoon white vinegar. Results are slightly less tender but still delicious.
- Flour alternatives: For a nuttier flavor, replace 1/2 cup of the all-purpose flour with almond flour; reduce by a tablespoon if the dough feels too wet. For gluten-free, use a 1:1 GF flour blend formulated for baking and add a teaspoon of xanthan gum if your blend lacks it.
- Cookie-inspired option: For a sweeter, softer cookie-like scone, increase granulated sugar by 1 tablespoon and fold in finely chopped shortbread or cookie crumbs (think strawberry-kiss cookie ideas from this recipe homemade strawberry kiss cookies).
Frequently Asked Questions

Q: Can I use frozen strawberries in these scones?
A: Yes, but with caution. Use frozen strawberries only if you toss them in a tablespoon of flour while still frozen to absorb excess moisture. Fold them into the dough straight from the freezer and expect slightly darker spots where the berry juices ran. Bake times remain similar; just watch for color and doneness.
Q: How do I make the scones taller and more tender?
A: Keep the butter in pea-sized pieces and chill the dough thoroughly before cutting. Use a light hand when mixing and avoid overworking. Slightly higher oven heat (400°F as written) helps immediate oven spring that boosts height.
Q: My scones came out dry — what went wrong?
A: Dry scones usually mean too much flour or overbaking. Ensure you measure flour correctly (spoon and level). Also check oven temperature with an oven thermometer; some ovens run hot and will bake scones faster than expected.
Q: Can I make the dough ahead of time?
A: Yes. After shaping the round, wrap the dough tightly and refrigerate up to 24 hours, or freeze for up to 1 month. If frozen, slice and bake from frozen — add 2–4 extra minutes to the baking time and watch for a golden color.
Q: What’s the best glaze for a sweeter, less-tangy finish?
A: Swap the lemon juice for whole milk in the glaze for a milder finish. You can also fold in a teaspoon of vanilla extract for extra sweetness and aroma. For a richer glaze, replace up to half the powdered sugar with sifted confectioners’ sugar and use cream instead of milk.
Final Thoughts
These strawberry scones are a reliable, delicious bake for weekend breakfasts, tea-time treats, or an easy dessert.
If you tried them, please leave a star rating in the recipe card below and pin this recipe to your brunch board on Pinterest.
For technique inspiration, check out Natasha’s take on a similar sweet scone in Perfect Strawberry Scones Recipe – NatashasKitchen.com.
If you like fruit-forward pastries, I also recommend the fresh approach shown in Strawberry Scones – 101 Cookbooks.
For another popular home-baker version, see the approachable recipe at Strawberry Scones {Melt in Your Mouth Good} – Two Peas & Their Pod.

Strawberry Scones
Ingredients
Scone Base
- 1/3 cup buttermilk Critical for tang and tenderness; can substitute with yogurt thinned with milk.
- 1 large egg (slightly beaten)
- 2 cups all-purpose flour 2 cups provide the right structure; replace 1/4 cup with cake flour for a lighter texture.
- 3 tablespoons granulated sugar Used in the dough for sweetness.
- 2 teaspoons baking powder
- 3/4 teaspoon fine sea salt
- 6 tablespoons cold unsalted butter (cut into small cubes) Keep very cold to ensure flaky layers.
- 1/2 cup chopped strawberries Use fresh, firm strawberries to avoid excess moisture.
Glaze
- 1 1/4 cups powdered sugar
- 2 tablespoons fresh-squeezed lemon juice Can substitute with milk if desired.
Instructions
Preparation
- Whisk together the buttermilk and slightly beaten egg in a large measuring pitcher until smooth.
- Set that mixture aside while you prepare the dry ingredients.
Mixing
- Add the flour, 2 tablespoons of granulated sugar, baking powder, and sea salt to a mixing bowl.
- Mix on low until combined, then add the cubed cold butter and mix until the butter resembles peas.
- Add the wet ingredients and strawberries, mixing until just combined.
Chilling
- Pat or gently roll the dough into a round about 1 inch thick. Wrap in plastic wrap and refrigerate for 1–2 hours.
Baking
- Preheat the oven to 400°F and line a baking sheet with parchment paper.
- Unwrap the chilled dough and slice into 8 wedges, placing on the prepared baking sheet.
- Bake for 15–18 minutes until golden brown and cooked through.
Glazing
- In a small bowl, combine the powdered sugar and lemon juice until smooth, adding more liquid if needed.
- Drizzle the glaze over the cooled scones and allow to set before serving.