Weeknights are brutal, especially when you’re trying to keep the kids entertained and fed while juggling a million other things. A while back, I mistakenly thought fruit snacks could double as a quick dessert. It didn’t go well. But then I discovered a game-changer: these Ocean Blue Lemonade Popsicles. They’re not just a hit with kids; they add a fun twist to a hot summer day, helping you escape the mundane while keeping your little ones satisfied and cool.
What Makes This Recipe Work
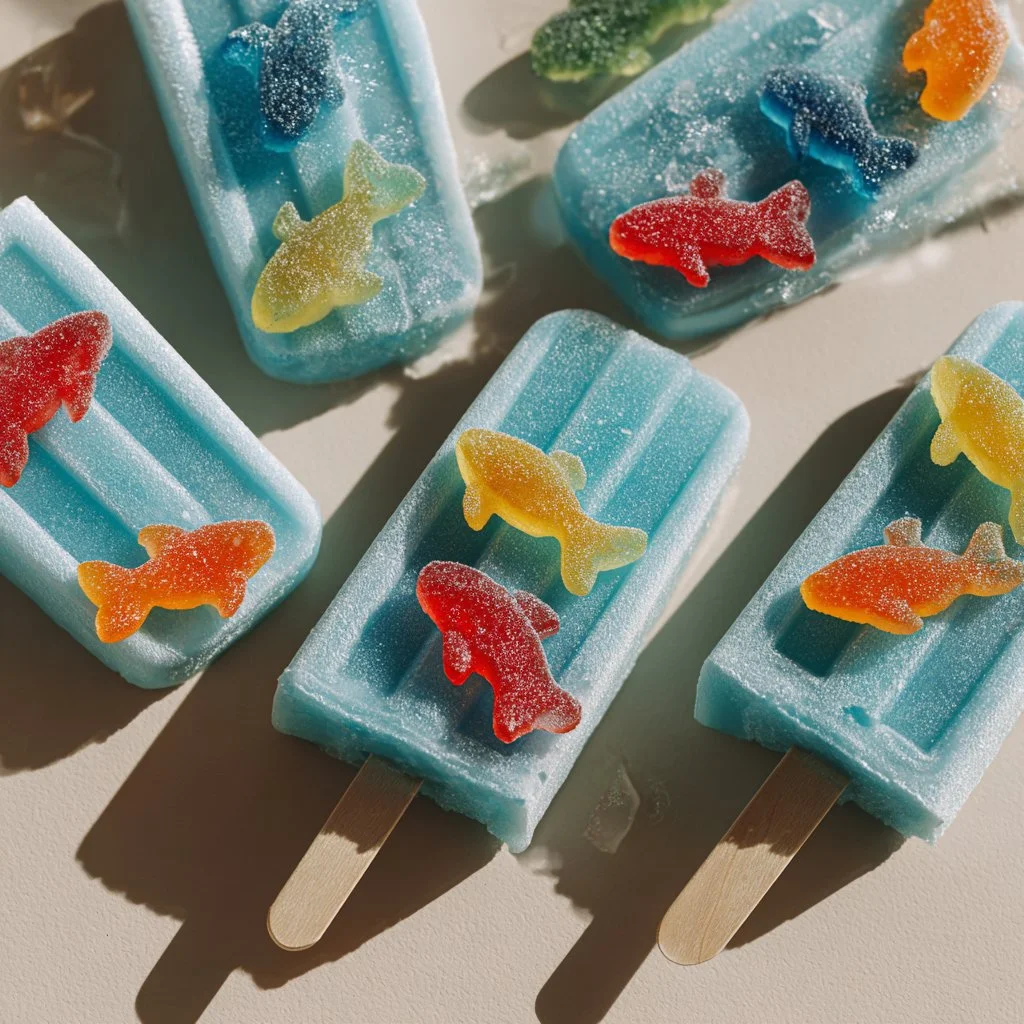
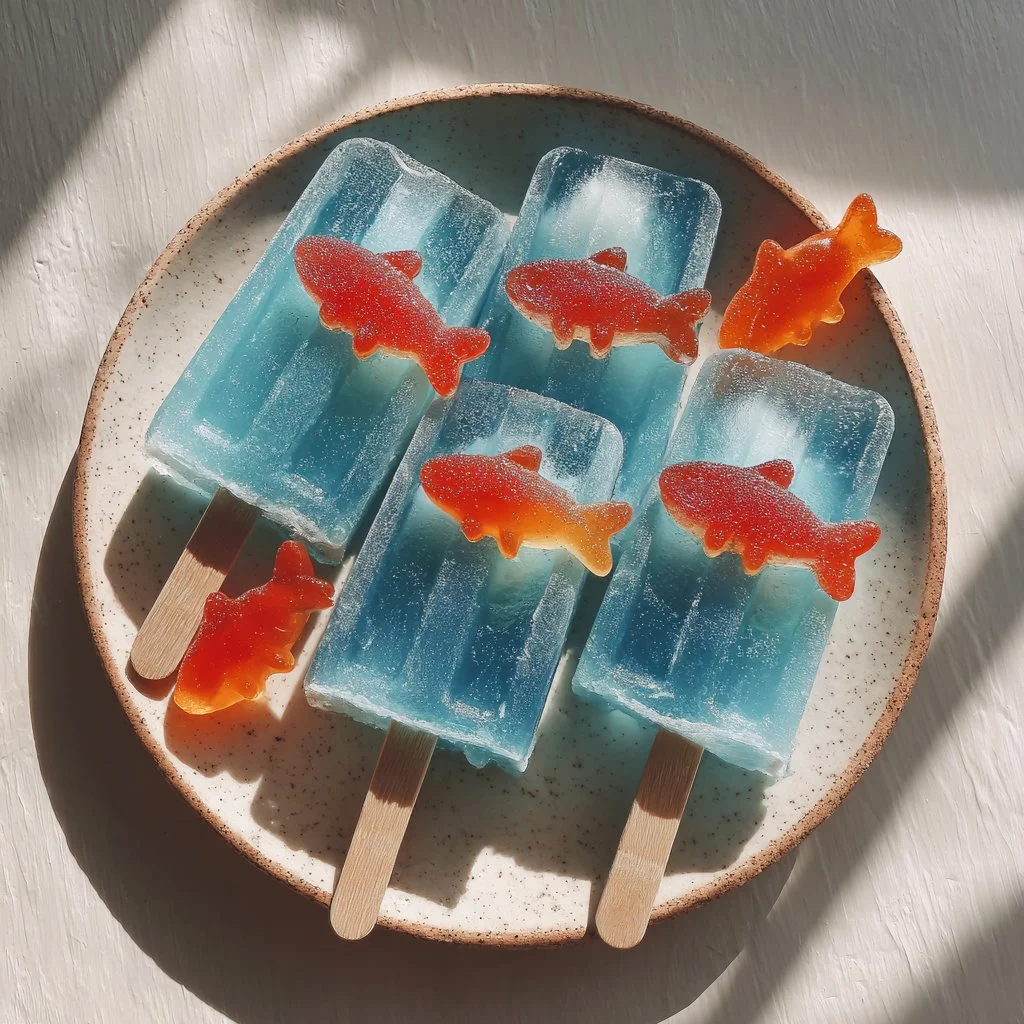
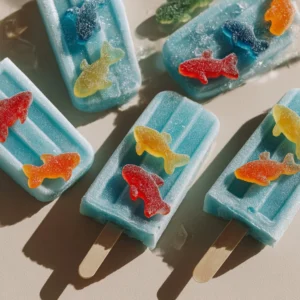
– **Color Appeal:** The vibrant blue hue makes these popsicles visually striking, attracting even the pickiest eaters.
– **Taste Explosion:** With a sweet lemonade flavor and chewy gummies, each bite offers a refreshing, tangy twist that perfectly embodies summer.
– **Simple Process:** Easy to throw together with minimal prep, making them a fantastic last-minute treat for kids.
– **Fun Presentation:** The gummy sharks and Swedish fish create a playful ocean scene that turns any day into a beach party.
– **Versatile Fun:** You can easily switch up the flavors or colors to match a theme, making them perfect for any occasion.
Key Ingredients
The brilliance of this recipe lies in its simplicity, but a few standout ingredients truly make it shine.
Blue Food Coloring: This is a must for that ocean-like appearance. Opt for gel food coloring for a deep, rich hue that’s more vivid than liquid varieties.
Lemonade: You can go with store-bought or homemade lemonade for this recipe. Fresh lemonade will give a bright, zesty feel, but the experience is equally delightful with convenient versions.
Gummy Sharks and Swedish Fish: These chewy treats add both flavor and visual fun. If you want a twist, consider swapping them for gummy whales or other sea creatures that might tickle your kids’ imaginations.
Full Ingredient List
– Blue food coloring
– 4 cups lemonade
– 10 gummy sharks
– 20 Swedish fish
How to Make It
Step 1: Mix
Start by adding just one drop of blue food coloring to your lemonade. This step is crucial for giving your popsicles that stunning oceanic look.
Pro Tip: The deeper the hue, the more exciting the popsicle looks!
Step 2: Arrange Gummies
Next, place gummy sharks along the sides of your popsicle molds.
Pro Tip: Holding the molds at an angle keeps those gummies in place—they look much cooler that way!
Step 3: Pour Lemonade
Now, pour the lemonade into the molds gently, making sure to coat the gummies evenly.
Pro Tip: Watch for bubbles—tap the molds lightly to release any!
Step 4: Insert Sticks
If the molds allow, add popsicle sticks into the centers to make them easier to hold later.
Pro Tip: Position the sticks slightly off-center for better balance.
Step 5: Freeze
Place your molds in the freezer for at least four hours or, even better, overnight until they’re completely solid.
Pro Tip: Pop one out after four hours to see if they’re ready—kids love the anticipation!
Step 6: Enjoy!
When they’re frozen solid, carefully remove the popsicles from the molds.
Pro Tip: If they stick, run the molds under warm water for a few seconds!
Tips for Best Results
– **Temperature Matters:** Ensure your freezer is at the right temp; too warm and they won’t freeze fast enough, too cold and they’ll freeze too quickly.
– **Quality Molds:** Use sturdy molds that won’t bend when you’re pulling the popsicles out. Silicone molds can be particularly helpful!
– **Surface Area:** The wider your popsicle molds, the easier it is for gummies to stick. Just be sure to balance the gummies well!
– **No Gummy Clumping:** If you want an even spread of gummies, double-check their positioning before you pour the lemonade.
– **Flavor Swaps:** Feel free to experiment with flavored lemonade, like raspberry or strawberry, for a new twist.
Storage & Reheating
Store any remaining popsicles in a sealed container or wrapped in cling film in the freezer for longer-lasting enjoyment. They can be frozen for up to two weeks without losing flavor. There’s no need to reheat; simply pop them out, and they’re ready to delight!
Variations to Try
– **Color Changes:** Swap the blue food coloring for green or purple to match your party theme, creating a unique twist on the popsicle aesthetic.
– **Different Gummies:** Use gummy whales, octopuses, or any other candy that fits your ocean theme for a delightful surprise in every bite.
– **Juice Swaps:** Instead of lemonade, use fruit juice like orange or pineapple to create a tropical take on these tasty frozen treats.
Common Questions
**Can I use fresh-squeezed lemonade?**
Absolutely! Fresh lemonade gives these pops a tangy kick and fresher taste, though store-bought is perfectly fine for convenience.
How can I make them healthier?
Consider using a natural lemonade, opting for sugar-free gummies, or exploring healthier gummy alternatives for a more nutritious treat.
What if I can’t find gummy sharks?
No worries! Any fruity gummy candy will work, or you can make your own gummy shapes at home for a fun DIY twist.
Are these popsicles suitable for adults?
Definitely! You can infuse them with a splash of alcohol like vodka or rum for a lively adult version of this treat.

Ready to Try It?
Dive into this scrumptious treat today! Don’t forget to rate below and save this recipe to Pinterest for those sunny days ahead.
Conclusion
These Ocean Blue Lemonade Popsicles are not just colorful, but they also turn ordinary lemonade into an enchanting treat. Perfect for kids or playful adults, they’re easy to make and fun to eat. For more creative recipes, check out 4ocean Blue Lemonade No Added Sugar Ice Pops, or if you’re looking for a slightly different flavor, check the Ocean Blue Lemonade Popsicles from Play Party Plan. You could also try aligning this recipe with something like Cranberry Lemonade Popsicle’s / Weekly Recap for a delicious twist!
Ocean Blue Lemonade Popsicles
Ingredients
Popsicle Base
- 4 cups lemonade Store-bought or homemade lemonade can be used.
- 1 drop blue food coloring Opt for gel food coloring for a more vivid hue.
Gummy Candies
- 10 pieces gummy sharks Place along the sides of the molds.
- 20 pieces Swedish fish Add for an extra fun look; consider using other sea-themed gummies.
Instructions
Preparation
- Start by adding just one drop of blue food coloring to your lemonade.
- Place gummy sharks along the sides of your popsicle molds.
- Pour the lemonade into the molds gently, making sure to coat the gummies evenly.
- Insert popsicle sticks into the centers to make them easier to hold later.
- Freeze the molds for at least four hours or overnight until solid.
- Carefully remove the popsicles from the molds once frozen.