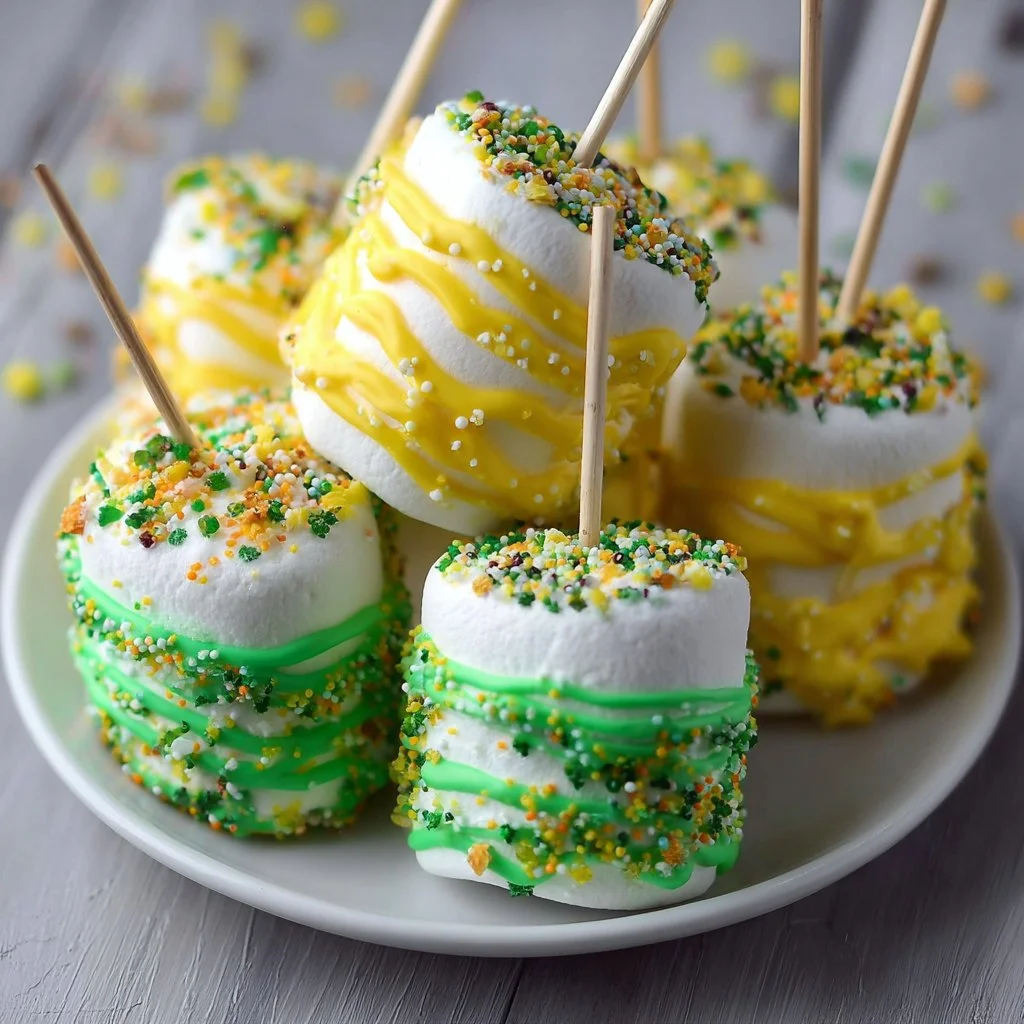
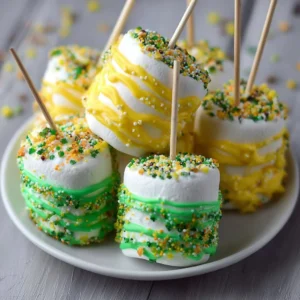
Bright, playful, and impossibly simple, these St. Patrick’s Day Marshmallow Pops are the kind of treat that steals the show at class parties and kitchen counters alike.
They’re quick to make, kid-friendly, and don’t require baking.
Use them for classroom treats, last-minute hostess gifts, or a colorful addition to your holiday dessert table.
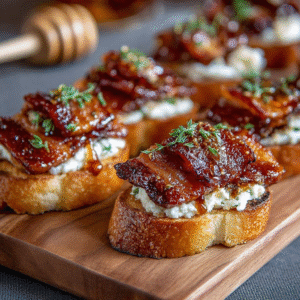
If you love festive sweets, you might also enjoy this birthday cake with bows for another easy showstopper.
Keep a small tray of these on hand and watch them disappear.
They’re perfect when you want a fast, festive recipe that still looks professional.
Why You’ll Love This St. Patrick’s Day Marshmallow Pops
- Super fast to make with minimal ingredients.
- No baking required — great for kids to help.
- Customizable colors and sprinkles for any party.
- Very forgiving — easy fixes if candy gets thick.
- Portable and perfect for school or potlucks.
- Fun textures: pillowy marshmallow and crisp candy shell.
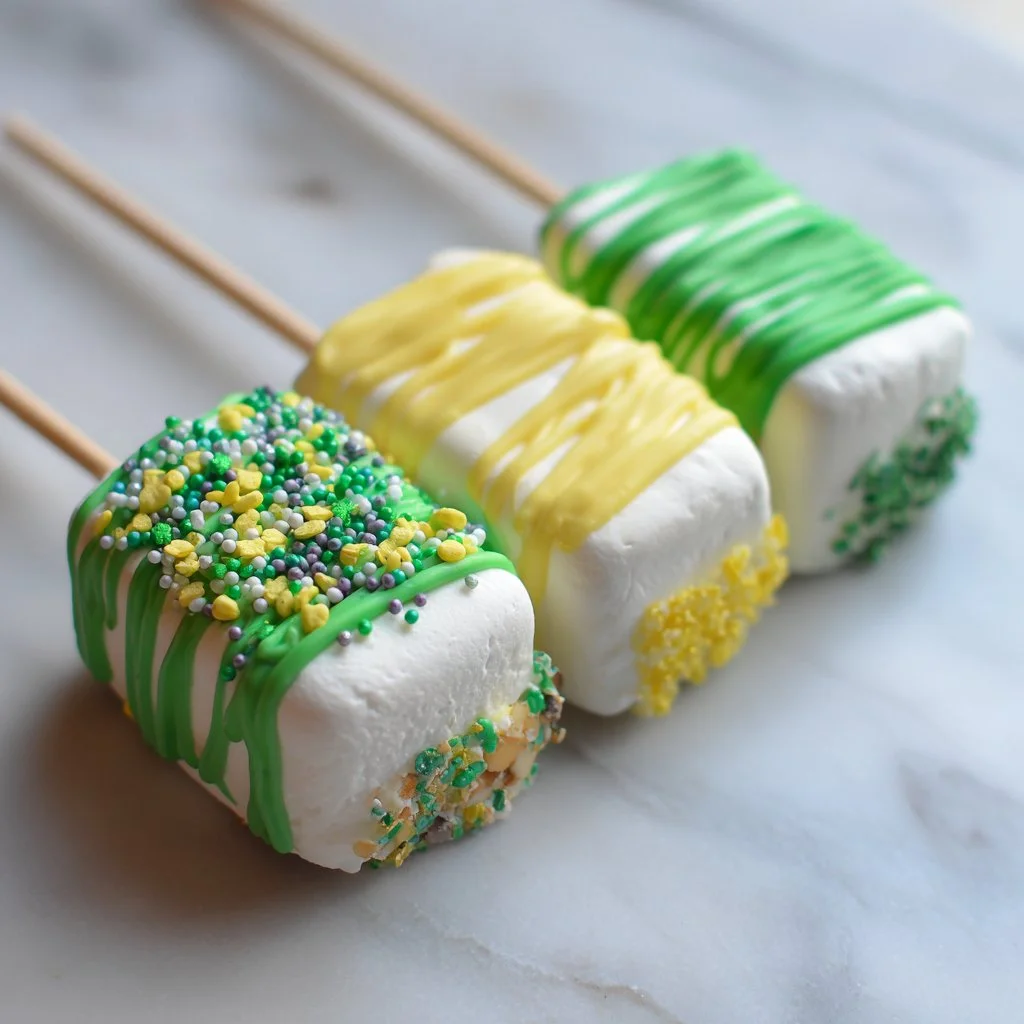
Taste-wise, these pops are all about contrast.
The marshmallow center is soft and pillowy.
The candy coating hardens to a thin, crisp shell that gives a pleasant snap when you bite in.
Sprinkles add bursts of color and a faint crunch that keeps each bite playful rather than sugary-sickly.
“Five stars! These were a hit at our St. Patrick’s celebration — easy to make, adorable, and the kids loved decorating them.” — Aileen R., reader
Discover more seasonal party ideas for inspiration while planning your dessert spread.
Key Ingredients for St. Patrick’s Day Marshmallow Pops
White candy melts or vanilla flavored almond bark
White candy melts form the base coating that gives a clean canvas for colorful drizzles.
Choose a brand known for smooth melting (Wilton and Guittard are reliable).
If you substitute with white chocolate chips, add more oil or melting aid; white chocolate contains cocoa butter and can seize or yield a grainier finish.
Green candy melts
Green candy melts provide the festive color without tempering chocolate.
Buy an evenly colored variety so your drizzle looks uniform.
If you swap for tinted white chocolate, be cautious: oil-based colorings can break temper and change texture.
24 regular size marshmallows
Fresh, pillow-soft marshmallows give the best texture contrast to the candy shell.
Firm or stale marshmallows won’t give that plush center and may slide off the stick.
If you only have mini marshmallows, thread more per stick and expect a different bite size.
Treat sticks or bamboo skewers
A sturdy stick gives structure for dipping and decorating.
Lollipop sticks or bamboo skewers work; make sure any wooden skewer is food-safe and smooth.
Metal skewers are too thin and hot to handle for kids, and flimsy sticks can bend under the weight of multiple marshmallows.
Full Ingredient List for St. Patrick’s Day Marshmallow Pops
– 24 regular size marshmallows
– White candy melts or vanilla flavored almond bark
– Green candy melts
– Yellow candy melts
– 1 tsp vegetable oil
– Rainbow sprinkles
– Shamrock sprinkles
– Piping bags
– Treat sticks or bamboo skewers
Step-by-Step Instructions for St. Patrick’s Day Marshmallow Pops
Step 1: Prep your workspace and assemble the pops
Line a cookie sheet with wax paper and arrange your tools.
Push a treat stick or skewer through four marshmallows each, spacing them evenly so the stick is stable.
Pro Tip: The marshmallows should sit snug on the stick and not wobble; if they wobble, re-center them until firm.
Step 2: Melt the white candy coating
Melt the white candy according to package directions, in short microwave bursts or a double boiler.
Add 1 teaspoon vegetable oil only if the candy looks thick or grainy; it helps smooth the coating.
Pro Tip: Properly melted white candy will be glossy and pourable, not dull and stringy.
Step 3: Coat the marshmallows
Pour the melted white candy over each marshmallow pop, rotating to ensure full coverage.
You can also dip quickly and let excess drip back into the bowl to avoid clumpy sides.
Pro Tip: The coated pop should look uniformly white with a thin sheen and no bare marshmallow peeking through.
Step 4: Melt the green and yellow candy melts separately
Heat the green and yellow candy melts in short microwave bursts, stirring between each burst.
Transfer each color to its own piping bag for controlled drizzling.
Pro Tip: Each color should be smooth and ribbon-like when drizzled; if thick, add a drop of oil and stir.
Step 5: Drizzle colors over the coated pops
Drizzle green candy over the white-coated marshmallows first, then follow with yellow in a contrasting pattern.
Work quickly while the white shell is still warm so the drizzles set together into a seamless finish.
Pro Tip: Your drizzles should look like thin ribbons, not globs; a heavy blob means the candy is too cool or over-thick.
Step 6: Add sprinkles
Sprinkle rainbow and shamrock sprinkles onto the pops while the candy is warm so they adhere.
Press lightly if needed, but don’t push through the shell.
Pro Tip: Sprinkles should sit flush on the surface and not fall off when the pop is gently tilted.
Step 7: Let set, trim, and store
Allow the marshmallow pops to set completely until firm.
Trim any excess candy from the sides for a clean look and store in an airtight container.
Pro Tip: Fully set pops should feel solid to the touch and have a crisp shell sound when tapped.
Expert Tips for St. Patrick’s Day Marshmallow Pops
- Work in small batches to keep drizzle melts at the right temperature; candy cools quickly.
- If your candy melts thicken, add 1/4 teaspoon vegetable oil at a time until smooth.
- Use piping bags with a small snip at the tip for precise drizzles instead of squeezing bowls.
- Keep marshmallows at room temperature; cold marshmallows can cause the candy to seize on contact.
- For a glossy finish, avoid overheating melts — 15–20 second microwave bursts are safer.
- Clean your bowl and utensils between colors to prevent cross-contamination of dyes.
- If sprinkles sink into the candy, the coating is too warm; let it cool slightly before decorating.
- Avoid using water to thin candy melts; water causes chocolate to seize and clump.
Try a similarly easy decorative recipe if you want another hands-on party treat idea.
Storage & Freezing for St. Patrick’s Day Marshmallow Pops
Store these pops at room temperature in an airtight container to preserve crunch.
Layer parchment between pieces to prevent sticking.
They keep best for up to 5 days at room temperature.
For fridge storage, use a shallow airtight container and consume within 7 days.
Refrigeration can make marshmallows slightly firmer; allow them to sit at room temperature before serving for best texture.
To freeze, place pops on a tray until firm, then transfer to a freezer-safe airtight container with parchment layers.
Freeze up to 1 month for best quality.
Thaw in the fridge for an hour, then bring to room temperature before serving to restore chewiness.
Variations & Substitutions for St. Patrick’s Day Marshmallow Pops
Chocolate-dipped marshmallow pops: Swap white candy melts for milk or dark chocolate.
This yields a deeper flavor and crunchier shell.
Tempering chocolate or using couverture improves snap and shine.Sparkling green ombré pops: Use three shades of green candy melts and layer drizzles from dark to light.
This creates a gradient effect that looks professional with minimal effort.Nutty crunch pops: After drizzling, press finely chopped toasted almonds or pretzels onto the warm coating.
This adds savory crunch and balances the sweetness for adult palates.Themed sprinkle mixes: Replace shamrock sprinkles with gold sugar or edible glitter for a luxe look.
Changing sprinkles alters texture and visual impact without changing technique.
Want another decorative idea that’s great for seasonal tables? Check this out.
Frequently Asked Questions About St. Patrick’s Day Marshmallow Pops
Q: How long do St. Patrick’s Day Marshmallow Pops stay fresh?
A: At room temperature in an airtight container, they stay fresh for up to 5 days.
Refrigeration extends that to about a week, though the marshmallow may firm slightly.
Freezing is possible for up to a month; thaw slowly in the fridge to avoid condensation.
Q: Can I make these a day ahead for a party?
A: Yes — prepare and store in a single layer in an airtight container.
Bring them to room temperature before serving for the best marshmallow texture.
Avoid stacking unless you separate layers with parchment.
Q: Why did my candy melts go grainy or seize?
A: Overheating or introducing water causes small crystals to form, creating a grainy texture.
Graininess can sometimes be fixed by adding a small amount of vegetable oil and stirring until smooth.
If water caused seizing, reheating generally won’t save it — start fresh or use a new bag of melts.
Q: How do I keep the drizzle lines thin and even?
A: Use piping bags with a tiny snip or a fine tip; keep the candy warm but not hot.
If the drizzle is thick, heat in 5–10 second bursts and stir, then test on parchment before decorating the pops.
Q: Are there allergy-friendly swaps for candy melts?
A: Many candy melts contain dairy or soy; look for allergy-friendly or vegan melts made with cocoa butter alternatives.
Alternatively, use vegan white compound coatings or meltable carob chips, though color options may be limited.

Final Thoughts on St. Patrick’s Day Marshmallow Pops
These St. Patrick’s Day Marshmallow Pops are a quick, cheerful treat that’s easy to personalize and perfect for crowds.
If you enjoyed this recipe, please leave a star rating in the recipe card below and pin it to Pinterest.
For additional inspiration and variations, see this take on the recipe from My Suburban Kitchen’s St. Patrick’s Day Marshmallow Pops, a colorful version at Ruffles and Rain Boots’ St Patrick’s Day Marshmallow Pops to Please, and another festive approach at 365 Days of Baking and More’s St. Patrick’s Day Marshmallows.
St. Patrick's Day Marshmallow Pops
Ingredients
Main ingredients
- 24 pieces regular size marshmallows Fresh, pillow-soft marshmallows give the best texture contrast to the candy shell.
- 1 bag white candy melts or vanilla flavored almond bark Forms the base coating.
- 1 bag green candy melts Provides festive color without tempering chocolate.
- 1 bag yellow candy melts For contrasting drizzles.
- 1 tsp vegetable oil To smooth the candy coating if thick.
- 1 cup rainbow sprinkles For decoration.
- 1 cup shamrock sprinkles For decoration.
- 2 pieces treat sticks or bamboo skewers For assembling the pops.
- 2 pieces piping bags For drizzling colored candy melts.
Instructions
Preparation
- Line a cookie sheet with wax paper and arrange your tools.
- Push a treat stick or skewer through four marshmallows each, spacing them evenly so the stick is stable.
- Ensure the marshmallows are snug on the stick.
Melt White Candy
- Melt the white candy according to package directions, using either a microwave or double boiler.
- Add vegetable oil if the candy looks thick or grainy.
Coat Marshmallows
- Pour the melted white candy over each marshmallow pop, rotating for full coverage.
- Let excess drip back into the bowl to avoid clumpy sides.
Melt Green and Yellow Candy
- Heat green and yellow candy melts in short bursts, stirring between each.
- Transfer each color to its own piping bag.
Drizzle Colors
- Drizzle green candy over the white-coated marshmallows first, then follow with yellow.
- Work quickly while the white shell is warm.
Add Sprinkles
- Sprinkle rainbow and shamrock sprinkles onto the pops while warm.
Set and Store
- Allow pops to set completely until firm, then trim any excess candy.
- Store in an airtight container.