Preheat your appetite — this sheet pan meal is speed, flavor, and cleanup you’ll actually enjoy. It comes together in under 30 minutes and leaves only one pan to wash.
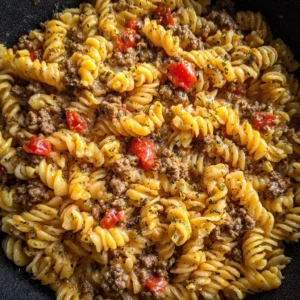
Sweet, savory, and garlicky, it’s an everyday weeknight hero that feels like a treat. If you like honey-garlic flavors, try this version with kielbasa instead of chicken or shrimp for a smoky, satisfying bite — similar ideas are in this honey garlic sheet pan sausage post for more inspiration.
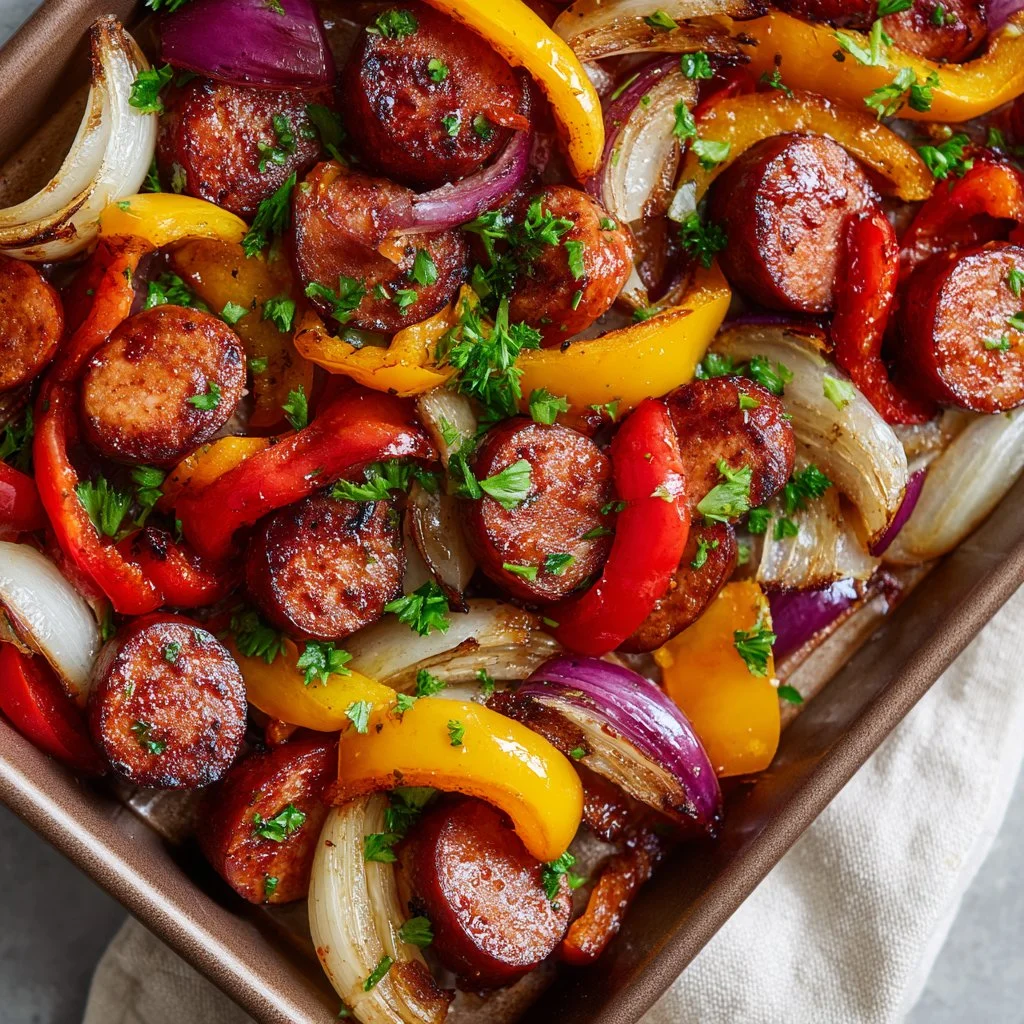
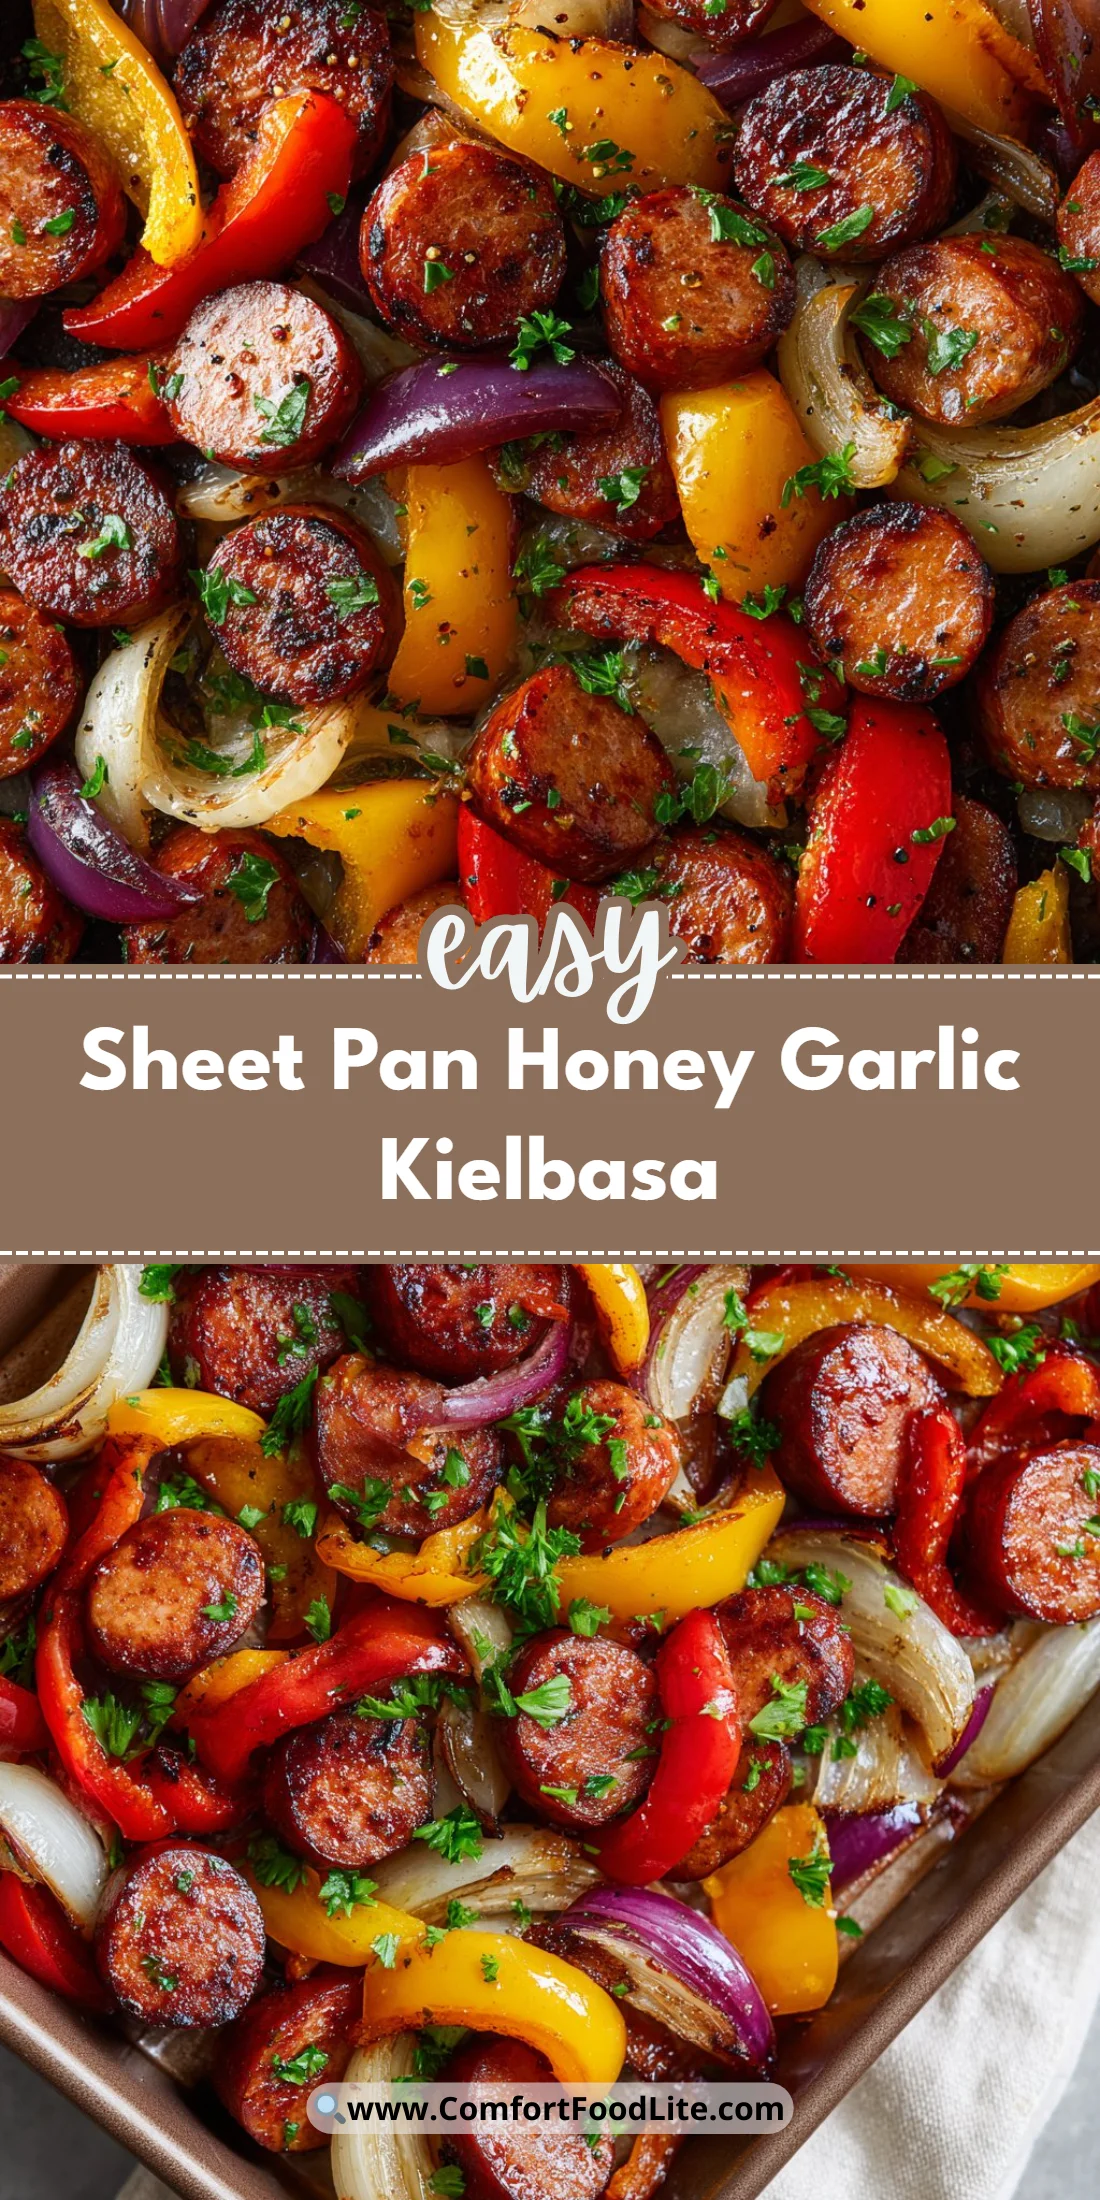
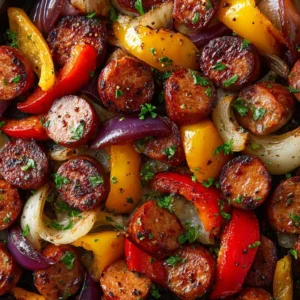
You’ll love how the sauce caramelizes and the peppers soften without losing snap. Serve it over rice, noodles, or with crusty bread.
Why You’ll Love This Sheet Pan Honey Garlic Kielbasa
– One-pan cleanup that saves time.
– Fast cook time — ready in about 25 minutes.
– Bold sweet-and-salty honey-soy glaze.
– Smoky kielbasa contrasts with bright bell pepper and onion.
– Kid-friendly and family-pleasing flavors.
– Versatile — pairs with rice, potatoes, or greens.
– Minimal prep, pantry-friendly ingredients.
The flavor is an easy balance of sweet honey, salty soy, and a roasted garlic backbone. Texturally, the kielbasa crisps at the edges while staying juicy inside and the bell peppers soften but still hold a slight bite.
“Weeknight miracle — sticky, flavorful, and the whole family loved it. I made it in 20 minutes and had zero dishes afterward.” — 5★ reader
Key Ingredients for Sheet Pan Honey Garlic Kielbasa
Kielbasa: The star of this recipe is the kielbasa. Pick a smoked kielbasa with a natural casing for the best snap and robust flavor. If you substitute with fresh sausage, expect a milder smoke profile and a slightly different fat render; adjust cooking time if links are thicker.
Honey: Honey provides sweetness and helps the glaze caramelize on the sausage and vegetables. Use a mild-flavored honey for balance; a darker honey will add deeper molasses notes. You can swap for maple syrup in a pinch, but expect a looser glaze and a slightly different flavor tone.
Soy Sauce: Soy delivers umami and salt. Use a regular or reduced-sodium soy sauce depending on your salt preference. Substituting with tamari keeps it gluten-free while preserving that savory depth, but adjust salt to taste.
Garlic: Fresh minced garlic gives sharp aromatic heat that mellows as it roasts. Use fresh cloves, not powdered garlic, for true fragrance. If you swap for garlic paste, use slightly less to prevent a gummy texture in the glaze.
Full Ingredient List for Sheet Pan Honey Garlic Kielbasa
– 1 pound kielbasa, sliced
– 1/4 cup honey
– 1/4 cup soy sauce
– 3 cloves garlic, minced
– 1 bell pepper, chopped
– 1 onion, sliced
– 1 tablespoon olive oil
– Salt and pepper to taste
– Chopped parsley for garnish (optional)
Step-by-Step Instructions for Sheet Pan Honey Garlic Kielbasa
Step 1: Preheat the oven to 400°F (200°C).
Preheating ensures the pan is hot enough to brown the kielbasa and begin caramelizing the sauce immediately.
Pro Tip: The oven should feel hot when you open it; preheat for at least 10 minutes so it reaches 400°F.
Step 2: Make the honey garlic sauce.
Whisk the honey, soy sauce, and minced garlic in a small bowl until well combined. This creates a thin glaze that will thicken as it cooks.
Pro Tip: The sauce should be glossy and pourable, not grainy; fresh honey blends smooth.
Step 3: Toss sausage and vegetables on the sheet pan.
On a large sheet pan, toss sliced kielbasa, chopped bell pepper, and sliced onion with olive oil, salt, and pepper until evenly coated. Spread the pieces so they aren’t crowded.
Pro Tip: Ingredients should glisten with oil and be separated enough to allow hot air to circulate.
Step 4: Add the sauce and coat evenly.
Pour the honey-garlic mixture over the sausage and veggies. Toss gently with tongs or a spatula so each piece gets a light coating.
Pro Tip: The pan should show an even sheen of glaze; nothing should be drenched or pooling.
Step 5: Arrange everything in a single layer.
Spread the kielbasa and vegetables so they lie in a single layer with space between pieces. Crowding leads to steaming instead of roasting.
Pro Tip: You should see gaps between slices; a crowded pan will look pale and soft rather than browned.
Step 6: Roast for 20–25 minutes, stirring once.
Bake until the kielbasa browns at the edges and the vegetables are tender. Stir once halfway through to encourage even caramelization.
Pro Tip: Look for golden-brown edges on the sausage and translucent, slightly charred edges on the onion and pepper.
Step 7: Garnish and serve warm.
Remove from oven, sprinkle with chopped parsley if using, and serve immediately over rice or alongside potatoes.
Pro Tip: Serve while steaming; the glaze firms slightly as it cools and will look glossy and sticky when hot.
Pro Tip Summary: By step 3 you should smell caramelizing garlic and see glossy glaze; by step 6 you should have browned edges and softened peppers with a sticky coating.
Expert Tips for Sheet Pan Honey Garlic Kielbasa
– Use a rimmed sheet pan for better airflow and to capture drips.
– Slice kielbasa about 1/2-inch thick for ideal browning and bite.
– Roast at 400°F to get fast caramelization without drying the sausage.
– If the sauce is too thin, bake a few extra minutes uncovered to reduce and thicken the glaze.
– Avoid crowding: items should lie flat and not overlap for even browning.
– For crisper vegetables, cut them slightly larger and flip halfway through.
– If your kielbasa is very fatty, drain excess fat mid-bake to prevent soggy veggies.
– Use tongs, not a fork, when tossing or stirring to preserve juices inside the sausage.
Storage & Freezing for Sheet Pan Honey Garlic Kielbasa
Fridge storage: Cool to room temperature, then store in an airtight container for up to 3–4 days. Use a shallow container for faster cooling.
Freezer storage: Freeze in a sturdy, freezer-safe container or heavy-duty freezer bag for up to 2 months. Label with date and portion for easy reheating.
Thawing: Thaw overnight in the fridge, then reheat thoroughly to at least 165°F.
Reheating: Reheat in a 350°F oven for 8–12 minutes until hot and the glaze is glossy, or reheat in a skillet over medium heat for 4–6 minutes. Avoid microwaving if you want to preserve crisp edges.
Variations & Substitutions for Sheet Pan Honey Garlic Kielbasa
Veg-forward version: Add broccoli florets or snap peas and roast the same time. The result is a greener plate and more fiber; cut broccoli small so it cooks through in 20–25 minutes.
Spicy honey garlic: Stir 1–2 teaspoons of sriracha or red pepper flakes into the glaze. You’ll get a sweet-heat profile that complements the smoked sausage.
Maple-glazed swap: Replace honey with pure maple syrup and add a splash of apple cider vinegar. Expect a nuttier sweetness and a tangier finish.
Chicken or shrimp swap: Substitute kielbasa with sliced chicken thighs or large shrimp; cook times change — thighs need longer, shrimp much less — for a lighter protein option that soaks up the glaze.
Frequently Asked Questions About Sheet Pan Honey Garlic Kielbasa
Q1: Can I use turkey kielbasa or another low-fat sausage?
A1: Yes, but lower-fat sausages can dry out faster. Reduce roast time by a few minutes and monitor the edges; you can also add a small pat of butter or a drizzle of oil before roasting to keep slices glossy and moist.
Q2: How do I prevent the honey from burning during roasting?
A2: Honey can darken quickly; keep the oven at 400°F and stir once halfway through. If you notice excessive darkening before the vegetables are tender, tent the pan with foil for the last 5–7 minutes to finish cooking without burning.
Q3: Can I make this on the stovetop instead of the oven?
A3: Yes — use a large skillet over medium-high heat. Sear sliced kielbasa first until browned, remove, then sauté the peppers and onion until tender. Return the sausage, add the glaze, and simmer briefly until thick and sticky.
Q4: What are good serving ideas for this dish?
A4: Serve over steamed rice, buttered egg noodles, roasted potatoes, or even tucked into soft rolls for a sandwich-style dinner. A simple green salad or quick pickled cucumber adds brightness to cut through the glaze.
Q5: How can I make this meal gluten-free?
A5: Use tamari or a certified gluten-free soy sauce and confirm the kielbasa contains no gluten fillers. Most pure meat kielbasa is gluten-free, but always check labels for hidden binders or flavorings.
Final Thoughts on Sheet Pan Honey Garlic Kielbasa
This Sheet Pan Honey Garlic Kielbasa is ideal for busy nights when you want big flavor with minimal fuss. Please leave a star rating in the recipe card below and pin this to Pinterest for the next time you need a fast, comforting dinner.
You can compare similar takes and detailed variations on this flavor profile at Oh Sweet Basil’s one-pan kielbasa, review another home-cook-friendly version at 12 Tomatoes’ sheet pan dinner, or explore a wholesome sausage-centered sheet pan approach at Wellness Mama’s sheet pan sausage recipe.
Sheet Pan Honey Garlic Kielbasa
Ingredients
Main Ingredients
- 1 pound kielbasa, sliced Use smoked kielbasa for best flavor.
- 1/4 cup honey Use mild-flavored honey for balance or maple syrup as a substitute.
- 1/4 cup soy sauce Regular or reduced-sodium soy sauce; tamari can be used for gluten-free.
- 3 cloves garlic, minced Fresh garlic is preferred.
- 1 bell pepper chopped Any color bell pepper can be used.
- 1 medium onion, sliced Yellow or white onion works best.
- 1 tablespoon olive oil For tossing with vegetables and sausage.
- Salt and pepper to taste
- Chopped parsley for garnish (optional) Enhances presentation.
Instructions
Preparation
- Preheat the oven to 400°F (200°C).
- In a small bowl, whisk together honey, soy sauce, and minced garlic until well combined.
- On a large sheet pan, toss sliced kielbasa, chopped bell pepper, and sliced onion with olive oil, salt, and pepper until evenly coated.
- Pour the honey-garlic mixture over the sausage and vegetables and toss gently to coat.
- Spread everything into a single layer on the sheet pan.
- Roast in the oven for 20 to 25 minutes, stirring once halfway through.
- Garnish with chopped parsley if using and serve immediately.