The first time I made these semi-homemade chili cheese fries I thought, "This might be the ultimate weeknight win."
They come together fast, hit every comfort-food note, and feed a crowd with almost no fuss.
If you keep a bag of hand-cut fries and a good no-bean chili in the pantry, you have dinner—or late-night party food—on standby.
I often pair these fries with other easy crowd-pleasers like my cream cheese chicken chili for a full comfort-food spread.
This version skips the scratch-heavy steps and focuses on technique: crisp fries, hot chili, and perfectly melted cheese.
Why You’ll Love This Recipe
- Fast assembly with pantry staples and frozen fries.
- Total crowd-pleaser for game day, movie night, or casual dinners.
- Flexible: easy to dress up with toppings or swap ingredients.
- Minimal cleanup: bake, assemble, broil, serve.
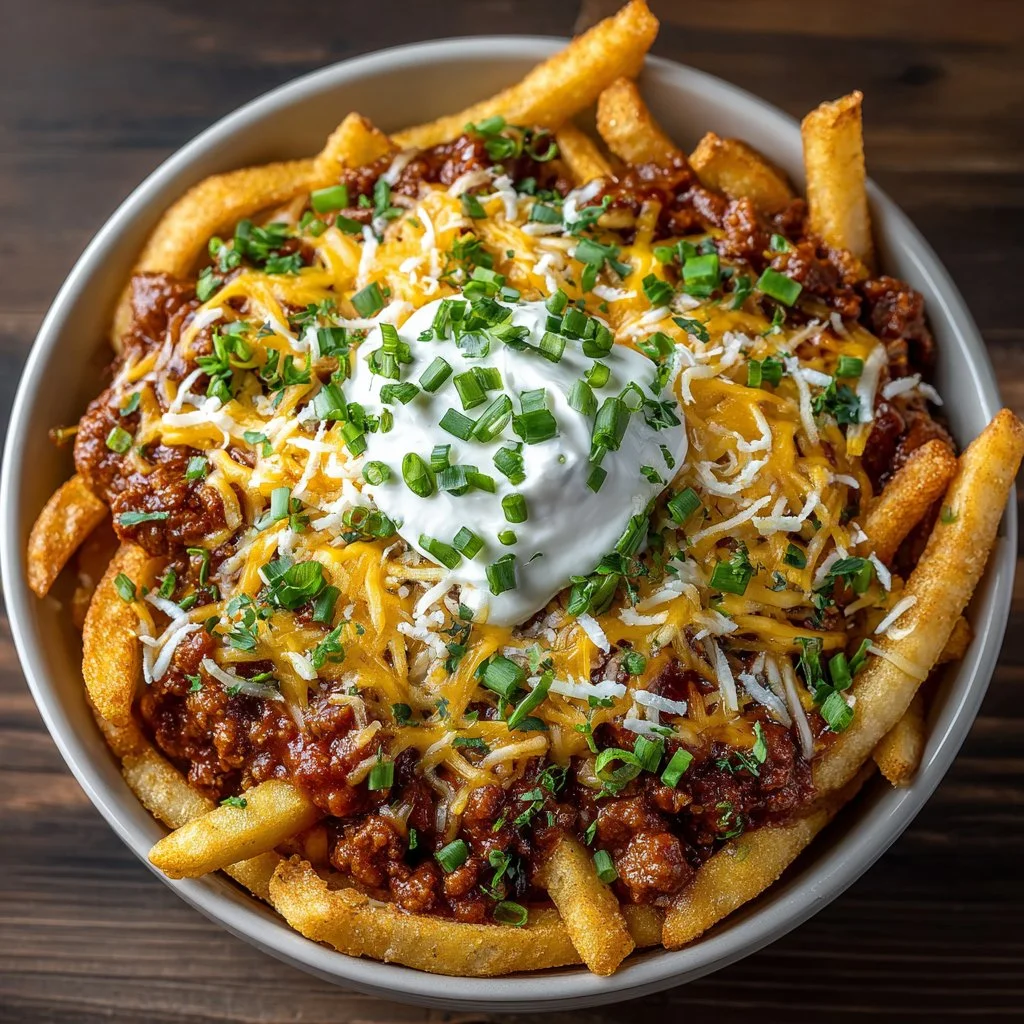
These fries are a study in contrasts: the exterior crunch of oven-baked hand-cut fries gives structure, while the chili adds a saucy, savory depth and the cheese creates a gooey, elastic finish. Every bite is a combination of crisp, meaty, and creamy textures with familiar, nostalgic flavors. The optional sour cream and chives add brightness and cooling contrast that keeps the palate interested.
"Five stars — made these for a small party and everyone went back for seconds. So easy and so good!" — reader Lindsey R.
Key Ingredients
Hand-cut style frozen fries (28-ounce bag)
Choose a high-quality, thicker-cut frozen fry for texture—these hold up under chili better than shoestring types. Brands labeled "hand-cut" usually have more surface area for crisping and a satisfying potato bite after baking.
No-bean chili (20 oz, your favorite brand)
A no-bean chili is ideal here because it stays saucy without adding bulky pieces that can make the fries soggy. Pick a brand with robust seasoning and a texture you like; if you prefer a spicier note, choose a chili with jalapeño or chipotle flavoring.
Shredded cheese (2 cups)
Go for a blend that melts smoothly—sharp cheddar mixed with Monterey Jack or a pre-shredded "Mexican blend" gives you both flavor and stretch. If you shred your own, you’ll get better melt because pre-shredded cheese often contains anti-caking agents.
Seasoning salt (2 teaspoons, optional)
A light dusting of seasoning salt before baking amps the fries and adds that savory bottom note that complements the chili and cheese. If you prefer, use smoked paprika and a pinch of garlic powder instead for a different flavor profile.
Full ingredients list:
- 28 ounce bag hand cut style fries (frozen)
- 2 teaspoons seasoning salt (optional)
- 20 oz chili, no bean (your favorite brand)
- 2 cups shredded cheese
- Optional toppings: Sour cream, Chives or green onions
Step-by-Step Instructions
Step 1: Preheat and arrange
Preheat your oven to 425°F so the fries start crisping immediately.
Arrange the frozen fries in a single layer on a baking sheet; crowding creates steam and soggy fries.
Pro Tip: Use a rimmed baking sheet lined with parchment or a silicone mat for easy cleanup and better airflow. You’ll know they’re ready to move on when the oven fills with a toasty potato aroma.
Step 2: Season and bake
Lightly sprinkle 2 teaspoons of seasoning salt over the fries if using; toss gently to coat.
Bake for approximately 25 minutes, turning once halfway through for even browning, until the fries are golden and crispy.
Pro Tip: If the fries still look pale at 20 minutes, increase oven temperature by 25°F for the last 5 minutes—or move the rack closer to the heat for more direct browning.
Step 3: Heat the chili
While the fries bake, warm the 20 oz can of no-bean chili in a small saucepan over medium heat.
Stir occasionally and bring to a gentle simmer so it’s piping hot when you assemble.
Pro Tip: If your chili seems thick, add a splash of water or broth to loosen it for better coverage over the fries.
Step 4: Assemble on an oven-safe plate
Transfer the hot fries to an oven-safe plate or shallow baking dish. Spoon the hot chili evenly over the fries. Sprinkle the 2 cups of shredded cheese across the top.
Pro Tip: For even melt, distribute cheese thinly in layers—this prevents a cold cheese zone in the center.
Step 5: Broil to finish
Place the plate under the broiler for 4–5 minutes, watching closely until the cheese is fully melted and bubbly with small golden spots.
Pro Tip: Rotate the plate halfway through broiling if your broiler has hot spots. You’ll know it’s perfect when the cheese is bubbling and slightly bronzed around the edges.
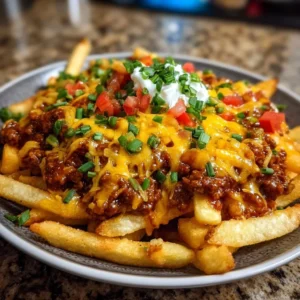
Step 6: Garnish and serve
Remove from the oven and top with optional sour cream and chopped chives or green onions. Serve immediately while the cheese is molten and the fries are still crisp.
Pro Tip: Serve on a warmed plate to keep the fries hot longer and encourage the cheese to stay gooey.
Expert Tips for Success
- Use the right fries: thicker hand-cut style fries provide structure under the chili. Thin fries lose crispness quickly.
- Space matters: bake fries in a single layer and don’t overcrowd the sheet. Air circulation equals crispness.
- Preheat fully: make sure your oven is at 425°F before inserting fries; an underheated oven produces limp fries.
- Turn once: flipping fries halfway through baking ensures even browning and reduces cold centers.
- Heat chili properly: bring the chili to a simmer so it’s uniformly hot; cold chili chills the fries and lengthens melting time.
- Cheese choices: a blend of sharp cheddar and Monterey Jack gives both flavor and stretch. For best melting, shred a block yourself.
- Broil with caution: broilers vary a lot. Stay within arm’s reach and use short increments—4 to 5 minutes usually suffices.
- Layering technique: put a thin layer of cheese under the chili and another on top if you like extra cheese stretch. This creates pockets of molten cheese that cling to fries.
- Avoid sogginess: serve immediately. If you expect a transport time, crisp fries for an extra 2–3 minutes before assembly to build more surface dryness.
- Equipment tip: a metal baking sheet with a raised lip helps concentrate heat and produces crunchier edges than glass.
- Troubleshooting: if fries soften quickly, reduce chili volume on the plate or serve chili on the side for dipping.
- Time-saver variation: for a faster route, use pre-heated oven and keep chili warm in a slow cooker on low if serving buffet-style.
Storage & Freezing
Fridge storage:
Cool leftover fries slightly, then transfer to an airtight container. Store in the refrigerator for up to 3 days. Reheat in the oven at 400°F on a baking sheet for 8–12 minutes to restore crispiness; avoid microwaves for best texture.
Freezer options:
You can freeze assembled but un-broiled fries on a tray until firm, then wrap tightly and freeze up to 1 month. For best results, thaw overnight in the fridge and broil briefly to melt cheese. Note: fries will lose some crispness after freezing.
Reheating tips:
Reheat individual portions on a baking sheet at 400°F, 8–12 minutes, checking frequently. For faster results, use an air fryer at 375°F for 4–6 minutes. Add a fresh sprinkle of shredded cheese for melt before serving.
Variations & Substitutions
- Spicy beef: stir in a tablespoon of chipotle in adobo to the chili for smokier heat. Swap the seasoning salt for smoked paprika to match.
- Vegetarian swap: use a chunky vegetarian or lentil chili (watch for added moisture) and increase cheese for richness.
- Sweet potato version: use frozen sweet potato fries and top with black-bean or vegan chili for a sweeter, earthier profile; this pairs well with tangy toppings. See an inspired plant-forward take on chili fries in recipes like apple crumble cheesecake for dessert after a more vegetable-focused meal.
- Air-fry method: if you prefer, crisp the fries in an air fryer for 12–15 minutes at 400°F before assembling. For technique ideas, check how other veggies transform under high heat like in this air-fried Korean chili cauliflower recipe.
Frequently Asked Questions
{image_template}
Q: Can I use homemade chili instead of canned?
A: Absolutely. Homemade chili works great—just make sure it’s well-seasoned and not overly chunky. If your chili has large meat or veggie pieces, give it a gentle chop or reduce the chunk size so it spreads evenly over fries without weighing them down.
Q: How do I keep the fries crispy under the chili?
A: The key is a hot, dry surface before adding chili. Bake the fries until very crisp, and keep the chili leaner (not soupy). Alternatively, place a thin layer of cheese under the fries before adding chili to create a moisture barrier.
Q: Can I prepare this ahead for a party?
A: Prep components ahead: bake the fries until just shy of done, and refrigerate the hot chili in a covered container. Finish baking and assemble just before serving—broil for 4–5 minutes to complete.
Q: What cheeses melt best for chili cheese fries?
A: Cheddar and Monterey Jack are classic. For extra stretch, add a small amount of mozzarella. Avoid high-moisture cheeses like fresh queso fresco unless combined with a melting cheese.
Q: Are these freezer-friendly after assembly?
A: Assembled and frozen fries will survive, but they’ll lose some crispness. Freeze before broiling for best texture, then thaw and broil to finish.
Final Thoughts
This semi-homemade chili cheese fries recipe is all about smart shortcuts and simple technique.
Make it your own with favorite toppings, and don’t forget to rate the recipe—drop a star rating in the recipe card below or pin this to Pinterest for later.
Conclusion
For another quick take on chili-topped fries, check out this inspired version on Semi Homemade Recipes: Easy Chili Cheese Fries – Semi Homemade Recipes.
If you want a plant-forward twist using sweet potatoes and black beans, this recipe offers a great flavor combo: Sweet Potato-Black Bean Chili Cheese Fries!
Chili Cheese Fries
Ingredients
Main Ingredients
- 28 ounce hand cut style fries (frozen) Choose a high-quality, thicker-cut frozen fry for texture.
- 20 ounce no-bean chili Pick a brand with robust seasoning; add jalapeño for spice if desired.
- 2 cups shredded cheese Sharp cheddar mixed with Monterey Jack melts smoothly.
- 2 teaspoons seasoning salt Optional; use smoked paprika and garlic powder as an alternative.
Optional Toppings
- sour cream For topping.
- chives or green onions For garnish.
Instructions
Preparation
- Preheat your oven to 425°F (220°C) so the fries start crisping immediately.
- Arrange the frozen fries in a single layer on a baking sheet.
Baking
- Lightly sprinkle seasoning salt over the fries if using; toss to coat.
- Bake for approximately 25 minutes, turning once halfway through.
Chili Preparation
- Warm the no-bean chili in a small saucepan over medium heat.
Assembly
- Transfer baked fries to an oven-safe plate, spoon hot chili evenly over the fries, and sprinkle cheese on top.
Broiling
- Place the plate under the broiler for 4-5 minutes until the cheese is melted and bubbly.
Serving
- Remove from the oven and top with optional sour cream and chives or green onions.