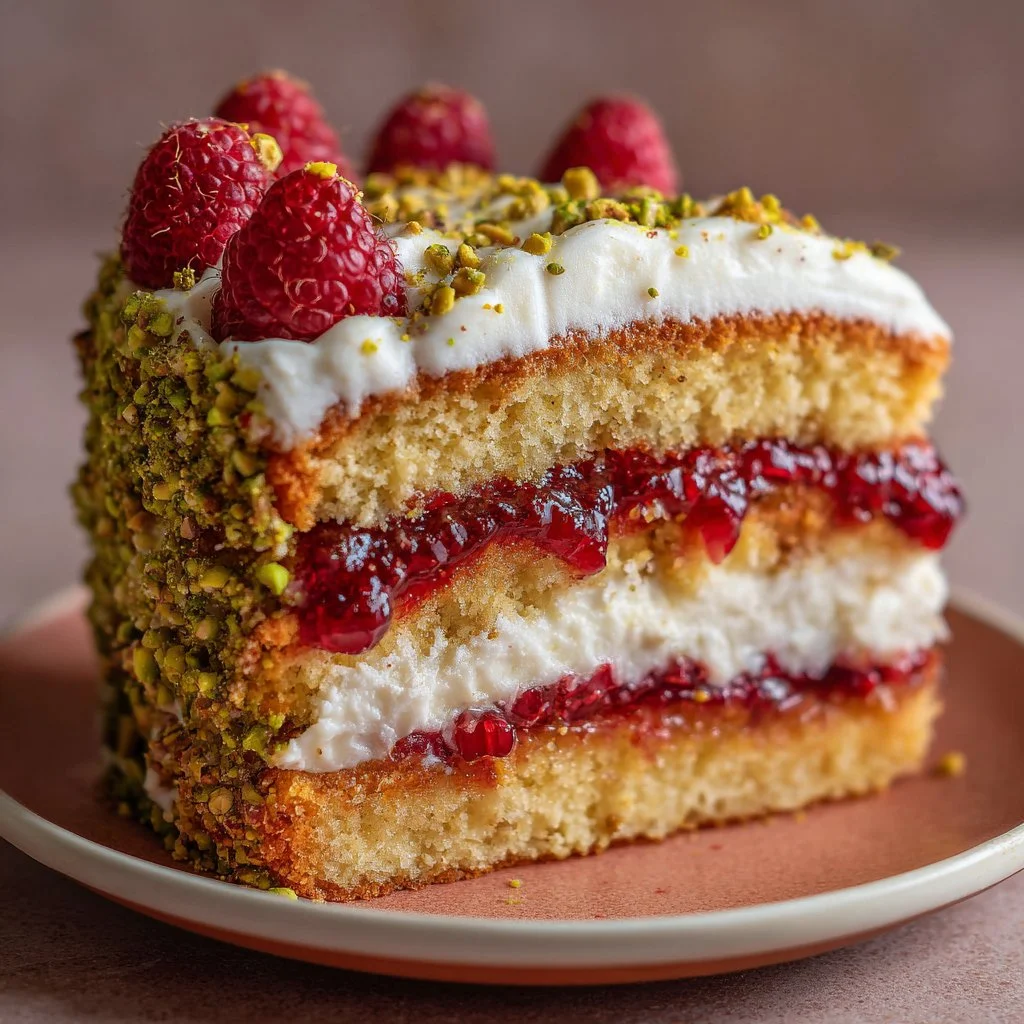
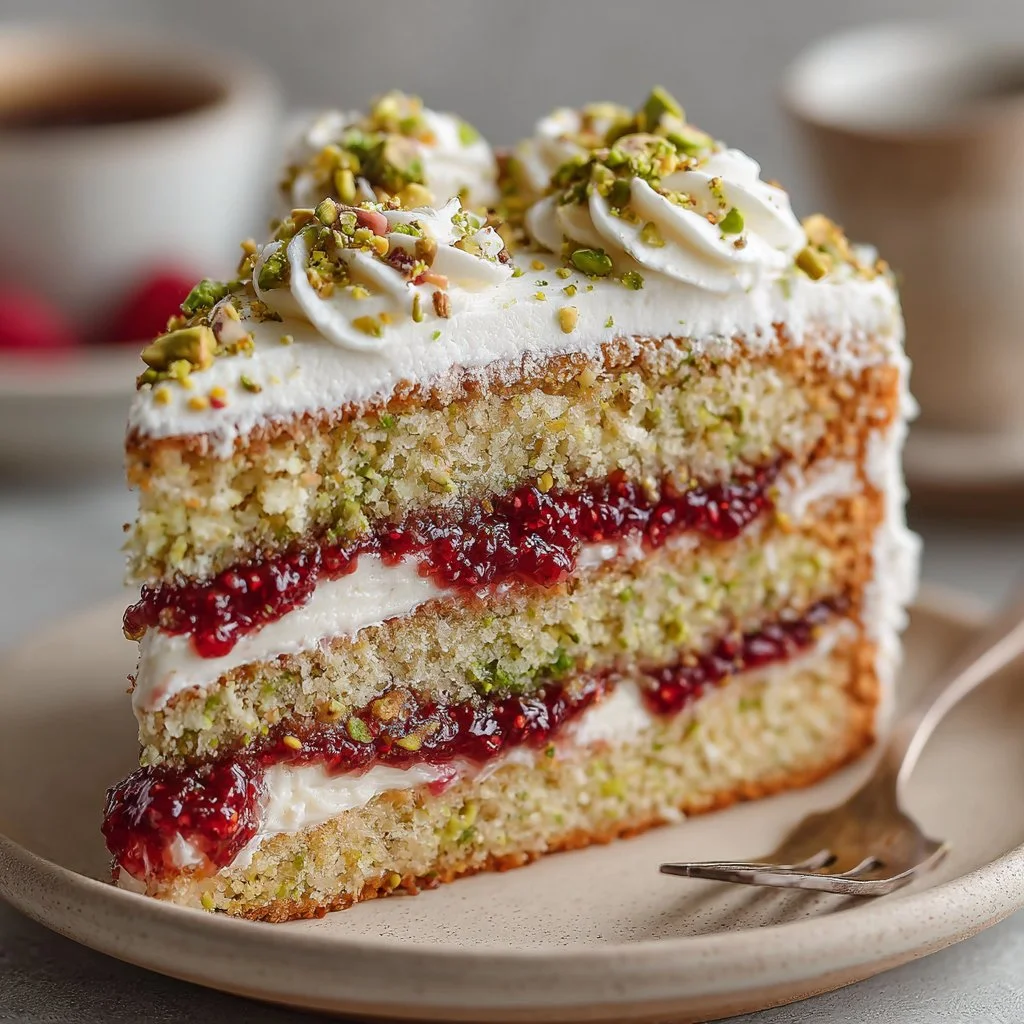
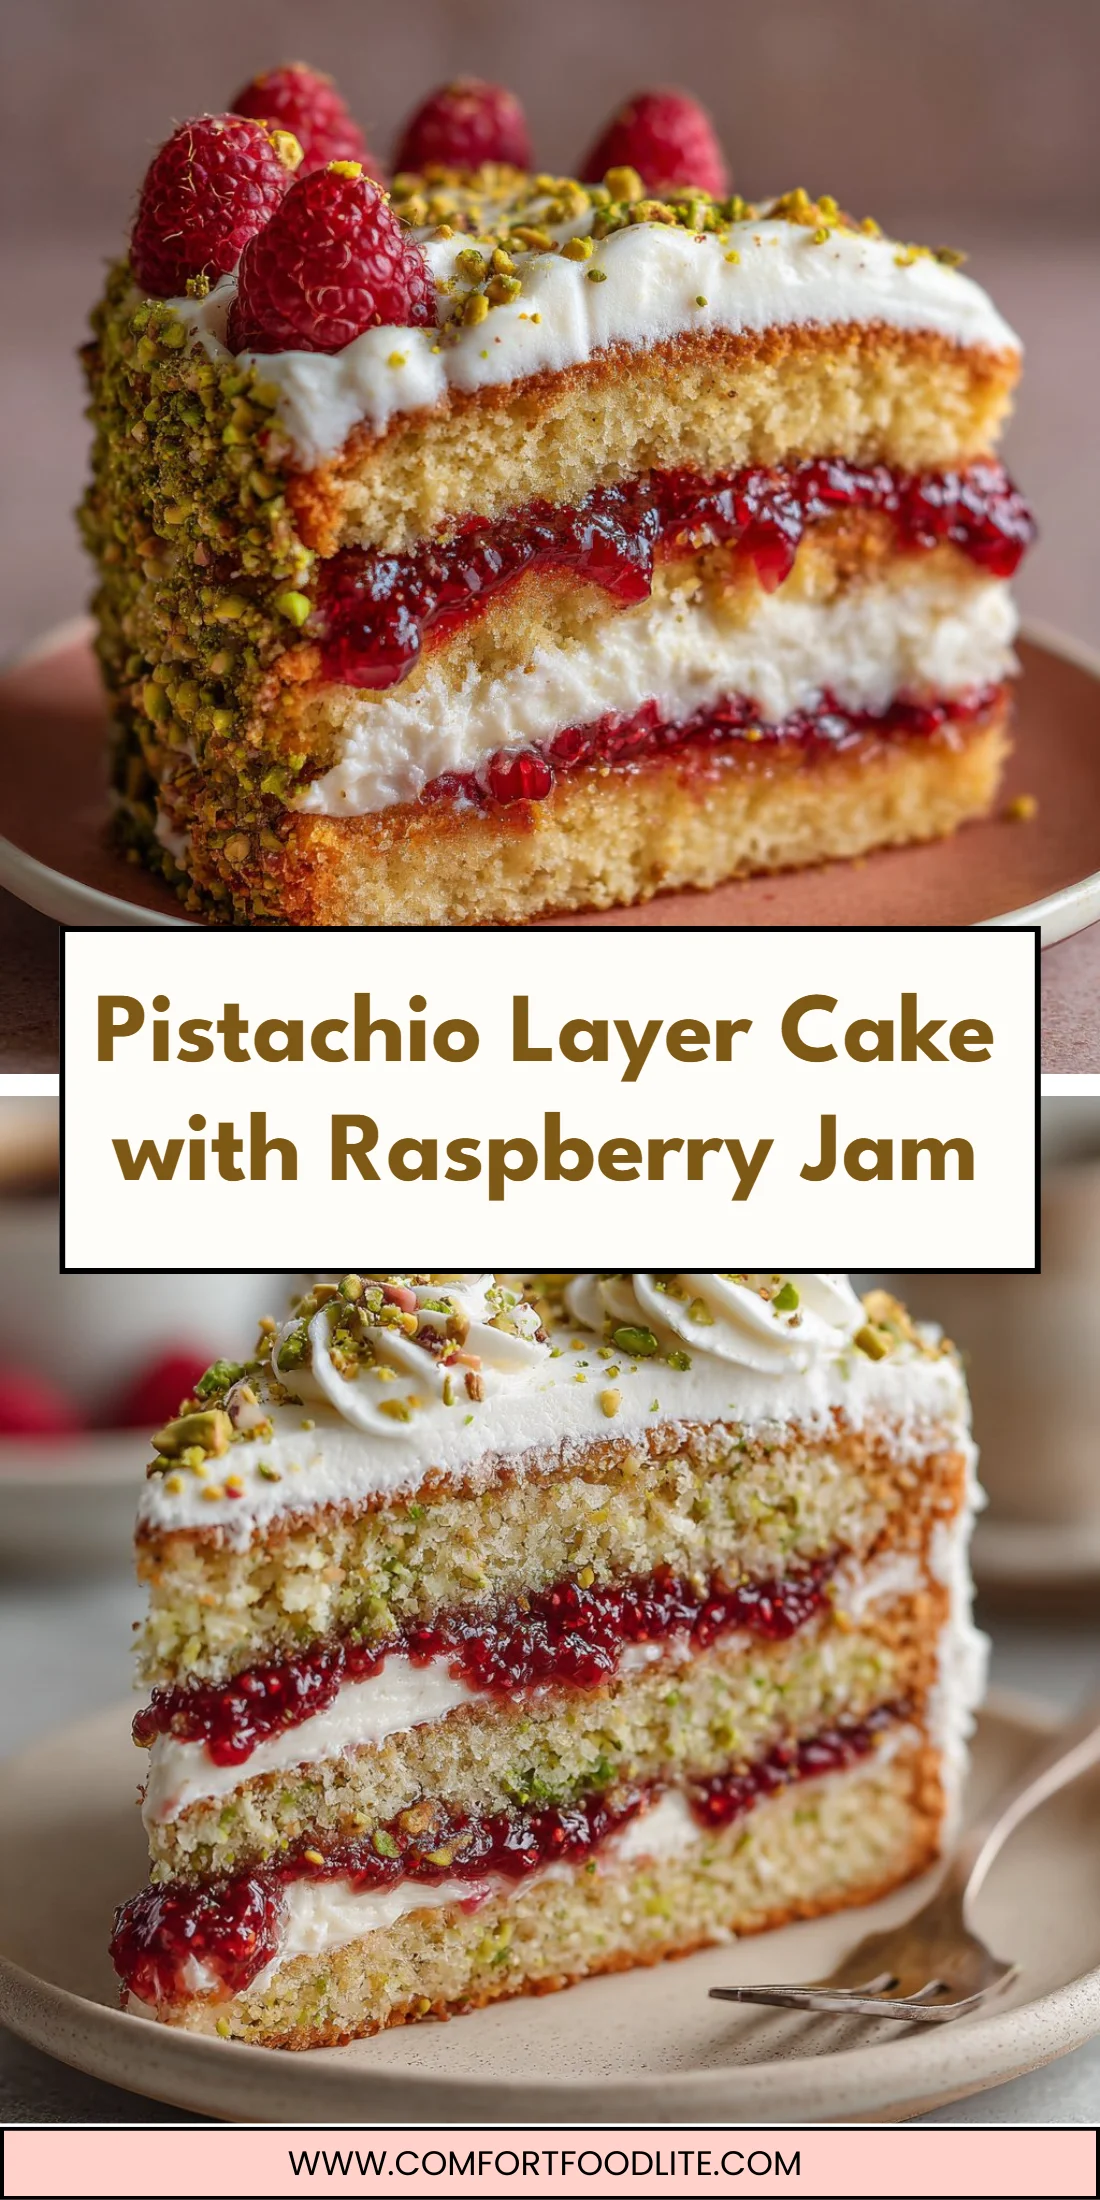
A bright, nutty layer cake studded with pistachios and a ribbon of raspberry jam—this Pistachio Layer Cake with Raspberry Jam is the kind of dessert that gets remembered.
It’s simple to bake but looks like a showstopper on the table.
Perfect for brunches, birthdays, or an elegant weeknight treat.
Pair it with a savory appetizer for contrast or serve with tea for a delicate finish. Try a nut-forward appetizer pairing to echo the pistachio flavor.
Why You’ll Love This Pistachio Layer Cake with Raspberry Jam
– Nutty pistachio flavor that’s subtle and sophisticated.
– Moist, tender crumb thanks to butter-and-milk balance.
– Bright raspberry jam layer for contrast and acidity.
– Silky buttercream that complements, not overpowers, the pistachios.
– Easy to slice and serve at parties without falling apart.
– Visually pretty: green pistachio flecks and ruby raspberries.
– Flexible: swappable jams or nuts for seasonal twists.
The taste is a gentle pistachio nuttiness, balanced by the sugar and butter in the cake. The texture is tender and slightly dense—think classic layer cake, not chiffon—with a smooth buttercream and a bright streak of raspberry jam that cuts through the richness.
“Five stars. The pistachios added a refined flavor and the jam made every bite sing—everyone asked for the recipe!” — A satisfied reader
Key Ingredients for Pistachio Layer Cake with Raspberry Jam
Pistachios (3/4 cup, ground). Fresh or roasted unsalted pistachios give the cake its defining flavor and flecked green color. Buy shelled pistachios and toast them lightly for deeper flavor before grinding. If you substitute almond meal, expect a milder, sweeter profile and a paler cake.
Unsalted butter (1/2 cup for cake + 1 cup for frosting). Butter provides richness, moisture, and structure; unsalted keeps your salt level controllable. Use European-style butter for higher fat and silkier texture. Margarine or oil will change texture and won’t cream the same way, resulting in a looser crumb.
Raspberry jam (1 cup). Jam adds concentrated fruit flavor and a stable, spreadable layer that won’t weep into the crumb. Choose a high-quality jam with real fruit pieces for texture. Fresh raspberry puree could be used, but thin puree will soak the cake unless cooked down or stabilized with a bit of gelatin.
Eggs (3). Eggs supply structure, emulsification, and lift when beaten into the creamed butter and sugar. Use large eggs at room temperature for even incorporation. Egg substitutes (flax, applesauce) will alter structure and may require other adjustments for rise and crumb.
Full Ingredient List for Pistachio Layer Cake with Raspberry Jam
– 2 cups all-purpose flour
– 1 cup granulated sugar
– 1/2 cup unsalted butter, softened
– 1 cup milk
– 3/4 cup pistachios, ground
– 3 eggs
– 1 tablespoon baking powder
– 1/2 teaspoon salt
– 1 cup raspberry jam
– 1 cup fresh raspberries
– 1 cup unsalted butter, softened (for frosting)
– 4 cups powdered sugar
– 1 tablespoon vanilla extract
Step-by-Step Instructions for Pistachio Layer Cake with Raspberry Jam
Step 1: Preheat and prepare pans
Preheat the oven to 350°F (175°C). Grease and flour two 9-inch round cake pans to ensure easy release and even browning.
Pro Tip: The pans should look evenly coated with butter and dusted in flour—no shiny spots or clumps of flour.
Step 2: Cream butter and sugar
In a large mixing bowl, cream together 1/2 cup softened butter and 1 cup granulated sugar until light and fluffy, about 3–5 minutes with an electric mixer.
Pro Tip: The mixture should be pale, airy, and noticeably larger in volume—if it still looks grainy, beat longer.
Step 3: Add eggs
Add the eggs one at a time, beating well after each addition so the mixture stays emulsified and smooth.
Pro Tip: The batter should look glossy and uniform after each egg, not curdled or separated.
Step 4: Fold in ground pistachios
Mix in the ground pistachios until evenly distributed to preserve the nutty texture throughout the batter.
Pro Tip: The batter will show fine green flecks and smell toasty; if it smells raw, your pistachios may be under-toasted.
Step 5: Whisk dry ingredients
In a separate bowl, whisk together the flour, 1 tablespoon baking powder, and 1/2 teaspoon salt to aerate and remove lumps.
Pro Tip: The dry mix should be light and uniform—no visible clumps—so the cake rises evenly.
Step 6: Combine dry and wet
Gradually add the dry ingredients to the creamed mixture, alternating with the milk until just combined, taking care not to overmix.
Pro Tip: The batter should be smooth and pourable but still hold some body; overmixing will create a tougher crumb.
Step 7: Divide batter
Divide the batter evenly between the prepared cake pans using a scale or measuring cups for even layers.
Pro Tip: The surface should be level and glossy; tap pans lightly on the counter to remove air bubbles.
Step 8: Bake
Bake for 25–30 minutes, or until a toothpick inserted in the center comes out clean and the edges pull slightly from the pan.
Pro Tip: The tops should be golden with slight cracks and spring back when touched lightly.
Step 9: Cool in pans
Allow cakes to cool in the pans for 10 minutes so they set before flipping out onto a wire rack to cool completely.
Pro Tip: The cakes should slide out easily when you run a thin spatula around the edge; if not, let them cool 2–3 minutes more.
Step 10: Make the buttercream
For the buttercream, beat together 1 cup softened butter, 4 cups powdered sugar, and 1 tablespoon vanilla extract until fluffy; adjust consistency with milk if needed.
Pro Tip: The frosting should be silky and light, not grainy; if it’s too thick, add a teaspoon of milk at a time.
Step 11: Assemble with jam
Assemble the cake by spreading 1 cup raspberry jam between the layers, pressing gently to adhere without squeezing out the filling.
Pro Tip: The jam layer should remain a distinct bright ribbon—if it sinks in, your cake layers may still be too warm.
Step 12: Frost and garnish
Frost the outside with the raspberry buttercream and garnish with fresh raspberries on top for color and texture.
Pro Tip: The finished cake should look smooth with a defined jam stripe if you cut through; fresh raspberries should look plump and vibrant.
Step 13: Serve
Slice with a warm, clean knife for neat pieces and serve at room temperature to enjoy the full flavor bouquet.
Pro Tip: Each slice should have visible pistachio flecks, a thin jam layer, and smooth buttercream—if it’s leaking jam, chill briefly before slicing.
Pro baking note: For jam stability and extra fruit texture, consider stirring a few fresh raspberries into the jam before layering—similar filling ideas are used for compact pastries like chocolate raspberry cupcakes.
Expert Tips for Pistachio Layer Cake with Raspberry Jam
– Temperature tip: Use room-temperature eggs and butter to ensure proper emulsion and air incorporation.
– Oven accuracy: Check your oven with an oven thermometer; 350°F should be consistent for 25–30 minutes.
– Texture troubleshooting: If the crumb is too dense, you likely overmixed or undercreamed—beat butter and sugar longer next time.
– Frosting texture: Beat frosting at medium speed and scrape the bowl; if it’s too airy, lower speed to avoid tiny air pockets that can collapse.
– Equipment tips: Use a scale for batter division and an offset spatula for smooth frosting edges.
– Common mistakes: Don’t assemble while layers are warm—jam will sink and frosting will slide off.
– Visual cues: A correctly baked cake will be slightly domed and spring back when pressed.
– Flavor boost: Lightly toast the pistachios to deepen flavor but cool them completely before grinding.
For bright, small-batch fruit techniques and piping ideas, explore the process used in delicate handheld desserts like deviled strawberries with cheesecake filling to adapt presentation.
Storage & Freezing for Pistachio Layer Cake with Raspberry Jam
Fridge storage: Store the assembled cake in an airtight cake carrier or covered cake dome in the refrigerator for up to 4 days. Keep the cake away from strong odors and serve at room temperature (30–60 minutes) for best texture.
Freezer storage: Freeze individual slices wrapped tightly in plastic wrap and placed in a freezer-safe container for up to 3 months. For a whole cake, freeze on a flat surface until firm, double-wrap in plastic, then foil; store up to 2 months.
Thawing: Thaw slices overnight in the refrigerator or a few hours at room temperature. For whole cakes, move from freezer to fridge for 12–18 hours, then bring to room temperature before serving.
Reheating: Do not microwave the whole cake. If you prefer warm slices, warm single slices for 8–10 seconds in the microwave (watch carefully) to soften buttercream slightly without melting jam.
Variations & Substitutions for Pistachio Layer Cake with Raspberry Jam
Lemon-pistachio twist. Substitute lemon zest in the batter and a lemon curd layer instead of jam for a brighter, tangy cake. The result is zippier and more refreshing; reduce sugar slightly to avoid cloying.
Chocolate-pistachio version. Fold 2–3 tablespoons of unsweetened cocoa into the dry ingredients and use chocolate ganache between layers. Expect a richer, deeper flavor where pistachios play a supporting, crunchy role.
Mascarpone frosting swap. Replace half the butter in the frosting with mascarpone for a tangy, cream cheese–like finish. The frosting will be softer and more delicate—keep the cake chilled before slicing.
Berry medley. Use mixed berry jam or alternating layers of raspberry and blackberry for varied fruit complexity. The cake becomes fruitier and more jewel-toned, perfect for summer parties and vibrant presentations; for citrus contrast, see a related cheesecake approach like Meyer lemon cheesecake techniques to balance acidity.
Frequently Asked Questions About Pistachio Layer Cake with Raspberry Jam
What can I use instead of ground pistachios?
You can use almond meal or finely chopped toasted almonds as a substitute. Expect a milder, sweeter nut profile and slightly different moisture absorption; reduce any added sweeteners if the substitute is sweetened.
How do I prevent the jam from making the cake soggy?
Use a thicker jam or cook down a fresh raspberry puree to concentrate it, or chill the cake layers before applying jam. A thin smear of buttercream as a moisture barrier also helps keep jam from soaking in.
Can I make this cake ahead of time?
Yes. Bake the layers a day ahead and wrap them tightly in plastic wrap. Store unfrosted layers in the fridge for 24 hours or freeze for longer storage; assemble and frost on the day of serving for best texture.
How do I grind pistachios without making pistachio butter?
Use a pulse setting in a food processor and stop as soon as crumbs form. Over-processing releases oils and creates a paste; chill nuts briefly before grinding to reduce oil release.
Is this recipe suitable for high-altitude baking?
At high altitude reduce baking powder slightly and increase oven temperature by 15–25°F; reduce sugar by 1–2 tablespoons if necessary. Also consider reducing liquid slightly to prevent collapse.
Final Thoughts on Pistachio Layer Cake with Raspberry Jam
This Pistachio Layer Cake with Raspberry Jam balances nutty depth and bright fruit for a memorable dessert. Please leave a star rating in the recipe card below and pin this to Pinterest for later.
For inspiration and variations, check recipes like Raspberry Pistachio Layer Cake – Lion’s Bread, baker showcases such as Pistachio Raspberry Cake – Pies and Tacos, and bakery examples at Pistachio Raspberry Cake | Fresh Bean Bakery.