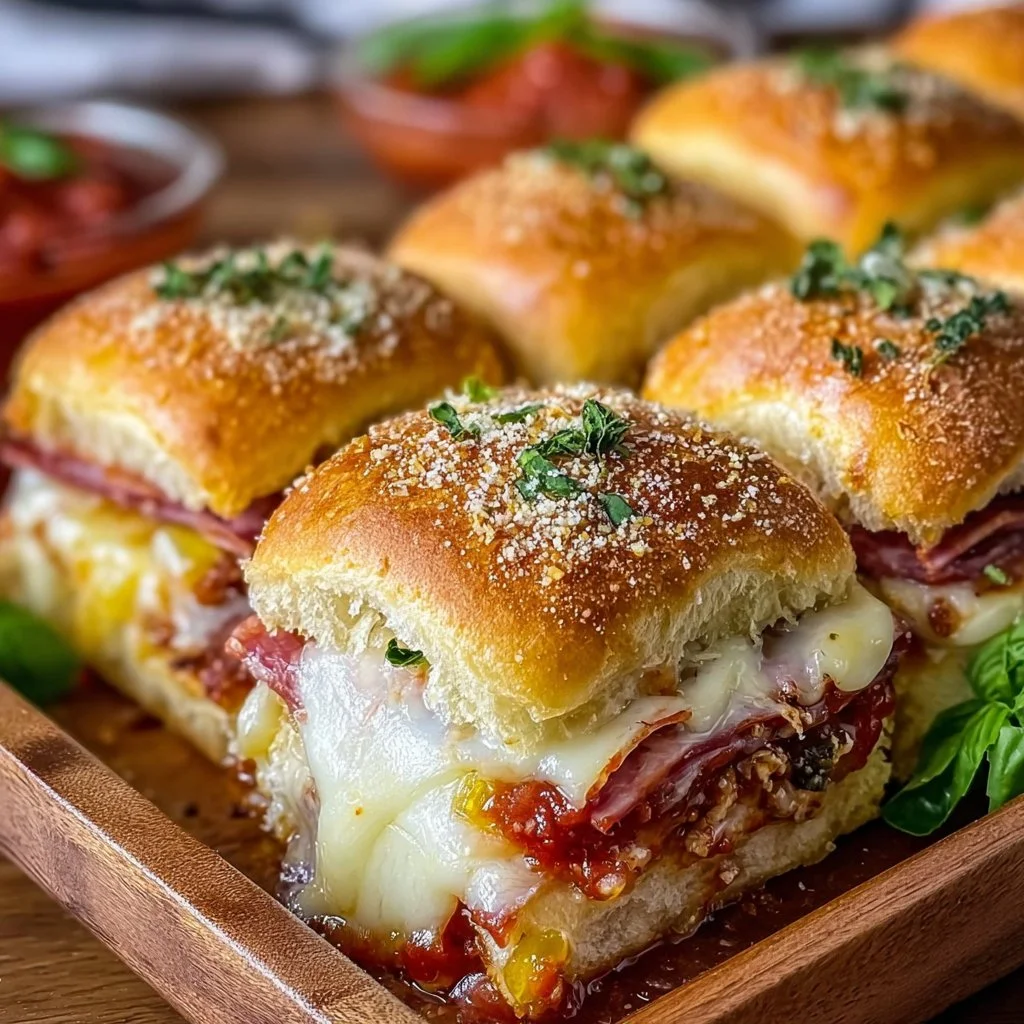
The first time I made these Italian sliders, I expected a quick party snack and ended up with a request to bring them to every family gathering thereafter.
They’re ridiculously simple, transportable, and the flavors—salami, melty mozzarella, and bright marinara—sing without any fuss.
If you’re looking for a no-fail appetizer or a weeknight crowd-pleaser, these sliders are the answer.
Pair them with a warm bowl like this creamy Italian sausage gnocchi soup for a cozy, all-Italian meal.
Why You’ll Love This Recipe
- Ready in about 30 minutes from start to finish.
- No chopping or complicated prep—assembly is the main job.
- Crowd-pleasing flavors that appeal to kids and grown-ups alike.
- Easily customized for spice, veggies, or different cheeses.
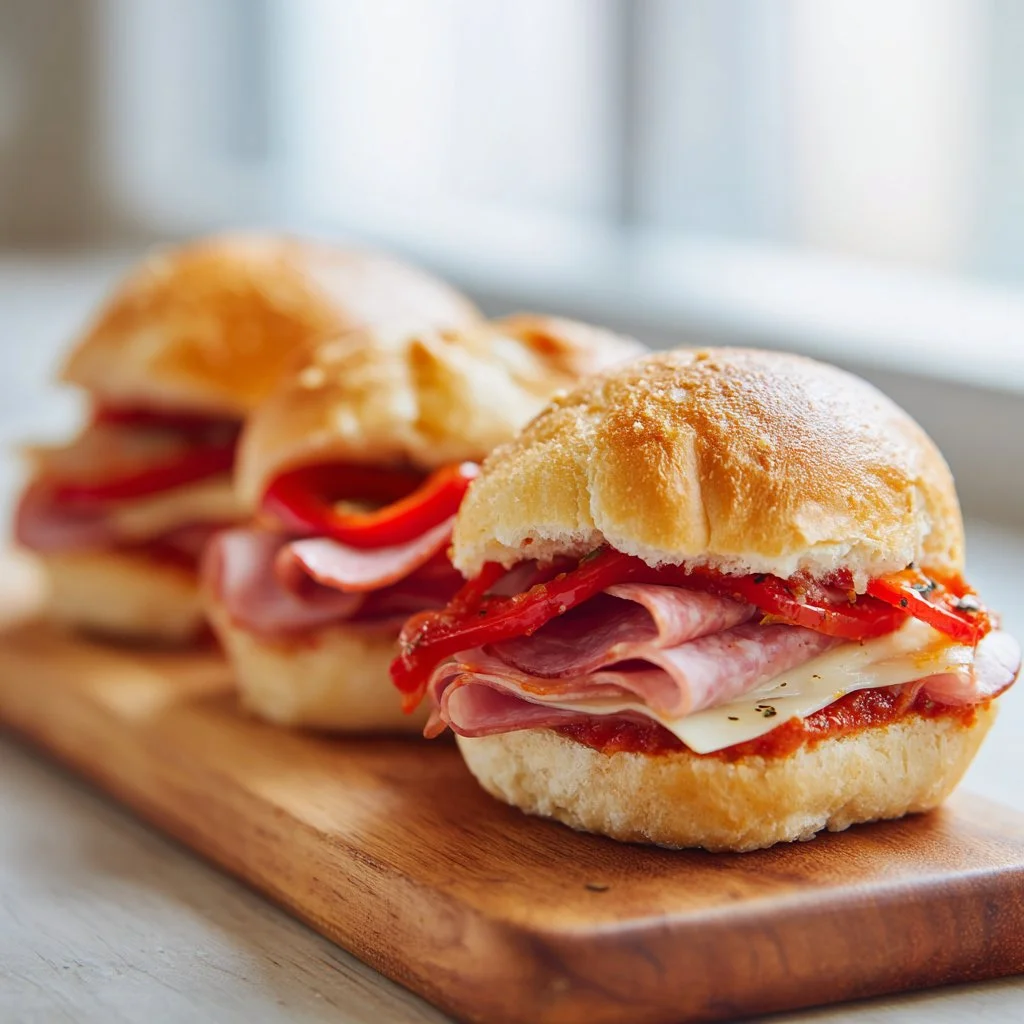
These sliders hit a perfect contrast of textures: soft, slightly sweet slider buns that crisp on top, a gooey ribbon of mozzarella beneath the sauce, and savory layers of deli meat that add a salty, cured depth. The marinara brightens the whole bite with acidity, cutting through fat and melting into the cheese for each satisfying pull. Heat caramelizes the bun tops and blends flavors into a compact, hand-held sandwich that feels indulgent without being fussy.
"Five stars — I made these for a Sunday game day and they disappeared in minutes. Easy to swap meats and they stayed moist the next day." — Sarah, reader
Key Ingredients
Mozzarella cheese
Mozzarella is your melting hero here. Use a low-moisture shredded mozzarella for even melting without turning the sliders watery. For a silkier melt and richer flavor, mix in a little fresh mozzarella torn into pieces, but skip big puddles of liquid-packed fresh mozzarella.
Savory deli meats (salami, ham, or turkey)
The choice of meat defines the slider’s character. Thinly sliced salami or soppressata gives peppery spice and a chewy bite, while ham keeps it milder and classic. If you want something lighter, turkey provides lean protein and lets the sauce shine.
Zesty marinara sauce
A bright, slightly chunky marinara is best—its acidity balances the fat from the meats and cheese. Look for brands with basil and garlic listed high on the ingredient list, or use a homemade marinara for the freshest flavor. Don’t sting with the sauce; this is where the sliders get their signature Italian tang.
Slider buns
Soft, slightly sweet slider buns hold up under baking and crisp beautifully on top. Hawaiian rolls work in a pinch for sweetness, but classic potato or brioche-style slider buns give a better balance of texture and structure.
Full ingredient list:
- Slider buns
- Savory deli meats (e.g., salami, ham, or turkey)
- Mozzarella cheese
- Zesty marinara sauce
- Olive oil
- Italian seasoning
- Optional: sliced peppers or onions
Step-by-Step Instructions
Step 1: Heat the oven
Preheat your oven to 350°F (175°C).
This moderate heat warms the slider through without burning the tops, and gives the cheese time to melt evenly.
Pro Tip: Use an oven thermometer if your oven runs hot or cool; accurate heat makes the difference between gooey cheese and dried-out sliders.
Step 2: Assemble the bun base
Slice the slider buns in half and place the bottom halves in a baking dish.
Arrange them snugly so the tops will meet the bottoms and press together slightly to form a single baking surface.
Pro Tip: Line the dish with parchment or spray lightly to prevent any bottom sticking if your sauce overflows.
Step 3: Layer the meats
Layer the deli meats evenly over the bottom buns, covering them edge to edge.
Overlap thin slices for a consistent bite in every sandwich, and vary the meats if you want a more complex flavor profile.
Pro Tip: If using thicker deli cuts, give them a quick fold or tear to fit the buns and encourage even heating.
Step 4: Add the cheese
Scatter the mozzarella cheese on top of the meats, covering the surface but leaving a little room at the edges.
A uniform layer melts more predictably and creates the irresistible cheese pull when you serve.
Pro Tip: For extra flavor, stir a tablespoon of grated Parmesan into the shredded mozzarella before sprinkling.
Step 5: Spoon on the marinara
Drizzle or dollop the zesty marinara sauce generously over the cheese.
The sauce should be prominent but not so heavy it soaks the buns; aim for a glossy, even coverage.
Pro Tip: Warm the sauce slightly before spooning for faster melting and a less chilled final bake.
Step 6: Season and top the buns
Sprinkle Italian seasoning evenly over the sauce, then place the top halves of the buns on the sliders.
The seasoning combines oregano, basil, and thyme notes and lifts the whole flavor profile.
Pro Tip: If adding sliced peppers or onions, tuck them between the cheese and sauce for roasting; they’ll soften and sweeten during the bake.
Step 7: Brush and bake
Brush the tops with olive oil, then cover the dish with aluminum foil and bake for 15 minutes.
This covered phase warms everything through and traps steam to melt the cheese.
Pro Tip: Use a pastry brush for an even coat; the oil helps the tops brown once you remove the foil.
Step 8: Uncover and brown
Remove the foil and bake for an additional 5–10 minutes until the tops are golden and the cheese is melted.
Watch closely during these last minutes—the tops can go from golden to too dark quickly.
Pro Tip: You’ll know they’re ready when the buns are golden, the cheese is fully melted and bubbling at the edges, and the edges of the bottom buns are slightly toasted.
Step 9: Rest and serve
Remove from the oven, let cool slightly, and serve warm.
Cut between buns if needed and transfer to a platter for guests.
Pro Tip: Let them sit 3–5 minutes before serving so the cheese sets just enough for neat slices.
Expert Tips for Success
- Temperature control matters: 350°F gives even heating; if you prefer a crisper top, finish under a hot broiler for 30–60 seconds but watch closely to avoid burning.
- Use low-moisture shredded mozzarella to prevent sogginess, but add small pieces of fresh mozzarella sparingly for creaminess.
- Toast the bottom buns lightly before assembling if you’re worried about soggy bottoms—pop them under the broiler for 30–45 seconds, then proceed.
- For a no-mess transport option, assemble in a disposable foil pan and reheat covered at 350°F for 10–12 minutes, then uncover for 3–5 minutes to refresh the crust.
- If toppings are watery (fresh tomatoes, wet peppers), pat them dry with a paper towel; excess moisture dilutes flavor and softens the bun too much.
- To feed a crowd, double the recipe in two pans rather than crowding a single dish; heat circulates better with space between pans.
- Swap meats strategically: for a spicy kick, use pepperoni or hot capicola; for a milder family-friendly version, stick with ham or turkey.
- Equipment note: a 9×13 baking dish fits a standard pack of slider buns nicely. If you use a smaller dish, press buns together more tightly to retain structure.
- Troubleshooting: If cheese melts but the center feels cold, cover and give it another 5–7 minutes; if buns brown too quickly but cheese hasn’t melted, tent foil lightly and continue baking.
- Serving suggestion: Place small bowls of extra marinara and pickled peppers at the table for guests to customize their sliders.
In colder months these pair beautifully with tomato-ey soups; try serving them alongside a hearty bowl like this Italian Penicillin Soup for a satisfying meal.
Storage & Freezing
Fridge storage: Cool sliders to room temperature, then cover the baking dish tightly with plastic wrap or transfer individual sliders to an airtight container.
They’ll keep well in the refrigerator for up to 3 days and reheat nicely.
Reheating from the fridge: Reheat covered at 325–350°F for 8–12 minutes until warmed through.
Uncover for the last 2 minutes to refresh the crust.
Freezer storage: Assemble and then flash-freeze the pan of assembled sliders on a sheet tray for 1–2 hours.
Once the tops are firm, wrap tightly in plastic and foil or transfer to a freezer-safe container; they keep for up to 2 months.
Reheating from frozen: Bake covered at 350°F for 25–30 minutes, then uncover and bake an additional 8–10 minutes until cheese bubbles and tops brown.
Avoid microwaving from frozen—too likely to make buns gummy.
If you plan to freeze single portions, wrap each slider in parchment and foil for faster reheating.
These make great make-ahead party trays when reheated gently.
For a dinner-and-dessert pairing, these sliders are easy to serve before an indulgent treat like this Italian Love Cake.
Variations & Substitutions
Classic pepperoni & provolone: Swap the deli meats for pepperoni and use provolone for a sharper, more pronounced melty bite.
Add a pinch of red pepper flakes on the sauce for heat.
Veggie-forward sliders: Replace meats with grilled zucchini, roasted peppers, and mushrooms.
Use a robust marinara and a mix of mozzarella with a sprinkle of smoked provolone for depth.
Herb-butter tops: Instead of olive oil, mix softened butter with minced garlic and chopped parsley and brush that on the tops before baking.
This yields a richer, more aromatic finish.
Gluten-free & dairy-free swaps: Use certified gluten-free slider buns and a dairy-free mozzarella-style shreds.
Check the marinara label for cross-contamination and choose a thicker sauce to prevent sogginess.
Make them party-friendly by adding a pickle or olive slice to each slider after baking.
These small additions add texture and salty contrast.
Try a winter comfort combo—serve alongside hearty sides like mashed potatoes or a warm soup; I often pair mine with a rustic soup like this winter penicillin-style soup for extra warmth.
Frequently Asked Questions
Q: Can I make these sliders ahead of time and bake later?
A: Yes. Assemble the sliders in the baking dish, cover tightly with plastic wrap, and refrigerate up to 24 hours before baking. For longer storage, freeze as described above. When baking from chilled, add 5–7 minutes to the covered bake time to ensure the center warms through.
Q: What cheeses work best besides mozzarella?
A: Provolone and fontina are excellent melting cheeses with a more pronounced flavor. A blend of shredded mozzarella and grated Parmesan adds nuttiness and helps create a golden top. Avoid block fresh mozzarella packed in water unless you blot it very dry first.
Q: How can I prevent soggy bottoms?
A: Use low-moisture cheese, warm the sauce slightly before assembling, and avoid over-saucing the sliders. Toasting the bottom buns briefly before assembly or placing a thin layer of grated cheese or breadcrumbs between bun and meat can create a moisture barrier.
Q: Are there vegetarian options that still feel satisfying?
A: Absolutely. Grilled vegetables like eggplant, zucchini, and roasted peppers layered with mushrooms and a robust tomato sauce make hearty, flavorful vegetarian sliders. Add a smear of pesto under the cheese for an umami boost.
Q: Can I scale this recipe for a large crowd?
A: Double the ingredients and bake in two pans instead of crowding one. Stagger pan placement in the oven if needed and rotate pans half-way through the bake for even browning. Keep extra marinara warm in a crockpot for topping or dipping.
Final Thoughts
These Italian sliders are a simple, dependable crowd-pleaser that require minimal prep and maximum flavor.
If you enjoyed this recipe, please leave a star rating in the recipe card below and pin this to your Pinterest boards for later.
For another take on warm, spiced sliders, check out this riff on a similar classic at Hot Italian Sub Sliders – The Jam Jar Kitchen.
If you want a slightly different family-style version, see the easy crowd-pleaser at Easy Italian Sliders – Cooking in the Midwest.
For a baked slider with bold flavor notes that inspired some of my seasoning choices, read the take at Italian Sliders Recipe – Chelsea’s Messy Apron.

Italian Sliders
Ingredients
Slider Ingredients
- 12 pieces Slider buns Soft, slightly sweet slider buns like Hawaiian rolls, classic potato, or brioche-style work well.
- 8 ounces Savory deli meats (salami, ham, or turkey) Thinly sliced deli meats for variety in flavors.
- 8 ounces Mozzarella cheese Low-moisture shredded mozzarella preferred for even melting.
- 1 cup Zesty marinara sauce A bright, slightly chunky marinara balances the sliders.
- 2 tablespoons Olive oil For brushing the tops before baking.
- 1 tablespoon Italian seasoning Sprinkled over the sauce for added flavor.
- 1 cup Optional: sliced peppers or onions Add for extra flavor and texture.
Instructions
Preparation
- Preheat your oven to 350°F (175°C).
- Slice the slider buns in half and place the bottom halves in a baking dish.
- Layer the deli meats evenly over the bottom buns.
- Scatter the mozzarella cheese on top of the meats, leaving a little room at the edges.
- Drizzle or dollop the marinara sauce over the cheese.
- Sprinkle Italian seasoning over the sauce and place the top halves of the buns on the sliders.
- Brush the tops with olive oil, then cover the dish with aluminum foil.
- Bake for 15 minutes, then uncover and bake for an additional 5-10 minutes until the tops are golden.
- Remove from the oven and let cool slightly before serving.