The first time I made these hot dog buns I was skeptical they could beat store-bought ones.
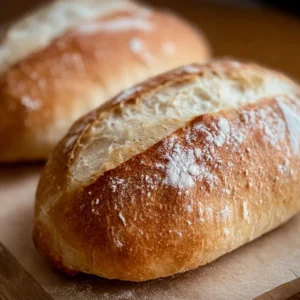
But the soft crumb and slightly sweet, buttery crust won me over after the first bite.
This recipe yields ten perfectly shaped buns that hold up to juicy sausages and grilled toppings.
It’s forgiving for new bakers and fast enough for weekend cookouts.
Why You’ll Love This Recipe
- Soft, tender crumb that still holds a hefty hot dog without collapsing.
- Lightly sweet and buttery flavor that complements savory sausages.
- Ten uniform buns — great for families or parties.
- Simple pantry ingredients and straightforward technique for reliable results.
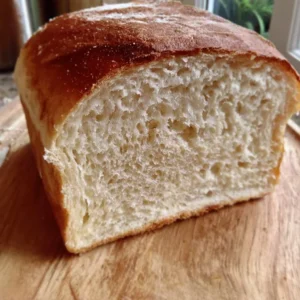
The texture is pillowy but with enough structure to slice without squashing.
The crust browns to a glossy, golden finish thanks to the egg wash and gives a slight chew that contrasts the tender interior.
Flavor is mild, slightly sweet, and savory from butter and eggs—perfect for bright or bold toppings.
"Made these for our backyard game night and they were gone in 10 minutes — soft, fluffy, and held up to chili. Best buns I’ve made at home!" — Sarah, reader
Key Ingredients
Flour — Use all-purpose flour for a balanced protein level that gives good structure without being too chewy.
If you prefer a slightly lighter crumb, try a brand with moderate protein (10–11%) and weigh your flour for consistency.
Active dry yeast — This recipe uses a standard packet of active dry yeast.
Always check the expiration date and proof it in warm milk to ensure it’s lively; instant yeast can be used but reduce proofing time slightly.
Warm milk (about 110°F/43°C) — Milk gives a richer crumb and softer crust than water.
Use whole milk for best flavor, or substitute 2% if you want lower fat. Keep temperature under 115°F so you don’t kill the yeast.
Unsalted butter — Butter adds flavor and tenderness to the crumb.
Melt and cool slightly before adding so it doesn’t cook the eggs or kill the yeast during mixing.
Full ingredients list:
- 4 cups all-purpose flour
- 1 packet (2 ¼ teaspoons) active dry yeast
- 1 ½ cups warm milk (about 110°F/43°C)
- ¼ cup granulated sugar
- ¼ cup unsalted butter, melted
- 1 teaspoon salt
- 2 large eggs
- 1 egg wash (1 egg beaten with 1 tablespoon water for brushing)
- Optional: sesame seeds or poppy seeds for topping
Step-by-Step Instructions
Step 1: Proof the yeast
In a small bowl, combine the warm milk and sugar.
Sprinkle the yeast on top and let it sit for about 5–10 minutes until foamy.
Pro Tip: If it doesn’t foam, the yeast is likely dead — discard and start with fresh yeast.
Visual cue: a bubbly, foamy surface means the yeast is active and ready.
Step 2: Mix the wet ingredients
In a large mixing bowl, whisk together the melted butter and eggs.
Add the activated yeast mixture and stir to combine.
Pro Tip: Let the melted butter cool to warm before combining so the eggs don’t partially cook.
Visual cue: mixture should look homogenous and slightly glossy.
Step 3: Combine dry ingredients
In another bowl, mix the flour and salt.
Gradually add the dry ingredients to the wet mixture, stirring until the dough starts to come together.
Pro Tip: Add flour in increments to avoid over-drying the dough — you may not need every last teaspoon if humidity is high.
Visual cue: dough will form a shaggy mass that pulls away from the bowl.
Step 4: Knead the dough
Transfer the dough to a floured surface and knead for about 5–7 minutes until smooth and elastic.
You can also use a stand mixer with a dough hook on medium speed for 4–5 minutes.
Pro Tip: Test readiness by pressing a finger into dough; it should spring back slowly.
Visual cue: the dough should be smooth, slightly tacky, and elastic, not sticky or crumbly.
Step 5: First rise
Place the dough in a greased bowl, cover it with a clean cloth or plastic wrap, and let it rise in a warm place for about 1 hour, or until doubled in size.
Pro Tip: For a warm spot, turn the oven to the lowest setting for 1 minute, then turn it off and place the covered dough inside.
Visual cue: dough has visibly doubled and leaves an indentation when gently poked.
Step 6: Shape the buns
Punch down the risen dough and divide it into 10 equal pieces.
Shape each piece into an oval or rectangle, about 6 inches long.
Pro Tip: Use a scale to weigh each piece for uniform buns (total dough weight divided by 10).
Visual cue: each piece should feel even and smooth on top for consistent baking.
Step 7: Second rise
Place the shaped buns on a baking sheet lined with parchment paper.
Cover them and let rise for another 30 minutes.
Pro Tip: Leave space between buns; they will expand and should barely touch when risen.
Visual cue: buns should look puffy but not over-proofed or collapsing.
Step 8: Egg wash and bake
Preheat your oven to 375°F (190°C).
After the second rise, brush the tops of the buns with the egg wash. Sprinkle with sesame or poppy seeds if desired. Bake for 15–20 minutes, or until golden brown.
Pro Tip: Rotate the sheet halfway through baking for even color.
Visual cue: buns are done when they sound hollow if tapped and are a deep golden brown.
Step 9: Cool
Remove from the oven and let cool on a wire rack for 10–15 minutes before serving.
Cooling prevents the crumb from becoming gummy and allows flavors to settle.
Pro Tip: Slice buns only after they’ve cooled slightly to preserve structure.
Visual cue: the bottom should be firm and the interior set, not doughy.

Expert Tips for Success
- Temperature control matters: aim for milk at 105–110°F (40–43°C) when proofing yeast. Too hot and you’ll kill it; too cold and activation is sluggish. Use an instant-read thermometer for accuracy.
- Weigh your flour: scoop-and-sweep often yields too much flour. For consistent buns, weigh 4 cups as about 480–500 grams depending on your flour. A kitchen scale removes guesswork.
- Don’t over-knead: knead until elastic and smooth. Overworked dough can become tight and dense. If using a mixer, stop once the dough clears the bowl and feels springy.
- Use a warm proofing spot: yeast loves 75–85°F (24–29°C). If your kitchen is cold, place the covered bowl near a warm appliance or use the oven trick (briefly on, then off).
- Egg wash timing: apply egg wash after the final rise, not before, to get an even glossy finish. For a shinier top, add a tiny pinch of sugar to the wash.
- Moisture at bake time: for a slightly crisper crust, place an oven-safe pan on the bottom rack with a half-cup of water for the first 5 minutes of baking to create steam.
- Uniform shaping: use a ruler or simple template to shape 6-inch buns for consistent filling capacity and appearance, especially if serving guests.
- Troubleshooting dense buns: if buns are dense, check yeast freshness, avoid too much flour, and ensure adequate rising time. Under-proofing is a common culprit.
- Flavor boosters: fold in 1–2 tablespoons of powdered milk to the flour for extra tenderness and a touch more depth in flavor.
- Make-ahead option: dough can be shaped, covered, and refrigerated overnight for a slower second rise and more flavor complexity.
Storage & Freezing
Room temperature storage: Store cooled buns in a sealed plastic bag or airtight container for up to 2 days.
Keep them away from direct sunlight and heat to prevent drying.
Refrigerator: You can refrigerate cooled buns for up to 5 days, though refrigeration may slightly dry the crumb.
Wrap buns well in plastic wrap or place them in an airtight container to keep them soft.
Freezer: For longer storage, freeze individual buns in a single layer on a baking sheet until firm (about 1 hour).
Transfer to a freezer bag or container and store for up to 3 months.
Thawing & reheating: Thaw frozen buns at room temperature for 1–2 hours or overnight in the fridge.
Warm in a 300°F (150°C) oven for 5–8 minutes, or microwave covered with a damp paper towel for 10–20 seconds to restore softness.
Make-ahead tip: Freeze fully cooled buns immediately after baking for best texture retention.
Avoid refreezing once thawed to preserve quality.
Variations & Substitutions
Whole wheat swap: Replace up to half the all-purpose flour with whole wheat flour for nuttier flavor.
Increase liquid slightly and knead longer to develop gluten.
Sourdough version: Use a fed sourdough starter to replace some or all of the commercial yeast for tang and complexity.
Expect longer ferment times and a slightly chewier crumb.
Milk-free alternative: Use warm water plus 2 tablespoons of olive oil instead of milk and butter for dairy-free buns.
They’ll be slightly less tender but still sturdy.
Enriched flavors: Fold in 1–2 tablespoons of honey instead of sugar for a different sweetness profile.
Add herbs or minced onion for savory variation; reduce sugar slightly if adding sweet mix-ins.
Frequently Asked Questions
Q: Can I use instant yeast instead of active dry yeast?
A: Yes. If using instant yeast, sprinkle it directly into the dry ingredients and reduce the proofing time slightly. You may skip the initial foam step, but proofing in warm milk still helps if your starter is older.
Q: Why are my buns dense even after rising?
A: Common causes are inactive yeast, too much flour, or insufficient kneading/proofing. Check yeast freshness, weigh flour accurately, and ensure the dough has doubled during the first rise.
Q: How do I make smaller slider-sized buns?
A: Divide the dough into more pieces—about 20 for sliders—and shape into 3-inch rounds. Reduce bake time slightly and watch for golden color to avoid overbrowning.
Q: Can I bake these on a grill or in a convection oven?
A: You can bake on a grill set up for indirect heat; use a baking stone and keep covered to mimic oven conditions. In a convection oven, reduce the temperature by 25°F (about 14°C) and check earlier for doneness.
Q: Can I make the dough in a stand mixer?
A: Absolutely. Use a dough hook and mix on medium-low for 4–6 minutes until dough is smooth and elastic. Watch closely to avoid overheating the motor or over-kneading.
Final Thoughts
These hot dog buns are a fast route to homemade flavor and a proud way to elevate backyard classics.
If you try them, please leave a star rating in the recipe card below and pin this recipe to your Pinterest boards for later.
Conclusion
Looking for other approachable hot dog bun recipes or alternate methods? Check out this Quick And Easy Hot Dog Buns recipe – Chef Lola’s Kitchen for a fast, no-fuss version.
If you want a tangy sourdough take, this Sourdough Hot Dog Buns – Amy Bakes Bread offers a great fermented twist.
For another straightforward classic, read Easy Homemade Hot Dog Buns – The Flavor Bender for helpful shaping tips.
And if you want a recipe that doubles as burger buns, try this Burger or Hot Dog Buns Recipe for a versatile option.

Hot Dog Buns
Ingredients
Dough Ingredients
- 4 cups all-purpose flour Weigh for consistency; approximately 480-500 grams.
- 1 packet active dry yeast Check expiration date; proof in warm milk.
- 1.5 cups warm milk About 110°F (43°C); use whole for best flavor.
- ¼ cup granulated sugar
- ¼ cup unsalted butter, melted Cool before adding to not cook the eggs.
- 1 teaspoon salt
- 2 large eggs
- 1 egg egg wash (beaten with 1 tablespoon water) For brushing.
- optional sesame seeds or poppy seeds For topping.
Instructions
Preparation
- In a small bowl, combine warm milk and sugar. Sprinkle yeast on top and let it sit for about 5–10 minutes until foamy.
- In a large mixing bowl, whisk together melted butter and eggs. Add the activated yeast mixture and stir to combine.
- In another bowl, mix flour and salt. Gradually add dry ingredients to the wet mixture, stirring until dough starts to come together.
- Transfer the dough to a floured surface and knead for about 5–7 minutes until smooth and elastic.
- Place the dough in a greased bowl, cover it, and let it rise in a warm place for about 1 hour, or until doubled in size.
- Punch down the risen dough and divide it into 10 equal pieces. Shape each piece into an oval or rectangle, about 6 inches long.
- Place the shaped buns on a baking sheet lined with parchment paper, cover them, and let rise for another 30 minutes.
Baking
- Preheat your oven to 375°F (190°C).
- After the second rise, brush the tops of the buns with egg wash. Sprinkle with sesame or poppy seeds if desired.
- Bake for 15–20 minutes, or until golden brown.
- Remove from the oven and let cool on a wire rack for 10–15 minutes before serving.