The first time I made this honey garlic chicken, my whole kitchen smelled like a restaurant for less than $10 and 20 minutes of work.
It’s one of those weeknight miracles that doesn’t skimp on flavor or texture.
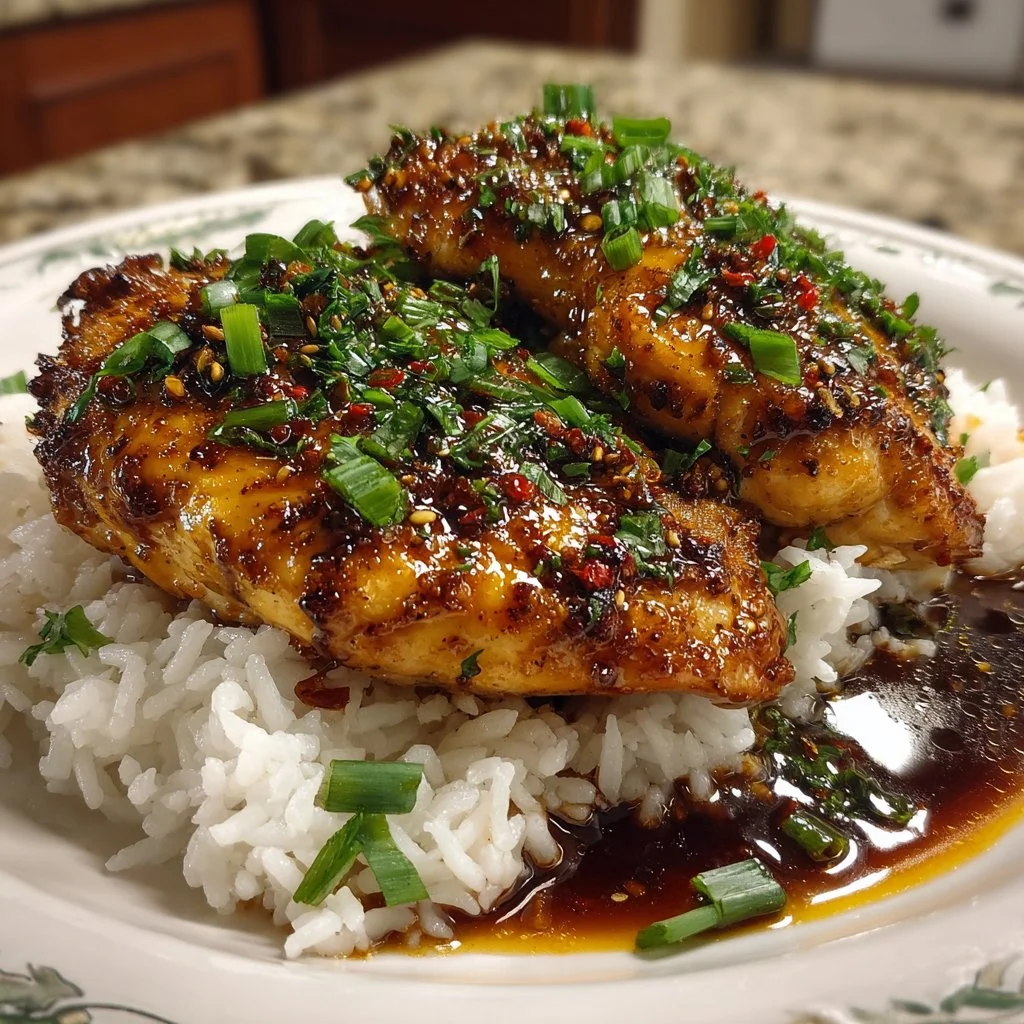
Sweet, savory, and garlicky, this recipe turns plain chicken breasts into a sticky, glossy dinner that kids and adults both request again.
This version uses pantry-friendly ingredients and one skillet, so cleanup is as easy as the cooking.
Why You’ll Love This Recipe
- Ready in about 20–30 minutes from start to finish.
- Uses simple pantry staples and minimal hands-on time.
- Produces a glossy, sticky sauce that clings to the chicken.
- Versatile: serves with rice, noodles, or roasted vegetables.
- Easy to scale up for meal prep or scale down for two.
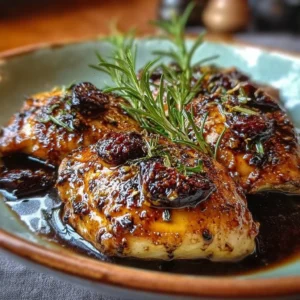
The texture is what truly wins: a lightly caramelized exterior with a tender, juicy interior. The honey creates a thin, glossy glaze that forms a slightly sticky crust when it hits the hot pan, while the soy sauce adds depth and savory balance. Garlic gives aromatic lift, and a short rest makes every bite moist rather than dry.
“Five stars — my kids fought over the last piece. Simple ingredients, big flavor. Weeknight winner!” — Rachel, reader
Key Ingredients
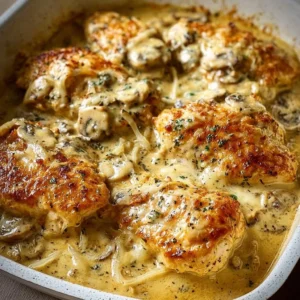
Chicken breasts (4): Choose breasts that are similar in size so they cook evenly. If your breasts are very thick, consider butterflying or gently pounding them to an even thickness for consistent cooking. If you prefer darker meat, boneless skinless thighs work wonderfully with the same sauce.
Honey (1/4 cup): Honey is the backbone of the glaze. It caramelizes quickly to give that glossy finish, so use a runny, mild-flavored honey for even coating. Local raw honey adds character, but any clear runny honey works well; avoid overly robust, strongly floral honeys if you want a classic balance.
Soy sauce (1/4 cup): Soy sauce supplies the umami and salt needed to balance the sweetness. For a cleaner, less salty sauce, use low-sodium soy sauce or tamari for a gluten-free option. Brand tip: Kikkoman is reliable for consistency, while tamari brands like San-J are best for GF swaps.
Garlic (2 cloves, minced): Fresh garlic is essential. It softens and mellows in the sauce, giving savory aroma rather than a raw punch. Mince just before mixing so the volatile oils stay bright; powdered garlic won’t provide the same freshness.
Ingredients (full list):
- 4 chicken breasts
- 1/4 cup honey
- 1/4 cup soy sauce
- 2 cloves garlic, minced
- 1 tablespoon olive oil
- Salt and pepper to taste
- Optional: green onions for garnish
Step-by-Step Instructions
Step 1: Make the honey-garlic sauce
In a small bowl, whisk together the honey, soy sauce, and minced garlic until smooth.
Set the sauce aside so the flavors meld while you heat the pan.
Pro Tip: Taste a tiny dab of the sauce and adjust for sweetness or salt. If it’s too sweet, add a splash more soy sauce; too salty, a touch more honey or a squeeze of lemon.
Step 2: Heat the skillet
Warm a heavy skillet over medium heat and add the olive oil.
Let the oil shimmer but not smoke — that means it’s ready.
Pro Tip: Use a stainless steel or cast-iron pan for better browning. Nonstick works but won’t develop quite the same caramelized crust.
Step 3: Season and sear the chicken
Pat the chicken breasts dry and season both sides with salt and pepper.
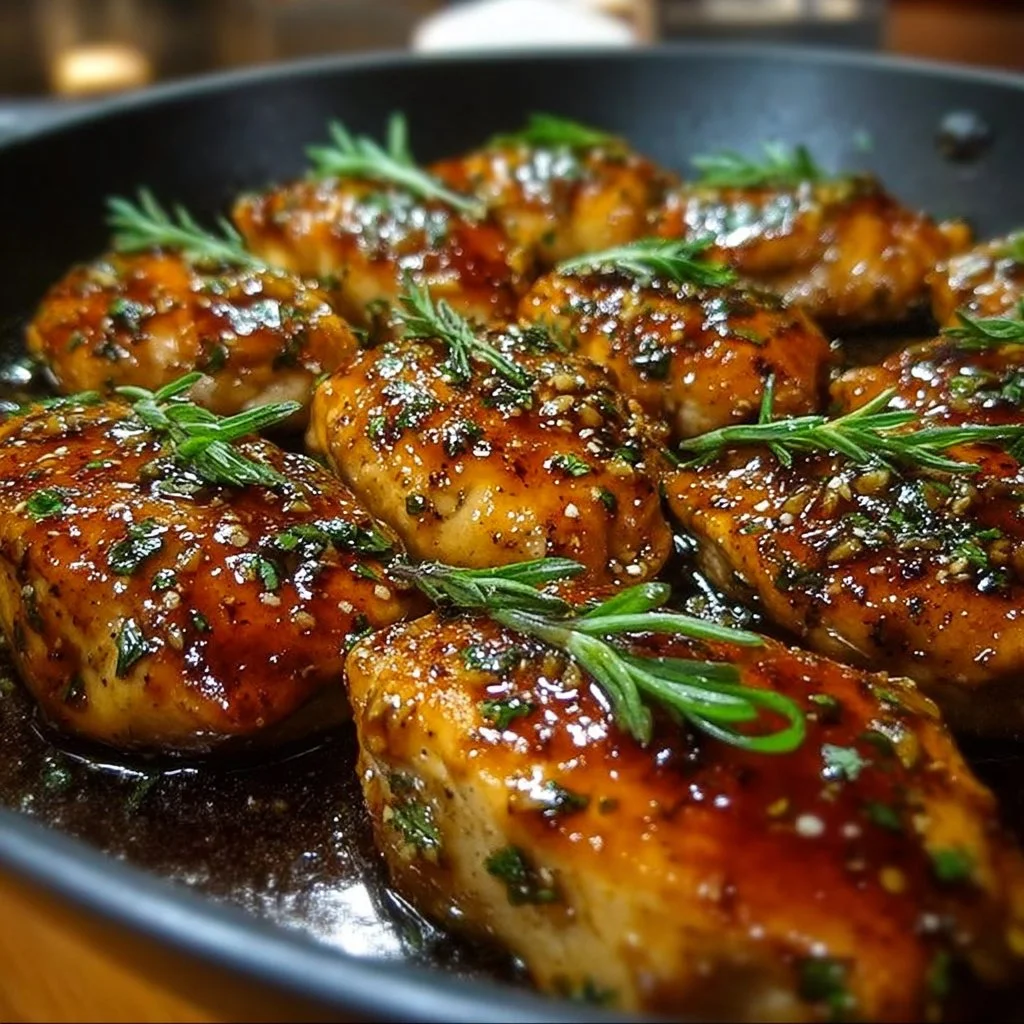
Place them carefully in the hot skillet and cook undisturbed for about 5–7 minutes on the first side.
Flip and cook the second side for another 5–7 minutes until the chicken is cooked through.
Internal temperature should read 165°F (74°C) at the thickest point.
Pro Tip: Don’t crowd the pan; if your skillet is small, cook in batches. You’ll know the chicken is ready to flip when it releases easily and has a deep golden crust.
Step 4: Add the honey-garlic sauce
Pour the reserved honey-garlic mixture over the chicken in the skillet.
Tilt the pan slightly and spoon the sauce over the breasts to coat them evenly.
Let the sauce simmer gently for a few minutes until it thickens slightly and becomes sticky.
Lower the heat if the glaze starts to burn at the edges.
Pro Tip: If the sauce isn’t thickening, stir it constantly for a minute or two; the natural sugars in the honey will reduce quickly. For a thicker glaze, lift the chicken and let the sauce reduce alone for an extra 1–2 minutes.
Step 5: Rest and serve
Remove the chicken from the pan and let it rest for 3–5 minutes.
This keeps the juices locked in and makes slicing cleaner.
Slice or serve whole, spooning extra sauce from the pan over the chicken.
Garnish with sliced green onions if you like and serve with rice or vegetables.
Pro Tip: Resting is non-negotiable for juicy chicken. If you slice immediately, the juices will run out and the breast can dry.
Expert Tips for Success
- Use room-temperature chicken when possible. Cold chicken can lower the pan temperature and cause steaming instead of searing.
- Pound or butterfly uneven breasts to a uniform thickness. This prevents overcooking thin ends while waiting for thick centers.
- Preheat your skillet thoroughly. A properly heated pan is the difference between a satin glaze and a burnt, bitter mess.
- Control the heat when you add the sauce. Honey will caramelize fast and then burn; keep the flame moderate and reduce if you see smoke.
- For a silkier glaze, off the heat add a tablespoon of butter and swirl it into the sauce for shine and a rounder mouthfeel.
- If you want an extra sticky finish, remove the chicken once it’s cooked, reduce the sauce on medium-high until syrupy, then return chicken to coat.
- Use a meat thermometer. Visual checks are fine, but temp ensures safety and avoids drying out the breast.
- For even faster cleanup, line the skillet with foil for oven finishing—transfer to a preheated 375°F oven if the breasts are thick and need an extra 5–8 minutes.
- Switch to low-sodium soy sauce if preparing for kids or anyone on a low-salt diet; then tweak sweetness to taste.
- If your kitchen lacks ventilation, open a window when reducing the sauce; honey can quickly fill the room with a sweet aroma that lingers.
Storage & Freezing
Fridge: Cool the chicken to near room temperature before storing.
Place in an airtight container with some of the reserved sauce to keep the meat moist.
Stored properly, it will keep for 3–4 days in the refrigerator.
Freezer: For longer storage, freeze cooked chicken breasts in a single layer on a baking sheet.
Once solid, transfer to a freezer bag with a spoonful of sauce to protect against freezer burn.
Label with the date; best quality is within 2–3 months.
Reheating: Thaw overnight in the fridge if frozen.
Reheat gently in a skillet over low heat with a splash of water or extra sauce to loosen the glaze.
Avoid microwaving on high; it can make the chicken rubbery. Microwave in short bursts at medium power and cover to retain moisture.
Tip for meal prep: Slice the chicken before storing to make quick lunches. Keep sauce in a separate small container and reheat them together for best texture.
Variations & Substitutions
Gluten-free: Swap soy sauce for tamari or a gluten-free soy sauce alternative. Keep the same quantities.
Spicy honey garlic: Add 1/4 to 1/2 teaspoon red pepper flakes or 1 teaspoon sriracha to the sauce for a balanced heat.
Citrus lift: Add a tablespoon of rice vinegar or a splash of lemon juice to the sauce for brightness and to cut through sweetness.
Different protein: Use boneless skinless chicken thighs for more forgiving cooking and a richer flavor. Adjust cooking time to 7–10 minutes per side depending on thickness.
Frequently Asked Questions
Q: Can I use frozen chicken breasts for this recipe?
A: Yes, but thaw completely first. Frozen or partially frozen breasts release water into the pan and will steam instead of sear, preventing caramelization. Thaw overnight in the fridge for best results.
Q: How do I prevent the honey from burning in the pan?
A: Keep heat at medium and watch closely when you add the sauce. Reduce the heat as soon as the sauce starts to bubble, and stir or spoon it over the chicken rather than letting it sit in hot spots.
Q: Can I make this in the oven or an air fryer?
A: Absolutely. For the oven, sear briefly on the stovetop then finish at 375°F for 8–12 minutes, brushing with sauce midway. For the air fryer, cook at 370°F for 8–12 minutes depending on thickness, brushing with sauce and returning to air-fry for 1–2 minutes for caramelization.
Q: How can I thicken the sauce if it stays too runny?
A: Reduce it over medium heat until syrupy. Alternatively, whisk a small slurry of cornstarch and water (1 tsp cornstarch + 1 tbsp water), stir into the simmering sauce, and cook 30–60 seconds until glossy.
Q: Is honey-garlic chicken healthy?
A: It can be part of a balanced meal. Using lean chicken breasts, controlling the amount of oil, and pairing with vegetables and whole grains creates a nutritious dinner. For lower sugar, reduce the honey slightly and increase umami with low-sodium soy or add citrus.
Final Thoughts
This honey garlic chicken is effortless, forgiving, and delicious enough for company yet easy enough for a weekday night.
If you try it, please leave a star rating in the recipe card below or pin the recipe to Pinterest so others can find it.
Conclusion
If you’d like a slightly different take or additional technique notes, I recommend checking this tested Honey Garlic Chicken Breast – RecipeTin Eats for another reliable method.
For a faster version designed for busy nights, see the quick approach at 15-Minute Honey Garlic Chicken – Family Food on the Table.

Honey Garlic Chicken
Ingredients
Main Ingredients
- 4 pieces chicken breasts Choose breasts that are similar in size for even cooking.
- 1/4 cup honey Use runny, mild-flavored honey for even coating.
- 1/4 cup soy sauce Use low-sodium soy sauce for a cleaner flavor.
- 2 cloves garlic, minced Fresh garlic is essential for aromatic flavor.
- 1 tablespoon olive oil
- to taste Salt and pepper For seasoning the chicken.
- to taste Green onions for garnish Optional garnish.
Instructions
Preparation
- In a small bowl, whisk together honey, soy sauce, and minced garlic until smooth. Set aside.
Cooking
- Heat a heavy skillet over medium heat and add olive oil.
- Pat chicken breasts dry and season with salt and pepper. Place in the hot skillet and cook for 5-7 minutes without disturbing.
- Flip the chicken and cook for another 5-7 minutes until cooked through, with an internal temperature reaching 165°F (74°C).
- Pour the reserved honey-garlic mixture over the chicken and let simmer until thickened slightly.
- Remove from heat, let the chicken rest for 3-5 minutes, then slice or serve whole.