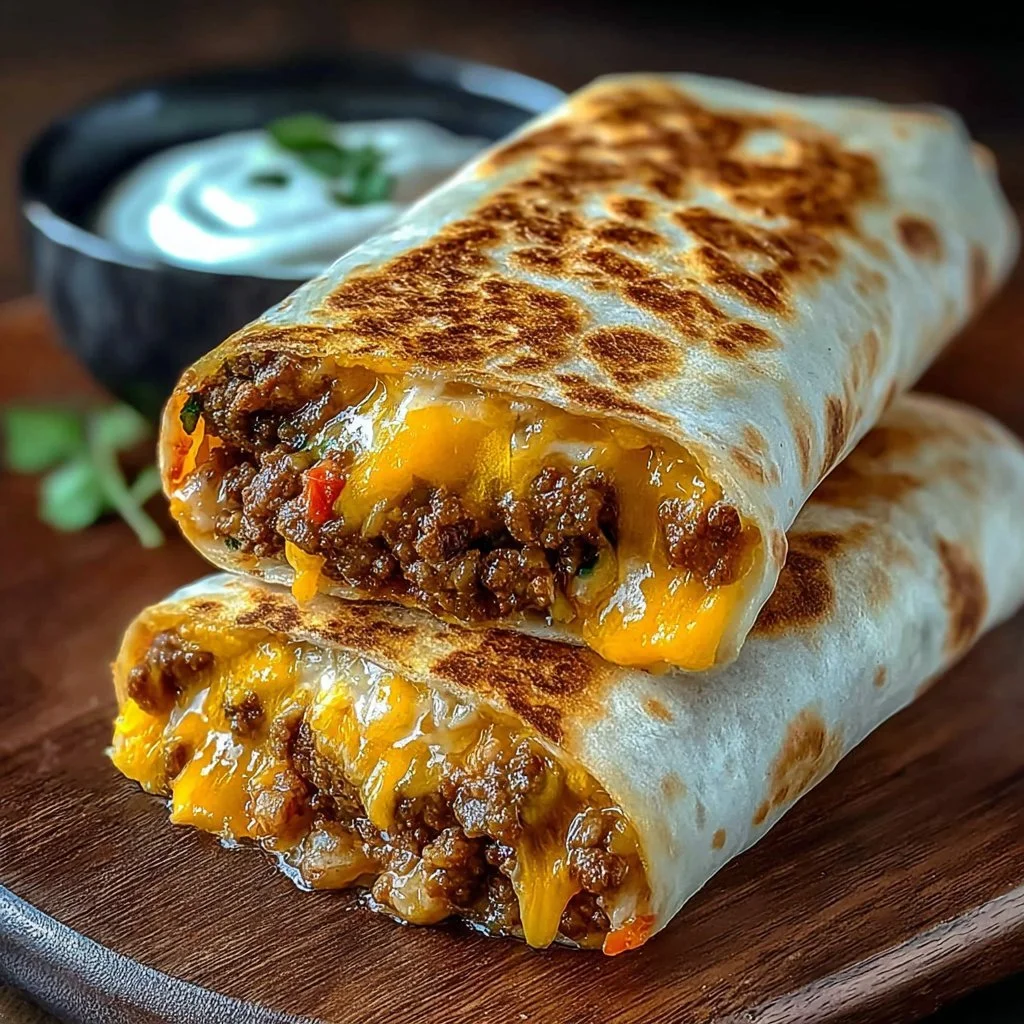
The first time I made this grilled cheese burrito, I was trying to combine two comfort-food obsessions into one handheld miracle.
It worked. The crunch of the toasted tortilla, the molten cheese, and a savory filling make this recipe a weeknight winner.
It’s fast, forgiving, and endlessly customizable — the kind of recipe you can riff on without breaking a sweat.
Why You’ll Love This Recipe
- Ready in under 20 minutes for a fast dinner or hearty snack.
- Uses pantry and fridge staples you probably already have.
- Melty cheese locked into a crispy tortilla — easy to eat on the go.
- Flexible: swap proteins or make it vegetarian without losing satisfaction.
The texture is the star: a toasty, slightly blistered tortilla gives way to a gooey cheese interior studded with seasoned meat or crisp vegetables. Each bite mixes crunchy, creamy, and savory notes — the butter on the pan builds a golden crust that contrasts the molten filling. Taste-wise it hits salty, tangy (if you add salsa), and richly cheesy — like a grilled cheese that went to a Mexican food party and never left.
"5 stars — My kids called it the best accidental invention. Quick, cheesy, and we’ll never buy fast food again." — Reader Emma R.
Key Ingredients
Cheddar cheese (2 cups shredded). Good melting cheese is everything here. Sharp cheddar gives bold flavor, but mixing half cheddar with a melter like Monterey Jack or mozzarella gives a silkier melt. I like Cabot or Tillamook for cheddar; shred it yourself for the best texture.
Large flour tortillas (4). Flour tortillas crisp beautifully and fold without cracking. Look for burrito-size (10–12 inch) tortillas labeled “for burritos” or “soft taco” — they roll tight and toast evenly. Brands like Mission or Guerrero are reliable, or use fresh tortillas from your local tortilleria for the best chew.
Cooked and seasoned protein (1 cup). Ground beef, shredded chicken, or spiced black beans add heft and flavor. Season with taco spices, adobo, or just salt and pepper. If using store-bought cooked meats, reheat and drain excess juices so the burrito doesn’t get soggy.
Butter (1 tablespoon for grilling). Butter gives that golden, nutty crust you can’t replicate with oil. Use real butter (not margarine) or a 50/50 mix of butter and a high-heat oil if you worry about burning. Plugrá or Kerrygold lends a nice flavor note.
Full ingredient list:
- 4 large flour tortillas
- 2 cups shredded cheddar cheese (or your favorite cheese)
- 1 cup cooked and seasoned ground beef, chicken, or beans (optional)
- 1 cup diced vegetables (like bell peppers, onions, or spinach)
- 1 tablespoon butter (for grilling)
- Salt and pepper, to taste
- Salsa or hot sauce (for serving, optional)
Step-by-Step Instructions
Step 1: Warm the skillet
Place a non-stick skillet over medium heat and let it warm up for a minute or two.
You want an even, medium heat so the tortilla crisps slowly without burning.
Pro Tip: You’ll know the skillet is ready when a drop of water skitters across the surface.
Step 2: Prepare the filling
In a bowl, mix the shredded cheese, cooked meat (if using), and diced vegetables.
Season the mixture lightly with salt and pepper; the cheese and any seasoned meat add plenty of salt on their own.
Pro Tip: Use room-temperature cheese so it melts faster. If your meat is cold from the fridge, warm it briefly to avoid a cold center.
Step 3: Assemble the burrito
Lay a tortilla flat on a clean surface and spoon some filling onto the center.
Don’t overstuff — leave a 1–2 inch border so you can fold the sides without filling spilling out.
Pro Tip: A line of cheese along the inner edge helps ‘glue’ the seam shut when grilled.
Step 4: Fold the burrito tightly
Fold the sides of the tortilla over the filling, then roll it up from the bottom, tucking the sides in as you go to create a tight burrito.
Tension in the roll keeps everything compact and prevents leaks during grilling.
Pro Tip: If a tortilla tears slightly, press it seam-side down in the skillet first to seal it with melted cheese.
Step 5: Butter the skillet
Add a tablespoon of butter to the heated skillet, allowing it to melt and coat the bottom in an even layer.
Swirl the pan so the butter foams slightly but doesn’t burn.
Pro Tip: Lower the heat a touch if the butter begins to brown too quickly.
Step 6: Grill seam-side down
Place the burrito seam-side down in the skillet. Cook for about 3–4 minutes until golden brown and crispy.
This initial seal sets the burrito and keeps the filling from spilling as you flip.
Pro Tip: Press gently with a spatula to encourage even contact and a blistered surface.
Step 7: Flip and finish grilling
Carefully flip the burrito using tongs and grill the other side for another 3–4 minutes until crispy and the cheese is melted.
If the tortilla is browning too fast, lower the heat and allow more time for the cheese to reach the perfect gooey stage.
Pro Tip: Tilt the pan and spoon a little butter over the top edge after flipping for an extra golden finish.
Step 8: Rest, then slice
Once cooked, transfer the burrito to a plate. Let it cool slightly for a minute or two before cutting it in half.
Resting prevents the molten cheese from escaping and makes the burrito easier to slice cleanly.
Pro Tip: Use a sharp chef’s knife and a steady single motion slice to avoid squashing the burrito.
Step 9: Serve warm
Serve warm with salsa or hot sauce on the side for dipping.
A squeeze of lime or a spoonful of pico de gallo brightens the whole thing.
Pro Tip: For a crunch contrast, serve with pickled jalapeños or a simple cabbage slaw.

Expert Tips for Success
-
Temperature control matters: medium heat is your friend. Too hot and the tortilla will burn before the cheese melts; too low and the tortilla won’t crisp. Aim for an even medium with a little patience.
-
Use two cheeses if you can: one for flavor (sharp cheddar) and one for melt (Monterey Jack or mozzarella). The flavor/melt combo makes the interior silky while keeping bold taste.
-
Prevent sogginess: drain wet fillings and pat vegetables dry. If using salsa or juicy tomatoes inside, sprinkle a little shredded cheese directly on the tortilla before the filling to create a moisture barrier.
-
Don’t skip the butter: it’s the shortcut to that golden, flavorful crust. If you’re avoiding dairy, use a neutral oil with a high smoke point and a small pat of vegan butter for flavor.
-
Press gently with a spatula when grilling. Light pressure encourages full-surface contact and a uniform crust without squashing the burrito.
-
Make-ahead tip: assemble burritos, wrap tightly in plastic, and store in the fridge for up to 24 hours. Grill straight from chilled, adding an extra minute per side to ensure the center heats through.
-
Equipment choice: a heavy skillet or cast iron gives the most even heat and best browning. Non-stick works well for sticking prevention, especially with delicate tortillas.
-
Troubleshooting: if cheese oozes out and burns in the pan, wipe the pan clean and continue at slightly lower heat. A little burned cheese is a quick pan fix.
-
Scaling for crowd feeding: keep cooked burritos warm on a baking sheet in a 250°F oven for up to 30 minutes while you finish the batch. This keeps them crisp without drying.
-
Leftover refresh: for a fresh finish on leftovers, re-grill in a skillet rather than microwaving — you’ll get the crisp exterior back and even melting inside.
Storage & Freezing
Fridge: Cool burritos to room temperature then wrap individually in plastic wrap or foil and store in an airtight container. They keep well for 3–4 days.
To reheat, place on a skillet over medium-low heat, turning occasionally until warm and crisp, or reheat in an oven at 350°F for 10–12 minutes.
Freezer: Wrap each burrito tightly in plastic wrap, then foil, and place in a freezer bag. Freeze for up to 2 months. Label with the date.
To reheat from frozen, unwrap and reheat in a 350°F oven for about 20–25 minutes, flipping midway, until the center is hot and cheese is melted. You can also microwave for 1–2 minutes then finish in a hot skillet for crispness.
Avoid microwave-only reheating for long storage items — that often yields a soggy, unevenly heated burrito.
Variations & Substitutions
Vegetarian: Swap the meat for seasoned black beans, refried beans, or a smoky chipotle lentil mix. Add roasted peppers and corn for texture.
Breakfast version: Fill with scrambled eggs, breakfast sausage, and cheese. Grill the same way for a morning handheld.
Low-carb swap: Use a large low-carb or high-fiber tortilla, or try a grilled cabbage leaf for a very low-carb option. Expect a different texture but similar flavor profile.
International twist: Add kimchi and a pinch of sesame oil for a Korean-inspired grilled cheese burrito. The acid from kimchi cuts through the richness beautifully.
Frequently Asked Questions
Q: Can I make these ahead and reheat later?
A: Yes. Assemble and wrap burritos, then chill up to 24 hours or freeze up to 2 months. Reheat in the oven or skillet for best texture. Avoid reheating only in the microwave unless you’re in a hurry.
Q: What’s the best cheese to use?
A: A mix is ideal. Sharp cheddar for flavor combined with Monterey Jack or mozzarella for meltability gives the best balance. Pre-shredded cheese has anti-caking agents that can slightly affect melt, so shred your cheese if possible.
Q: How do I keep the tortilla from tearing?
A: Use fresh, pliable tortillas and avoid overfilling. Warm tortillas briefly in the microwave (10 seconds) or in a dry skillet to make them more flexible before filling.
Q: Can I grill these in an air fryer or panini press?
A: Yes. An air fryer or panini press works well. Cook at 375°F in the air fryer for 6–8 minutes, flipping halfway. A press gives exceptional crispness; just keep an eye on the heat to prevent burning.
Q: Is it possible to make these gluten-free?
A: Absolutely. Use a gluten-free flour tortilla that’s large and flexible. Brands vary, so test one for pliability before filling — some are more prone to cracking.
Final Thoughts
This grilled cheese burrito is a simple, flexible recipe that feels indulgent but is quick enough for busy nights.
Try the variations, tweak the fillings, and make it your own — then come back and tell me which combo you loved.
Please leave a star rating in the recipe card below and pin this to Pinterest if you enjoyed it.
Conclusion
If you want inspiration or to compare techniques, check out this classic take on the concept at Grilled Cheese Burrito – House of Yumm.
For a fun copycat approach, read a detailed recreation at Grilled Cheese Burrito (Taco Bell Copycat) – Sailor Bailey.
If you’re collecting copycat versions and want variations, see Copycat Taco Bell Grilled Cheese Burritos – Life With The Crust Cut Off.
For another tested recipe with tips, try Grilled Cheese Burrito – Taco Bell Copycat | Moribyan.

Grilled Cheese Burrito
Ingredients
Main Ingredients
- 4 large large flour tortillas For best chew, use burrito-size tortillas.
- 2 cups shredded cheddar cheese Sharp cheddar for flavor; mix with Monterey Jack or mozzarella for better melt.
- 1 cup cooked and seasoned protein (ground beef, chicken, or spiced black beans) Drain excess juices to avoid sogginess.
- 1 cup diced vegetables (bell peppers, onions, or spinach) Pat vegetables dry to avoid sogginess.
- 1 tablespoon butter For grilling, real butter is preferred.
- Salt and pepper To taste.
- Salsa or hot sauce Optional, for serving.
Instructions
Preparation
- Warm a non-stick skillet over medium heat for about a minute.
- In a bowl, mix shredded cheese, cooked meat (if using), and diced vegetables. Season lightly with salt and pepper.
Assembly
- Lay a tortilla flat and spoon some filling onto the center, leaving a 1-2 inch border.
- Fold the sides over the filling and roll up tightly from the bottom to create a burrito.
Cooking
- Add butter to the heated skillet and let it melt.
- Grill the burrito seam-side down for about 3-4 minutes until golden brown.
- Carefully flip the burrito and grill the other side for another 3-4 minutes until crispy.
Serving
- Let the burrito rest briefly before cutting it in half.
- Serve warm with salsa or hot sauce on the side.