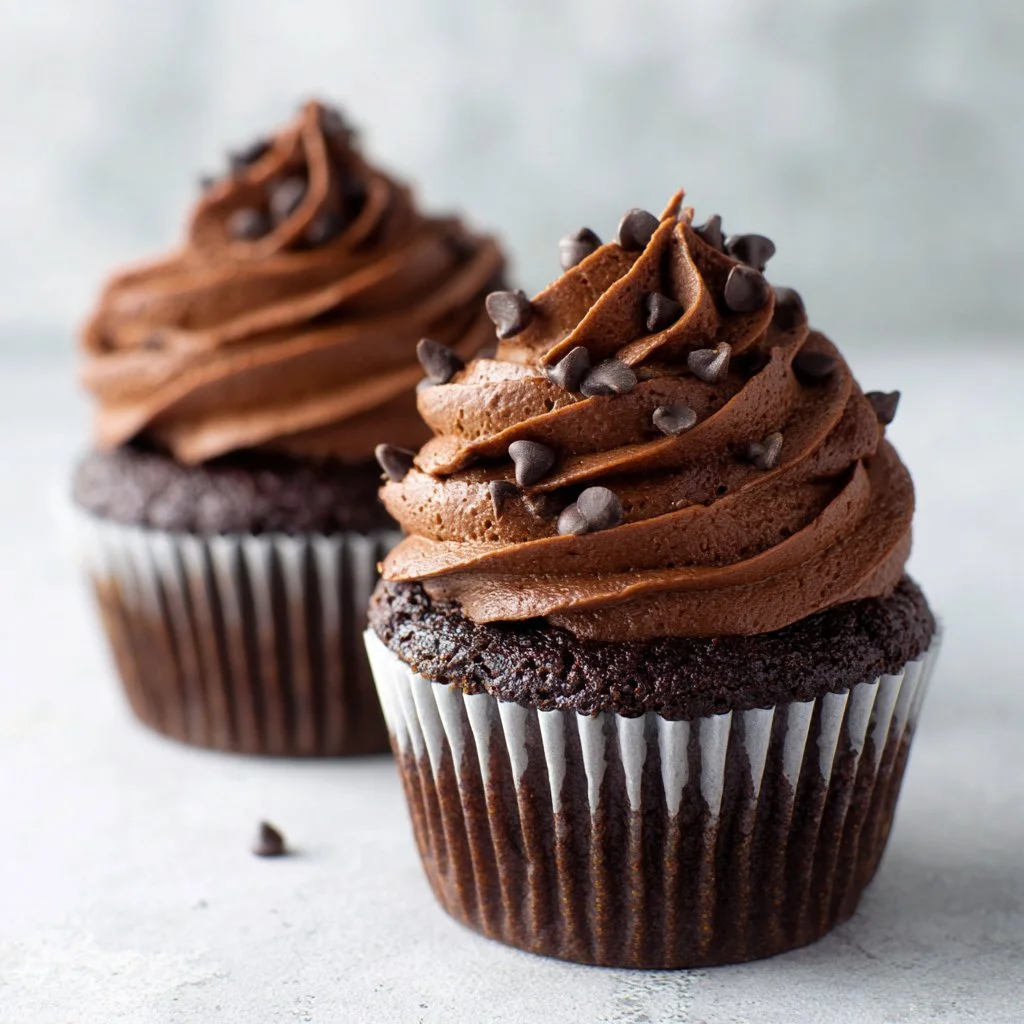
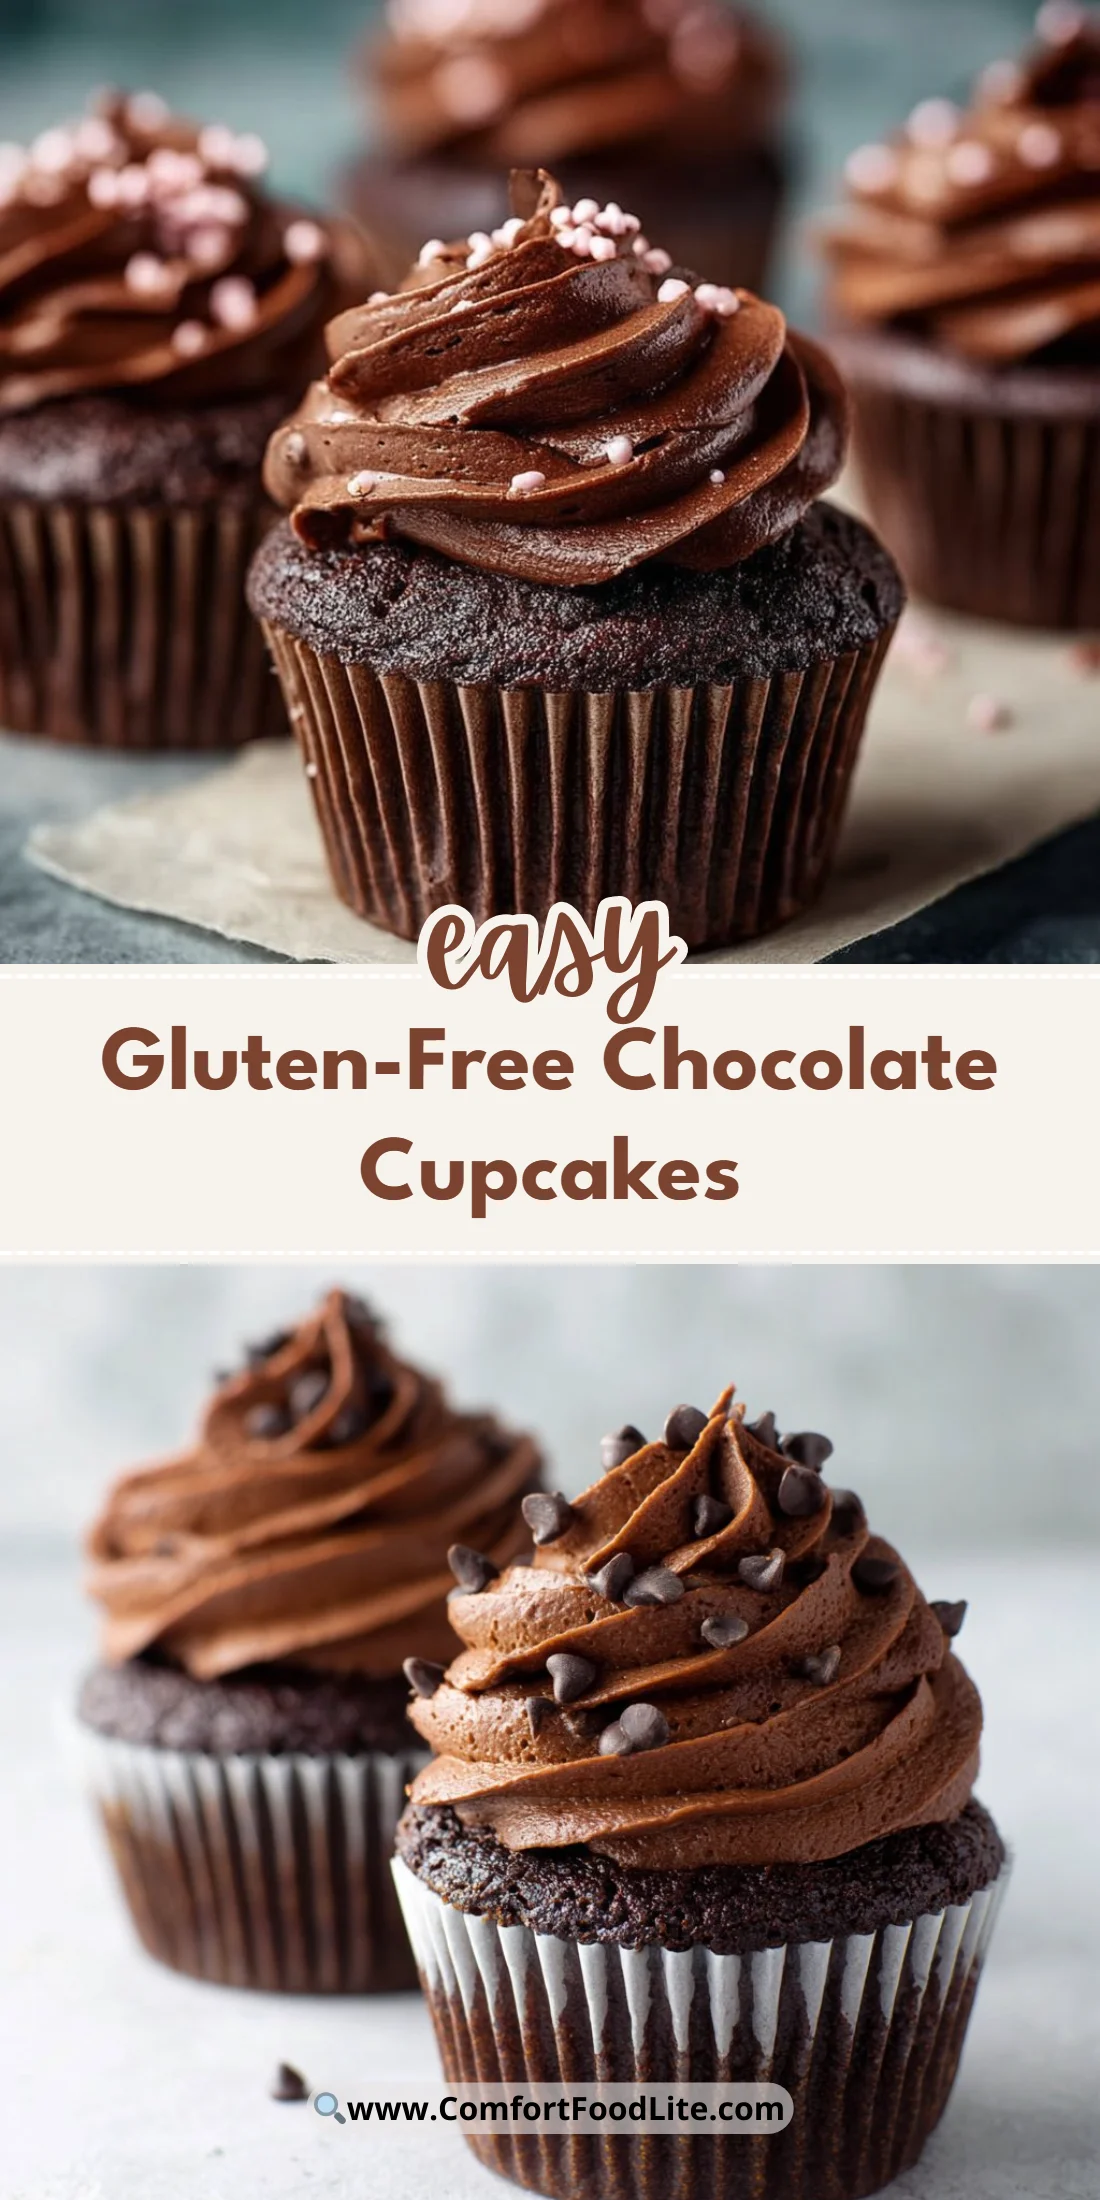
The first time I made these gluten-free chocolate cupcakes I expected crumbly disasters — instead I got tender, moist cupcakes that vanished in an afternoon.
They bake up with a deep chocolate flavor and a pillowy crumb that even non–gluten-free friends loved.
This recipe is simple, forgiving, and perfect for frosting experiments or last-minute celebrations.
If you like chocolate but need to avoid gluten, these cupcakes are a reliable go-to.
For a twist, I sometimes pair them with a raspberry buttercream — similar to the one I used on my chocolate raspberry cupcakes recipe for a party crowd. Try a berry pairing if you want something bright.
Why You’ll Love This Recipe
- Naturally moist without butter thanks to the oil and buttermilk.
- Deep, true chocolate flavor from real cocoa powder.
- Fast: one bowl for dry, one for wet — assembly in under 10 minutes.
- Foolproof rise even with gluten-free flour when you follow the steps.
- Versatile: fold in chips, add espresso, or top with any frosting.
The texture is soft and springy with a fine crumb that holds frosting well.
Because we use both baking powder and baking soda, the cupcakes get a confident lift and stay tender from the oil and buttermilk.
Cocoa keeps the crumb tight and moist while still delivering that classic chocolate intensity.
“These are the best gluten-free cupcakes I’ve tried — moist, chocolatey, and they never fall apart. My kids didn’t even notice they were GF!” — Sarah, reader
Key Ingredients
Gluten-free all-purpose flour: Use a blend labeled for 1:1 baking that contains xanthan gum if your blend doesn’t already include it. Bob’s Red Mill 1-to-1 or King Arthur Measure for Measure are dependable; they give structure and a familiar texture without graininess.
Cocoa powder: Use unsweetened Dutch-processed cocoa for a smoother, darker flavor, or natural cocoa for a brighter chocolate tang. I usually choose Dutch-process for cupcakes because it pairs beautifully with vanilla buttercream.
Buttermilk: Adds acid to react with baking soda for lift and creates an extremely moist crumb. If you don’t have buttermilk, make a quick substitute by adding 1 tablespoon lemon juice or vinegar to a cup of milk and letting it sit 5 minutes.
Vanilla extract: Small, quality vanilla goes a long way in chocolate bakes. Use pure vanilla extract rather than imitation — it elevates the overall flavor and rounds the bitterness of cocoa.
Full ingredient list:
- 1 cup gluten-free all-purpose flour
- 1/2 cup cocoa powder
- 1 cup sugar
- 1/2 teaspoon baking powder
- 1/2 teaspoon baking soda
- 1/4 teaspoon salt
- 1/2 cup vegetable oil
- 1 cup buttermilk
- 2 large eggs
- 1 teaspoon vanilla extract
- 1/2 cup chocolate chips (optional)
- Frosting of choice for topping
Step-by-Step Instructions
Step 1: Preheat and prep
Preheat your oven to 350°F (175°C).
Line a 12-cup cupcake tin with paper liners so the batter bakes evenly and releases easily.
Pro Tip: Place the oven rack in the middle position for even heat. You’ll know the oven is at the right temp when an oven thermometer reads steady 350°F.
Step 2: Whisk dry ingredients
In a large bowl, whisk together the gluten-free flour, cocoa powder, sugar, baking powder, baking soda, and salt.
Whisking now removes lumps and distributes the raising agents so every cupcake rises consistently.
Pro Tip: Sift the cocoa if it’s clumpy — a fine whisking is usually enough but sifting ensures a silky batter.
Step 3: Combine wet ingredients
In another bowl, mix the vegetable oil, buttermilk, eggs, and vanilla extract until blended and glossy.
This wet mix adds fat, acid, and structure that will keep the cupcakes tender.
Pro Tip: Beat the eggs lightly — you don’t need volume here, just a uniform mixture. If you want a slightly richer crumb, swap half the oil for melted butter.
Step 4: Bring wet and dry together
Combine the wet ingredients with the dry ingredients and mix until just combined.
If using chocolate chips, fold them in gently to avoid overmixing.
Pro Tip: Stop mixing when you see no streaks of flour. Overmixing will make the crumb gummy. A few small lumps are fine; they disappear during baking.
Step 5: Fill the liners
Fill each cupcake liner about two-thirds full with batter so they have room to rise without spilling.
A small ice cream scoop or two spoons keeps portions even.
Pro Tip: For uniform tops, tap the tin once on the counter to release large air bubbles.
Step 6: Bake until set
Bake for 18–20 minutes or until a toothpick inserted into the center comes out clean or with a few moist crumbs.
The tops will spring back lightly when pressed.
Pro Tip: Rotate the pan halfway through baking if your oven has hot spots. If tops are browning too fast, tent with foil for the last 5 minutes.
Step 7: Cool completely before frosting
Allow the cupcakes to cool in the pan for 5 minutes, then transfer to a wire rack to cool completely.
Frosting a warm cupcake will melt the frosting and make a messy presentation.
Pro Tip: If you’re in a hurry, chill the cupcakes briefly in the fridge for 10–15 minutes to set the crumb before piping frosting.
Step 8: Frost and serve
Top with your favorite frosting and enjoy.
Chocolate ganache, vanilla buttercream, or cream cheese frosting are all excellent matches.
Pro Tip: For clean piping, chill the frosted cupcakes for 10 minutes to set the swirl before storing.
Expert Tips for Success
- Measure your flour by spooning it into the measuring cup and leveling with a knife. Scooping can compact flour and lead to dense cupcakes.
- Use room-temperature eggs and buttermilk so they emulsify easily into the oil, creating a uniform batter. Cold ingredients can cause uneven texture.
- If your gluten-free blend lacks xanthan gum, add 1/4 teaspoon per cup to mimic gluten’s structure. This helps with rise and keeps the crumb from falling apart.
- Don’t skip the baking soda and buttermilk reaction; it’s crucial for lift. If your buttermilk is very thick, whisk it to loosen before mixing.
- For deeper chocolate flavor, add 1 teaspoon instant espresso powder to the dry mix — it enhances cocoa without making the cupcakes taste like coffee.
- When folding in chocolate chips, toss them with a teaspoon of flour to prevent sinking to the bottom during baking.
- To test doneness without a toothpick, gently press the top; it should spring back slightly. Overbaking dries these cupcakes quickly because they contain oil instead of butter.
- If your cupcakes seem dry after cooling, brush the tops with a thin simple syrup (equal parts sugar and water heated to dissolve) before frosting for added moisture.
- Invest in a good wire rack and a medium-sized offset spatula for frosting — small tools make smoother finishes and neater presentation.
- If you want a dairy-free version, substitute buttermilk with equal parts unsweetened almond milk plus 1 tablespoon vinegar and use a dairy-free frosting. For vegan swaps consult my quick chocolate rolls recipe for technique tips on egg substitutes and binding. See an egg-free approach
Storage & Freezing
Room temperature storage: Keep frosted cupcakes covered at room temperature for up to 24 hours. If your frosting contains dairy, refrigerate.
Unfrosted cupcakes store well in an airtight container at room temperature for 2 days.
Fridge storage: Place frosted cupcakes in a single layer in an airtight container and refrigerate for up to 4 days. Allow to come to room temperature for 20–30 minutes before serving to regain tender crumb.
Freezing unfrosted cupcakes: Cool completely, then freeze on a tray until solid. Transfer to a freezer-safe bag or container and freeze for up to 3 months. Thaw at room temperature and frost after fully thawed.
Freezing frosted cupcakes: You can freeze frosted cupcakes by placing them in a single layer on a tray and sliding into the freezer until frozen, then wrapping individually in plastic wrap and storing in a container. Thaw overnight in the fridge to avoid condensation on the frosting.
Reheating: For a quick warm cupcake, microwave an unfrosted cupcake for 10–12 seconds on medium power. For frosted cupcakes, let come to room temperature first, or remove frosting, warm briefly, and re-frost for best texture.
Variations & Substitutions
- Double chocolate: Fold in 1/2 cup chocolate chips and use a chocolate ganache frosting for an intense chocolate experience. For chips that hold shape, chill the batter briefly before scooping.
- Berry-filled: Add a spoonful of raspberry jam to the center before baking for a fruit surprise. This plays well with vanilla or cream cheese frosting and echoes the same berry pairing used in other chocolate-strawberry ideas. Try a strawberry pairing
- Dairy-free / vegan: Use a plant-based milk plus 1 tablespoon vinegar in place of buttermilk, replace eggs with a commercially available egg replacer or 1/4 cup applesauce per egg, and choose dairy-free chocolate chips and frosting. For a completely plant-based Halloween twist, consider flavors from the blackberry-filled vegan cupcake technique. Explore vegan flavor ideas
- Lighter crumb: Swap half the oil for unsweetened applesauce to reduce fat and add moisture. Note the texture will be slightly less rich but still tender.
Frequently Asked Questions
Q: Can I use a different gluten-free flour blend?
A: Yes. Use a 1:1 gluten-free all-purpose blend labeled for baking that includes a binder like xanthan gum. Blends heavy on rice flour can be gritty; instead choose blends with tapioca, potato starch, or sorghum for a finer crumb.
Q: Why did my gluten-free cupcakes sink in the middle?
A: Common causes are underbaking, too much leavening, or overmixing. Check that your measurements are accurate, your oven temperature is correct with an oven thermometer, and that you stop mixing as soon as the dry streaks disappear.
Q: Can I make the batter ahead of time?
A: You can mix dry components and wet components separately a day ahead and combine them just before baking. Fully mixed batter is best baked immediately; resting it too long can affect rise and texture.
Q: How do I prevent the cupcakes from sticking to liners?
A: Use high-quality, nonstick cupcake liners or spray the liners lightly with baking spray if they’re inexpensive paper. Allow cupcakes to cool fully before removing; too-early removal increases tearing.
Q: Are these cupcakes suitable for nut-free diets?
A: The base recipe contains no nuts, but always check the labels on your gluten-free flour blend and chocolate chips, as many facilities process nuts. For safe nut-free baking, choose certified nut-free brands and read labels.
Final Thoughts
These gluten-free chocolate cupcakes are a reliable, chocolate-forward treat that’s simple enough for weeknights yet lovely enough for company.
If you try them, please leave a star rating in the recipe card below and pin this recipe to your favorite baking board.
Conclusion
If you want another tested take on similar cupcakes, check this version for an alternate method and tips at Easy Gluten-Free Chocolate Cupcakes.
For a richly photographed, straightforward recipe comparison, see Gluten Free Chocolate Cupcakes | The Perfect Easy Recipe.
And for a glossy frosting-forward approach, I also recommend this longform recipe roundup at BEST Gluten Free Chocolate Cupcakes – Eat With Clarity.

Gluten-Free Chocolate Cupcakes
Ingredients
Dry Ingredients
- 1 cup gluten-free all-purpose flour Use a blend labeled for 1:1 baking that contains xanthan gum.
- 1/2 cup cocoa powder Use unsweetened Dutch-processed for a smoother flavor.
- 1 cup sugar
- 1/2 teaspoon baking powder
- 1/2 teaspoon baking soda
- 1/4 teaspoon salt
Wet Ingredients
- 1/2 cup vegetable oil
- 1 cup buttermilk Make a quick substitute if needed.
- 2 large eggs Use room temperature for best results.
- 1 teaspoon vanilla extract Use pure vanilla for the best flavor.
Optional Ingredients
- 1/2 cup chocolate chips Optional, fold in gently.
- frosting Frosting of choice for topping Consider chocolate ganache or vanilla buttercream.
Instructions
Preparation
- Preheat your oven to 350°F (175°C) and line a 12-cup cupcake tin with paper liners.
Mixing Dry Ingredients
- In a large bowl, whisk together the gluten-free flour, cocoa powder, sugar, baking powder, baking soda, and salt.
Mixing Wet Ingredients
- In another bowl, mix the vegetable oil, buttermilk, eggs, and vanilla extract until blended.
Combining Mixtures
- Combine the wet ingredients with the dry ingredients and mix until just combined. Fold in chocolate chips if using.
Filling the Liners
- Fill each cupcake liner about two-thirds full with batter.
Baking
- Bake for 18–20 minutes or until a toothpick inserted into the center comes out clean.
Cooling
- Allow the cupcakes to cool in the pan for 5 minutes, then transfer to a wire rack to cool completely.
Frosting and Serving
- Top with your favorite frosting and enjoy.