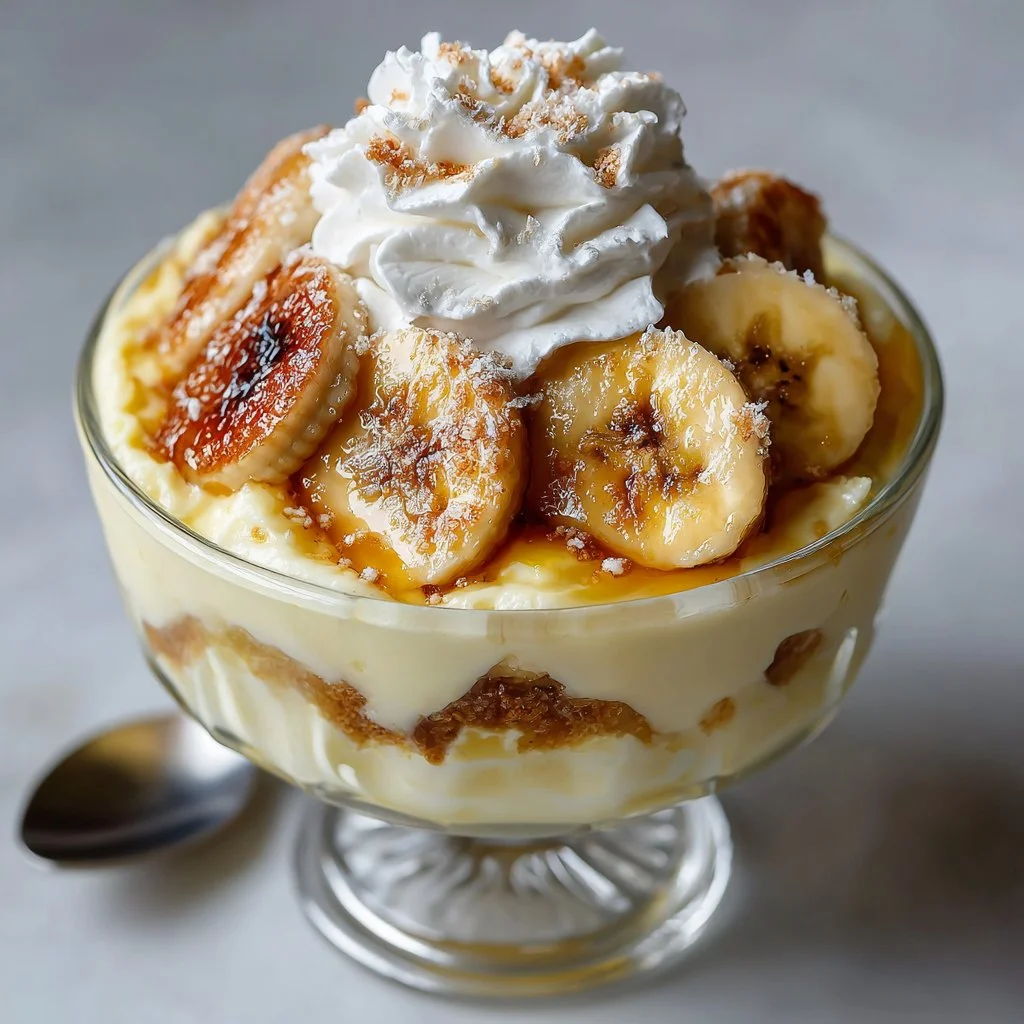
I’ve been making this Magnolia-style banana pudding for years and finally adapted it to be fully gluten-free without sacrificing that creamy, nostalgic flavor. It layers sweetened condensed milk–based pudding with lightly whipped cream, slices of barely ripe banana, and gluten-free vanilla wafers (I use Kinnikinnick). It’s the kind of dessert that disappears fast at potlucks, birthday dinners, and lazy weekend brunches.
Why you’ll love this dish
This gluten-free banana pudding hits comfort-food territory while being easy to pull together. It’s creamy but light, fridge-chilled (so no oven time), and kid-approved. Because the pudding is made from instant mix plus sweetened condensed milk, the texture is silky and stable—perfect for making a day ahead for parties.
“Exactly like the bakery version—just gluten-free. Crowd favorite every time.”
Reasons to make it:
- Fast assembly: no baking, mostly mixing and layering.
- Crowd-pleaser: familiar bakery flavor in a GF format.
- Make-ahead friendly: flavors meld overnight.
- Adaptable: swap wafers, add chocolate, or turn into parfaits.
If you love banana desserts, you might also enjoy a quick batch of banana bread cookies to use up ripe bananas in a different way — they’re a fun companion treat to serve alongside this pudding. banana bread cookies
The cooking process explained
Before you grab bowls, here’s the simple flow so you know what’s coming: chill equipment, whisk pudding with sweetened condensed milk and cold water, whip heavy cream to soft-stiff peaks, slice bananas just before assembling, then layer wafers, banana, pudding, and whipped cream. Chill to let wafers soften slightly and flavors meld. Total active time is about 20–30 minutes; chilling 2–4 hours is ideal.
I often make the pudding and whipped cream the night before, then assemble the morning of a gathering for a clean finish.
Gather these items
- 1 (14 oz) can sweetened condensed milk
- 1 ½ cups ice-cold water
- 1 (3.4 oz) box vanilla instant pudding mix (gluten-free if labeled)
- 3 cups heavy cream (cold)
- 4 cups sliced barely ripe bananas (about 3–4 medium bananas)
- 2 (6.3 oz) boxes gluten-free vanilla wafers (I use Kinnikinnick)
Substitution notes inline:
- Heavy cream: you can use half-and-half, but the whipped cream won’t hold as firmly. Stabilize with 1 tablespoon powdered sugar if needed.
- Instant pudding: use a gluten-free brand and check ingredients for cross-contact warnings.
- Wafers: other GF vanilla cookies work; shortbread-style cookies create a denser layer. If you prefer nutty contrast, try crushed gluten-free graham crackers.
If you like banana-centric recipes, try a loaf version with banana and zucchini for another way to enjoy ripe bananas: banana-zucchini bread
Directions to follow
MAKE THE PUDDING
- Chill a medium mixing bowl and the beaters for 10 minutes for best whipping results.
- In a bowl, pour the sweetened condensed milk. Add the 1 ½ cups ice-cold water and whisk until smooth.
- Add the entire box of vanilla instant pudding mix. Whisk vigorously for about 2 minutes until the mixture thickens. Set aside for 5 minutes to fully hydrate.
MAKE THE WHIPPED CREAM
- In the chilled bowl, pour 3 cups cold heavy cream. Start whipping on medium speed.
- Once soft peaks form, increase speed and whip to medium–firm peaks. Do not overbeat to dryness.
- Gently fold about 1/3 of the whipped cream into the pudding to lighten it. Fold in the remaining cream to create a uniform, mousse-like filling.
ASSEMBLE THE BANANA PUDDING
- Slice bananas just before assembling to prevent browning. Arrange a single layer of gluten-free vanilla wafers on the bottom of a 9×13 dish (or individual jars).
- Add a layer of banana slices over the wafers. Spoon about one-third of the pudding mixture over the bananas and spread evenly.
- Repeat: wafers, bananas, pudding. Finish with a top layer of pudding and a generous spread of whipped cream. Reserve a few whole wafers or cookie crumbs for garnish.
- Cover tightly and chill at least 2 hours, preferably 4–8 hours, so the wafers soften and flavors meld. For best slices, chill overnight.
- Serve cold. Leftovers will continue to soften; if you prefer firmer wafer texture, assemble just a few hours before serving.
Best ways to enjoy it
- Serve in a shallow glass dish for classic scoop-and-spoon portions, or layer in clear parfait glasses for single-serve presentation.
- Garnish with crushed vanilla wafers, thin banana coins, or a sprinkle of cinnamon for contrast.
- Pair with a strong coffee, a light dessert wine, or a glass of cold milk for a nostalgic combo.
If you want a playful twist, serve mini portions on a dessert bar with extra wafers and fresh berries so guests can customize.
How to store & freeze
Storage:
- Refrigerate covered for up to 3–4 days. The bananas will brown slightly but the flavor stays great.
- For best texture, eat within 48 hours if you prefer distinct layers.
Freezing:
- I don’t recommend freezing once assembled; bananas turn mushy and the texture degrades. If you must freeze, layer pudding (without bananas) in freezer-safe containers. Thaw overnight and add fresh banana slices before serving.
Food safety:
- Keep refrigerated at or below 40°F (4°C). Discard after 4 days. If serving outdoors, return to refrigeration within 2 hours (1 hour if above 90°F / 32°C).
Helpful cooking tips
- Use barely ripe bananas (yellow with a few brown speckles) for sweetness and body without mush. Overripe bananas will break down and make layers soggy.
- Whip the cream just to medium–stiff peaks. Overwhipped cream becomes grainy and can separate when folded.
- Work quickly when slicing bananas—brush lightly with a squeeze of lemon juice only if you want to delay browning (this can add a faint tang).
- For cleaner slices, chill the assembled pudding well and use a hot knife (dip in warm water and wipe dry between cuts).
- To save prep time, make pudding and whipped cream the day before and assemble a few hours before serving.
For a different snack or side to bring to the same gathering, consider a crisp gluten-free option like this air fryer zucchini recipe that’s great for nibbling while the pudding chills: air fryer zucchini
Recipe variations
- Chocolate banana pudding: Add a layer of chocolate pudding or fold 1/2 cup cocoa into the pudding for a chocolate-banana twist.
- Boozy adult version: Brush wafers lightly with a rum or bourbon syrup before layering for a grown-up edge.
- Coconut twist: Use coconut-flavored GF cookies and sprinkle toasted coconut flakes on top.
- Dairy-free: Use coconut cream for the whipped topping and a dairy-free instant pudding labeled gluten-free (results will be different in texture).
- Parfait jars: Assemble in small jars for grab-and-go portions—great for picnics or potlucks.
If you enjoy banana-forward desserts, you might also like a super-moist chocolate chip banana bread variation: chocolate chip banana bread
Common questions
Q: How long does this take to make?
A: Active time is about 20–30 minutes. Chilling for at least 2–4 hours (or overnight) is recommended for best texture.
Q: Can I substitute mascarpone or cream cheese for some of the whipped cream?
A: Yes—fold in 4–6 ounces of room-temperature mascarpone or cream cheese whipped smooth to the pudding for a richer, tangier version. Soften it well to avoid lumps.
Q: Are the vanilla wafers necessary? What can I use instead?
A: Wafers provide the classic textural contrast. If you don’t have GF wafers, use gluten-free shortbread cookies, crushed graham crackers, or even thin butter cookies. Toasted nuts or granola add crunch but will change the flavor profile.
Q: Can I make this ahead?
A: Absolutely. Make pudding and whipped cream ahead, then assemble and chill. For freshest banana appearance, slice bananas and layer just before serving or use lemon-spritzed slices.
Q: Is this recipe safe for people with gluten sensitivity?
A: Yes when you use certified gluten-free instant pudding and gluten-free wafers. Always check labels for cross-contamination warnings.
Q: How do I keep bananas from turning brown?
A: Slice them just before assembly. A light brush of lemon juice helps but can add brightness to the flavor.
Conclusion
This gluten-free take on Magnolia-style banana pudding keeps everything you love—silky pudding, airy whipped cream, tender banana slices, and a cookie bite—while making it accessible for those avoiding gluten. For a tested GF version and extra tips, see the Meaningful Eats adaptation for a similar approach. Gluten-Free Banana Pudding (Meaningful Eats) If you’d like a gluten-free copycat guide tied to Magnolia’s style, there’s a helpful write-up that walks through swaps and layering techniques. Magnolia Bakery Gluten Free Banana Pudding overview And for reference to the original bakery inspiration, check out Magnolia Bakery’s banana pudding offerings. Banana Pudding – Magnolia Bakery