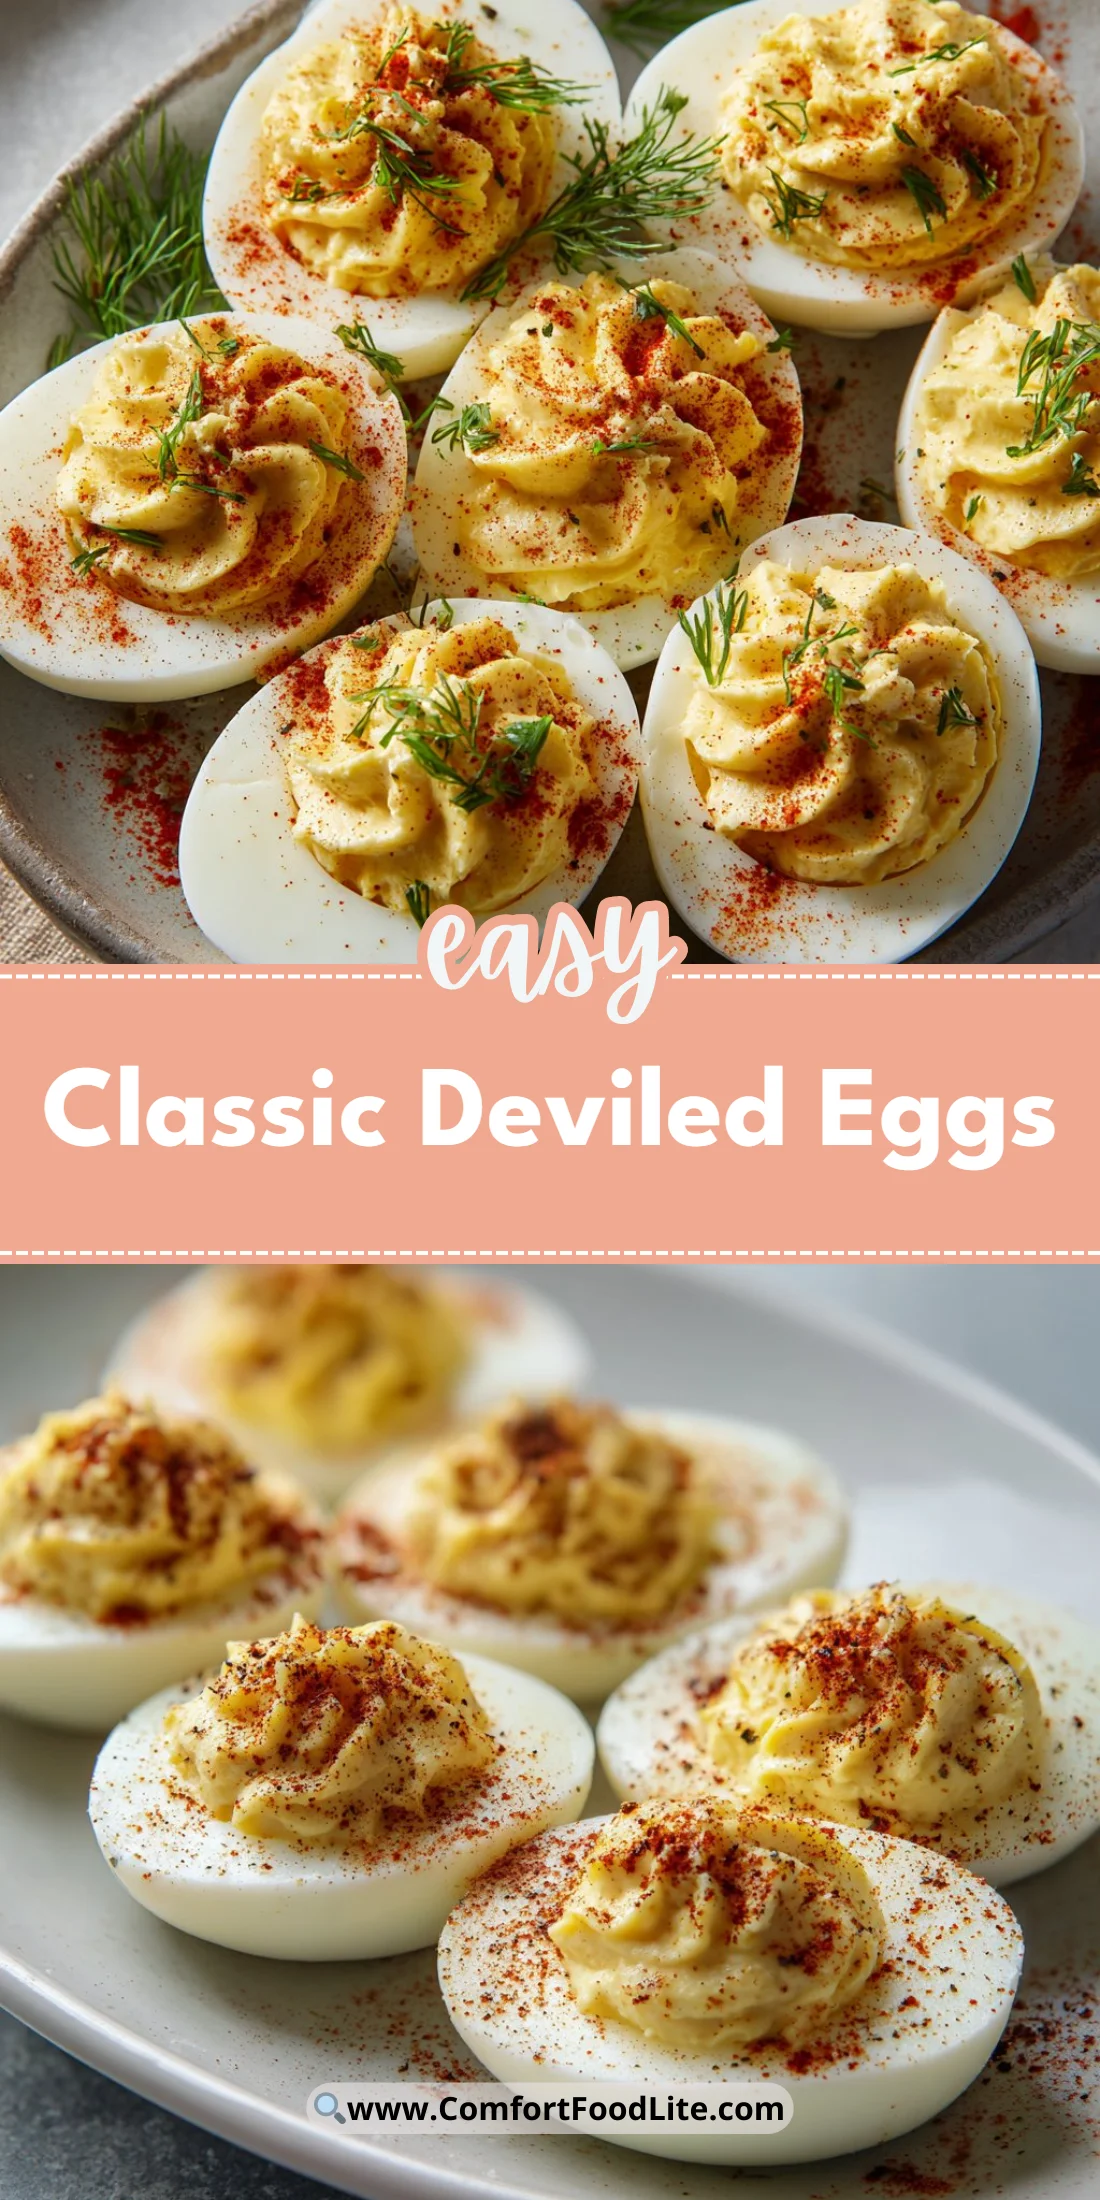
Start here with a bright hook: these Classic Deviled Eggs are the kind of small-bite comfort that disappears fast at brunches, picnics, and holiday tables.
They’re fast to make with pantry basics and scale easily for a crowd.
Perfect for meal prep or last-minute company, they feel fancy without fuss.
Try a twist or keep them classic; either way, they’ll vanish first. If you love smoky add-ins, check this bacon version for inspiration.
Why You’ll Love This Classic Deviled Eggs
- Timeless appetizer everyone recognizes and enjoys.
- Simple pantry ingredients with big flavor payoff.
- Creamy, silky yolk filling contrasted with firm whites.
- Ready in about 30 minutes, perfect for last-minute hosting.
- Easily customizable to suit spice or richness preferences.
- Kid-friendly while still sophisticated enough for adults.
The taste is a bright balance of creamy mayo, tangy mustard and vinegar, and a whisper of black pepper, with paprika adding color and a faint smoky note. Texture is crucial: the filling should be velvety and pipeable while the egg whites remain silky and hold shape.
"Five stars — These Classic Deviled Eggs were the hit of our family brunch. Simple to make and absolutely perfect." — Emily R., reader
Key Ingredients for Classic Deviled Eggs
Eggs: Fresh-but-not-too-fresh large eggs give the best texture. Very fresh eggs are harder to peel; eggs about a week old peel more cleanly. If you substitute with smaller eggs, reduce cooking time slightly to avoid overcooking.
Mayonnaise: This controls creaminess and mouthfeel. Use a good-quality full-fat mayo for a silky, rich filling; low-fat versions can taste thin and may need more mustard or a touch of Greek yogurt to compensate. For a tangier profile, swap part of the mayo for sour cream, but expect a looser texture.
Dijon Mustard: Dijon adds subtle heat and complexity that plain yellow mustard can’t match. If you only have yellow mustard, increase the vinegar slightly to brighten the flavor and reduce the quantity to avoid overpowering the yolks. Whole-grain mustard will add texture and a nutty pop.
Apple Cider Vinegar: A small acid boost keeps the filling lively and cuts richness. White wine vinegar works as a substitute; balsamic is too strong and will change the color and flavor. Omit the vinegar and the result will feel flat and cloying.
Full Ingredient List for Classic Deviled Eggs
- 6 large eggs
- 3 tablespoons mayonnaise
- 1 teaspoon Dijon mustard
- 1 teaspoon apple cider vinegar
- Salt to taste
- Black pepper to taste
- Paprika for garnish
Step-by-Step Instructions for Classic Deviled Eggs
Step 1: Place eggs in a saucepan and cover with cold water in a single layer
Start with cold water that covers the eggs by about an inch so they heat evenly and are less likely to crack. Use a saucepan large enough so eggs aren’t stacked; a single layer ensures uniform cooking.
Pro Tip: Visual cue — the eggs should sit snugly and be just submerged under cold water.
Step 2: Bring water to a gentle boil over medium heat
Gradually increase heat to avoid violent boiling which can crack shells. Once you see a steady simmer or gentle boil, start timing to control doneness.
Pro Tip: Visual cue — small bubbles should rise steadily, not a rolling rapid boil.
Step 3: Boil the eggs for about 10 minutes
Ten minutes produces fully set yolks that are not chalky if your stovetop runs true to temperature. Adjust by a minute less for slightly creamier yolks if you prefer them softer.
Pro Tip: Visual cue — steam around the lid and firm but not collapsing whites when gently jostled.
Step 4: Transfer eggs to ice water to cool completely
Shocking eggs in ice water stops cooking instantly and helps separate the membrane for easier peeling. Cool at least 5–10 minutes.
Pro Tip: Visual cue — eggs should feel completely cold to the touch when ready to peel.
Step 5: Peel and slice eggs in half lengthwise
Gently crack and roll each egg to loosen the shell, then peel under running water if needed. Slice cleanly down the center for uniform halves.
Pro Tip: Visual cue — the cut should reveal a smooth white surface and a centered yolk.
Step 6: Remove yolks and place them in a mixing bowl
Scoop yolks into a bowl, set whites on a platter, and gather your mise en place for mixing the filling. Keep whites chilled until ready to fill.
Pro Tip: Visual cue — yolks should separate cleanly, leaving intact egg white halves.
Step 7: Mash yolks until crumbly
Use a fork or potato ricer to break yolks down to fine crumbs before adding wet ingredients. A smoother base yields silkier filling.
Pro Tip: Visual cue — no large chunks remain; texture resembles fine breadcrumbs.
Step 8: Add mayonnaise, Dijon mustard, apple cider vinegar, salt, and black pepper
Add the mayo and mustard first, then a splash of vinegar and salt/pepper. Start with the listed amounts and taste, adjusting seasoning gradually.
Pro Tip: Visual cue — the mixture will begin to look glossy and slightly loose as you incorporate mayo.
Step 9: Mix until the filling is smooth and creamy
Stir vigorously or whip with a small hand mixer for a truly silky texture. If too thick, add a teaspoon of water or extra vinegar; if too thin, add a touch more mashed yolk or a little extra mayo.
Pro Tip: Visual cue — filling should mound smoothly and hold a soft peak, not runny.
Step 10: Spoon or pipe the filling into the egg white halves
Use a spoon for rustic dollops or a piping bag with a star tip for classic presentation. Fill each white generously but avoid overstuffing so pieces sit flat on a platter.
Pro Tip: Visual cue — a filled egg should have a neat, slightly domed top about level with the white rim.
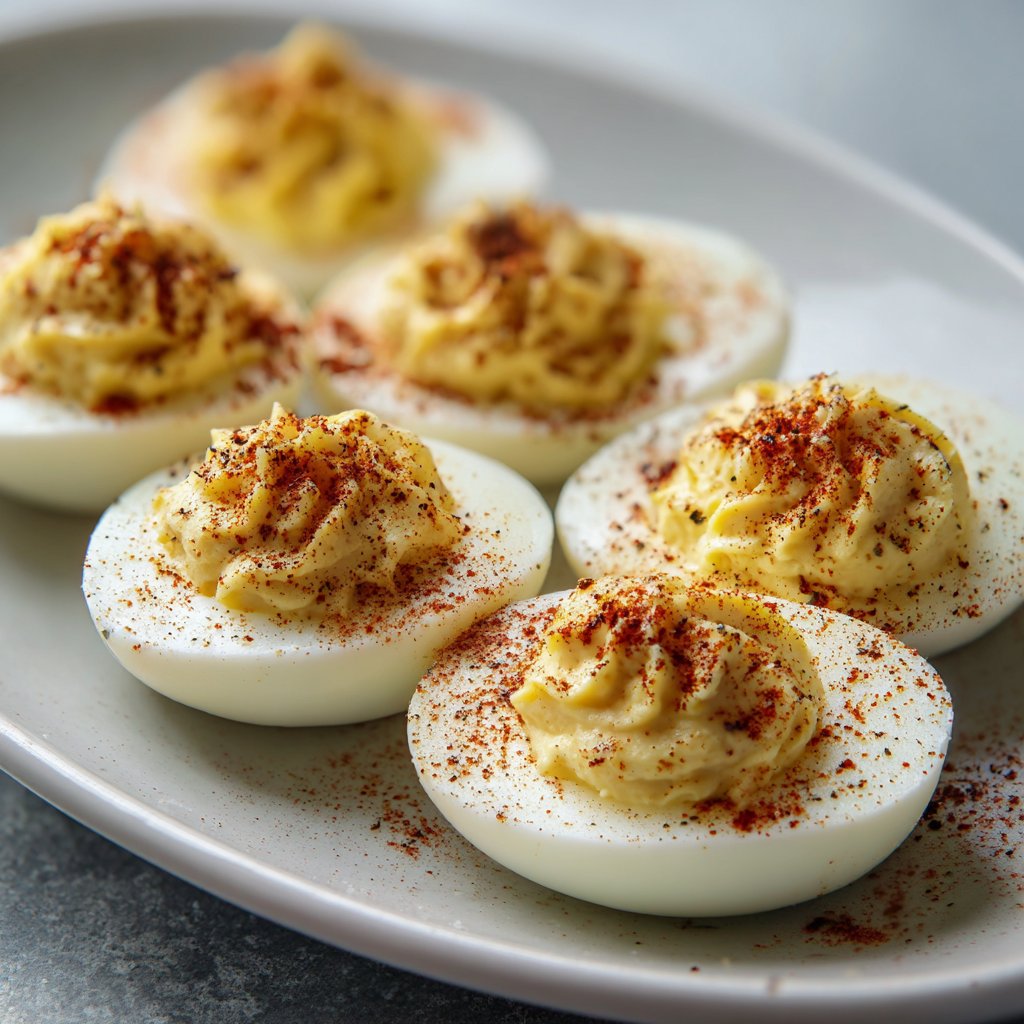
Step 11: Sprinkle paprika on top before serving
A light dusting of paprika adds color and a hint of smoky sweetness. Serve chilled or at cool room temperature for best texture and flavor.
Pro Tip: Visual cue — the eggs should look vibrant with an even red dusting centered on each mound.
Pro Tip: If you want an alternate presentation, try slicing the yolk mix into a piping bag for neat swirls. See a creative baked egg technique for plating ideas.
Expert Tips for Classic Deviled Eggs
- Temp tip: Start eggs from cold water and shock in an ice bath to prevent gray yolks and overcooking.
- Texture troubleshooting: If the filling is grainy, beat longer or pass through a fine sieve to refine it.
- Equipment tips: Use a ricer or fine mesh sieve for ultra-smooth yolks and a piping bag for consistent presentation.
- Salt timing: Season the filling after combining all ingredients to avoid oversalting.
- Common mistakes: Overcooking yields chalky yolks; undercooking yields runny centers—test one egg first.
- Make-ahead tip: Assemble up to a day in advance and keep chilled to let flavors meld without losing texture.
- Visual cue tip: If your filling is too stiff to pipe, add 1 teaspoon of water or vinegar and re-test.
- Serving tip: Use smoked paprika for a deeper flavor or sweet paprika for color without heat. See how small technique tweaks elevate simple recipes.
Storage & Freezing for Classic Deviled Eggs
Refrigerator storage: Keep assembled deviled eggs in an airtight container or covered platter in the fridge for up to 2 days. Place a damp paper towel over the whites before sealing to prevent drying.
Freezer storage: Fully assembled deviled eggs do not freeze well; texture becomes watery and grainy. If you must freeze, freeze only the cooked, unfilled whites and separately freeze a stabilized yolk filling with 1–2% extra mayo — but expect texture changes.
Thawing: Thaw frozen components in the fridge overnight. Recombine and gently whisk the filling if separation occurs.
Reheating: Serve cold or at cool room temperature; do not microwave assembled deviled eggs. If you reheat unfilled whites or filling components, warm gently to avoid cooking the yolk further.
Best containers: Use shallow airtight containers to keep eggs from being squashed and to maintain even chilling.
Variations & Substitutions for Classic Deviled Eggs
Smoky Bacon Deviled Eggs: Fold crispy crumbled bacon and a pinch of smoked paprika into the filling for a savory, smoky bite. The bacon adds crunch and a salty counterpoint to the creamy yolk.
Herbed Lemon Deviled Eggs: Replace the vinegar with fresh lemon juice and stir in finely chopped chives, dill, or parsley. The result is fresher, brighter, and pairs well with spring menus. For bold pairings, try with a spicy chili side.
Curried Deviled Eggs: Add 1/2 teaspoon curry powder and a tiny pinch of sugar to the filling for warm, aromatic complexity. This variation tastes excellent with toasted cumin seeds sprinkled on top.
Spicy Sriracha Deviled Eggs: Mix a teaspoon of Sriracha or hot sauce into the yolk filling and garnish with scallions. Expect a lively heat that pairs with the richness of the mayo.
Frequently Asked Questions About Classic Deviled Eggs
Q: How do I get perfectly smooth deviled egg filling every time?
A: Start by mashing yolks very fine or press them through a sieve. Whisk in mayo gradually and use a small handheld mixer or whisk to emulsify. If the filling starts grainy, add a teaspoon of liquid (water or vinegar) and beat until glossy.
Q: Why are my egg yolks chalky or greenish?
A: Overcooking causes a sulfur reaction that darkens yolks and creates a chalky texture. Use an ice bath immediately after boiling and reduce boil time if your stove runs hot.
Q: Can I make deviled eggs ahead and store them in the fridge?
A: Yes — assemble up to 24-48 hours ahead and keep chilled. For best appearance, sprinkle paprika just before serving to avoid moisture darkening the color.
Q: What’s the best way to peel hard-boiled eggs cleanly?
A: Use eggs that are about a week old and cool them in an ice bath after cooking. Crack and roll the shell, then peel under running water to help separate membrane from white.
Q: Are deviled eggs safe to leave out at a party?
A: Keep deviled eggs out for no more than 2 hours at room temperature. On hot days (above 90°F / 32°C), limit to 1 hour to prevent bacterial growth.
Final Thoughts on Classic Deviled Eggs
These Classic Deviled Eggs balance simplicity with elegance and reward a few technique-minded details. Leave a star rating in the recipe card below and pin this recipe to your brunch board for later.
Conclusion: Classic Deviled Eggs
For another classic take and helpful visuals, consult the Classic Deviled Eggs Recipe on Food Network which complements these techniques. If you want a detailed step-through of a traditional preparation, visit Easy Deviled Eggs Recipe at Tastes Better From Scratch. For additional variations and plating ideas, check Classic Deviled Eggs at Downshiftology.

Classic Deviled Eggs
Ingredients
Main Ingredients
- 6 large large eggs Use eggs about a week old for easier peeling.
- 3 tablespoons mayonnaise Use good-quality full-fat mayo for silkiness.
- 1 teaspoon Dijon mustard Adds subtle heat; adjust if using yellow mustard.
- 1 teaspoon apple cider vinegar Provides a tangy boost; white wine vinegar can substitute.
- to taste salt
- to taste black pepper
- for garnish paprika Use smoked or sweet paprika for garnish.
Instructions
Preparation
- Place eggs in a saucepan and cover with cold water in a single layer.
- Bring water to a gentle boil over medium heat.
- Boil the eggs for about 10 minutes.
- Transfer eggs to ice water to cool completely.
- Peel and slice eggs in half lengthwise.
- Remove yolks and place them in a mixing bowl.
- Mash yolks until crumbly.
- Add mayonnaise, Dijon mustard, apple cider vinegar, salt, and black pepper.
- Mix until the filling is smooth and creamy.
- Spoon or pipe the filling into the egg white halves.
- Sprinkle paprika on top before serving.