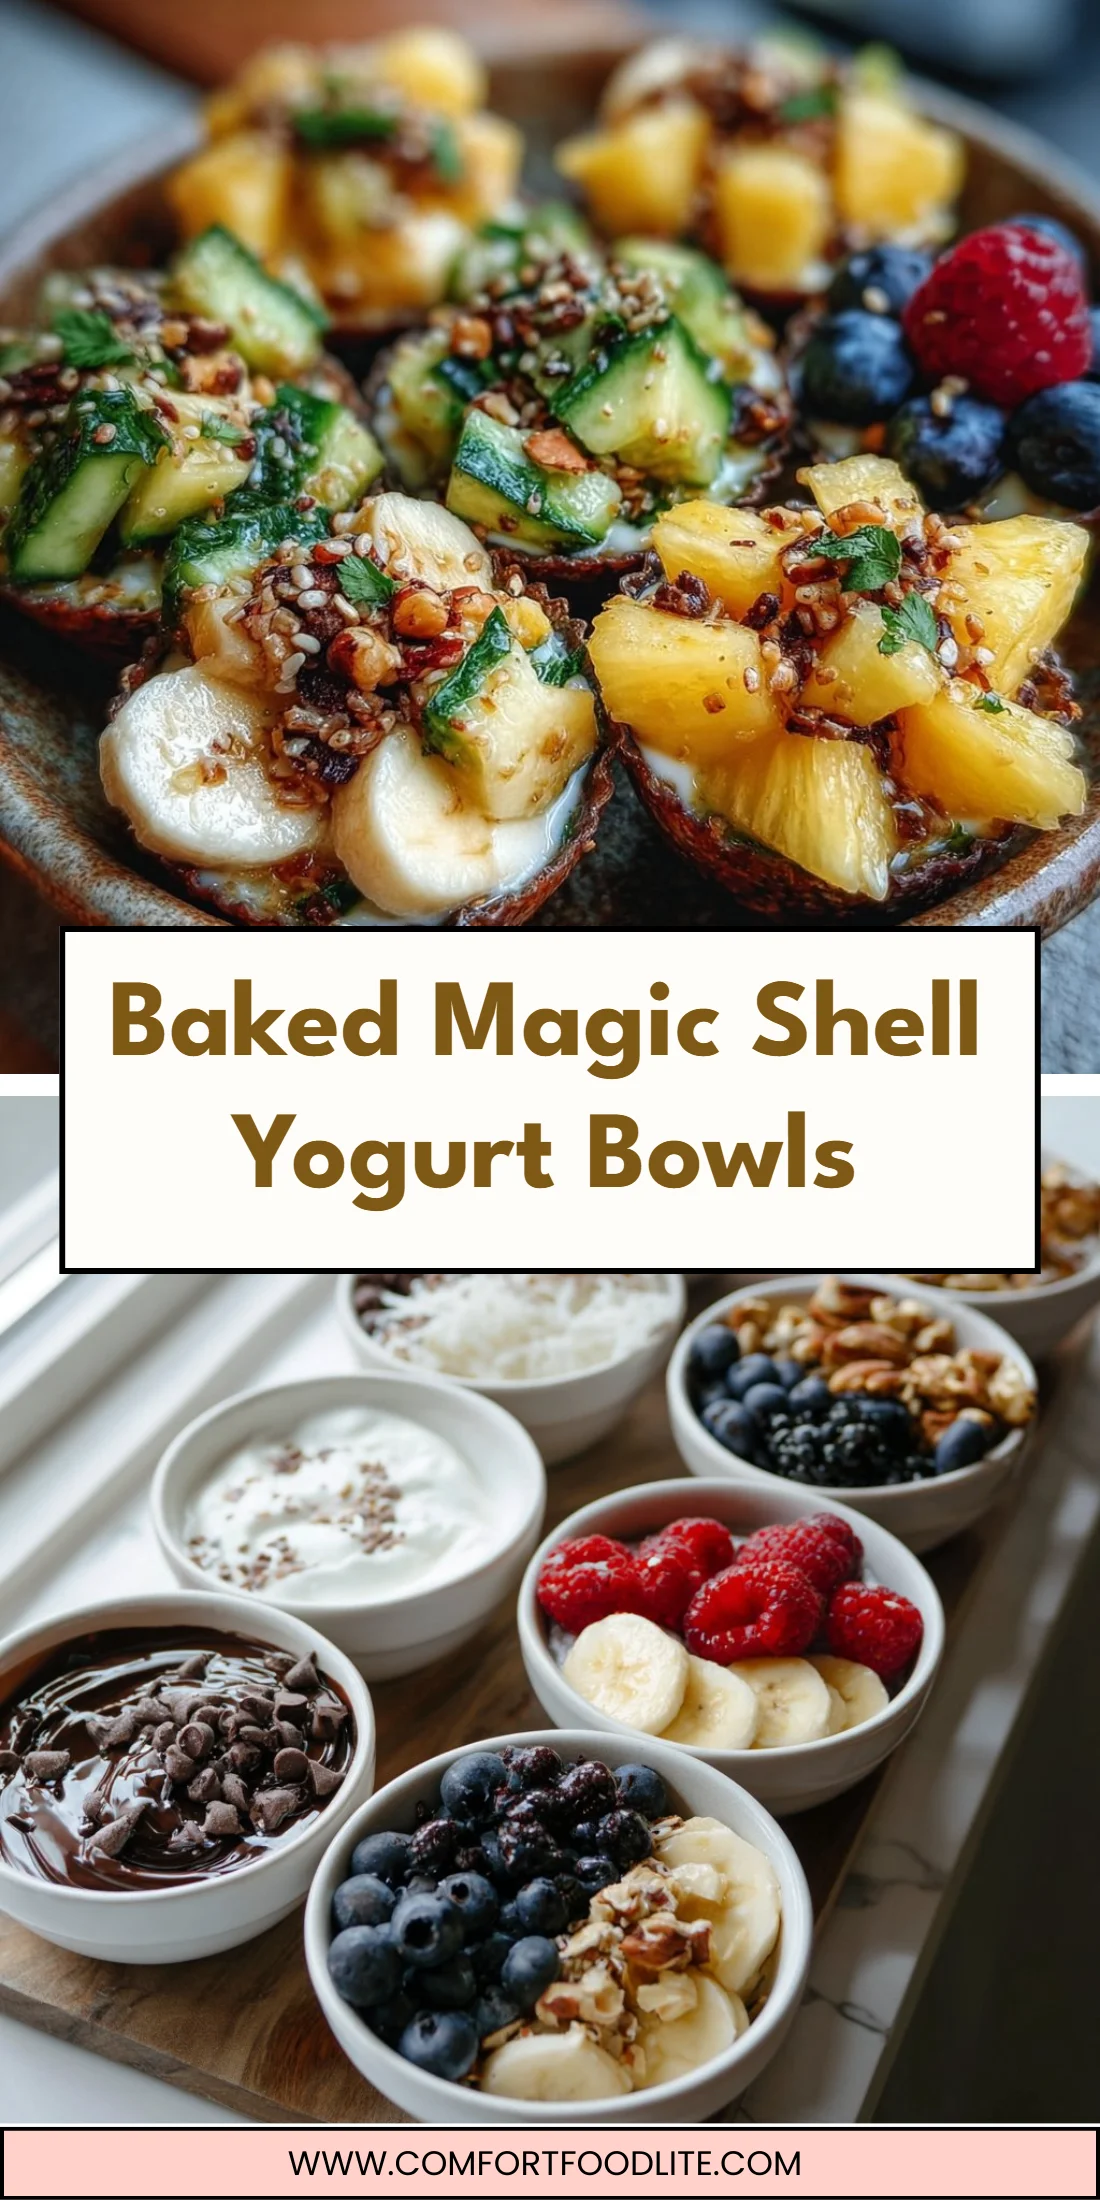
A cool, crunchy chocolate shell with a creamy yogurt center — it’s the playful twist your breakfast countertop has been waiting for.
Think of it as a grown-up chocolate-dipped scoop of yogurt you can customize in seconds.
Sweet, salty, fruity, crunchy — all in one spoonful.
This recipe is fast, family-friendly, and surprisingly elegant.
If you love chilled breakfast bowls, try a similar fruit-forward option like the baked blueberry cottage cheese bowls for more make-ahead ideas.
Why You’ll Love This Baked Magic Shell Yogurt Bowls
- Quick to make with pantry staples.
- Kid-friendly and customizable.
- Crunchy shell keeps yogurt insulated and fresh.
- Hot-and-cold contrast that’s refreshingly surprising.
- Great for portion control and entertaining.
- Works with Greek or regular yogurts for different textures.
The taste is a balance of rich chocolate and tangy yogurt, with fruit and nuts adding bursts of freshness and crunch.
The texture contrast — brittle shell giving way to smooth yogurt — makes each spoonful fun and satisfying.
"Five stars! The chocolate shell held beautifully and the kids loved building their own bowls — so easy and impressive." — a happy reader
Key Ingredients for Baked Magic Shell Yogurt Bowls
Yogurt matters most. Use full-fat Greek yogurt for a rich, spoonable center and a tang that cuts the chocolate sweetness.
Regular yogurt works too and gives a looser mouthfeel; chill it well so the shell bonds cleanly.
Chocolate chips provide the flavor and structure of the shell. Choose semi-sweet chips for balance, or dark chips if you prefer less sweetness.
If you substitute with chocolate bars, chop finely and watch melting times — bars can temper differently and may seize if overcooked.
Coconut oil makes the magic shell crack and harden at cold temperatures. It thins the melted chocolate so it coats molds evenly and solidifies glossy.
If you swap coconut oil for butter or vegetable oil, expect a softer, less stable shell and potential flavor changes.
Granola gives texture contrast and adds a toasty, nutty crunch to the finished bowl. Use a chunky, low-sugar granola for best bite.
Substituting with cereal or crushed cookies changes sweetness and crunch level but can be a fun variation.
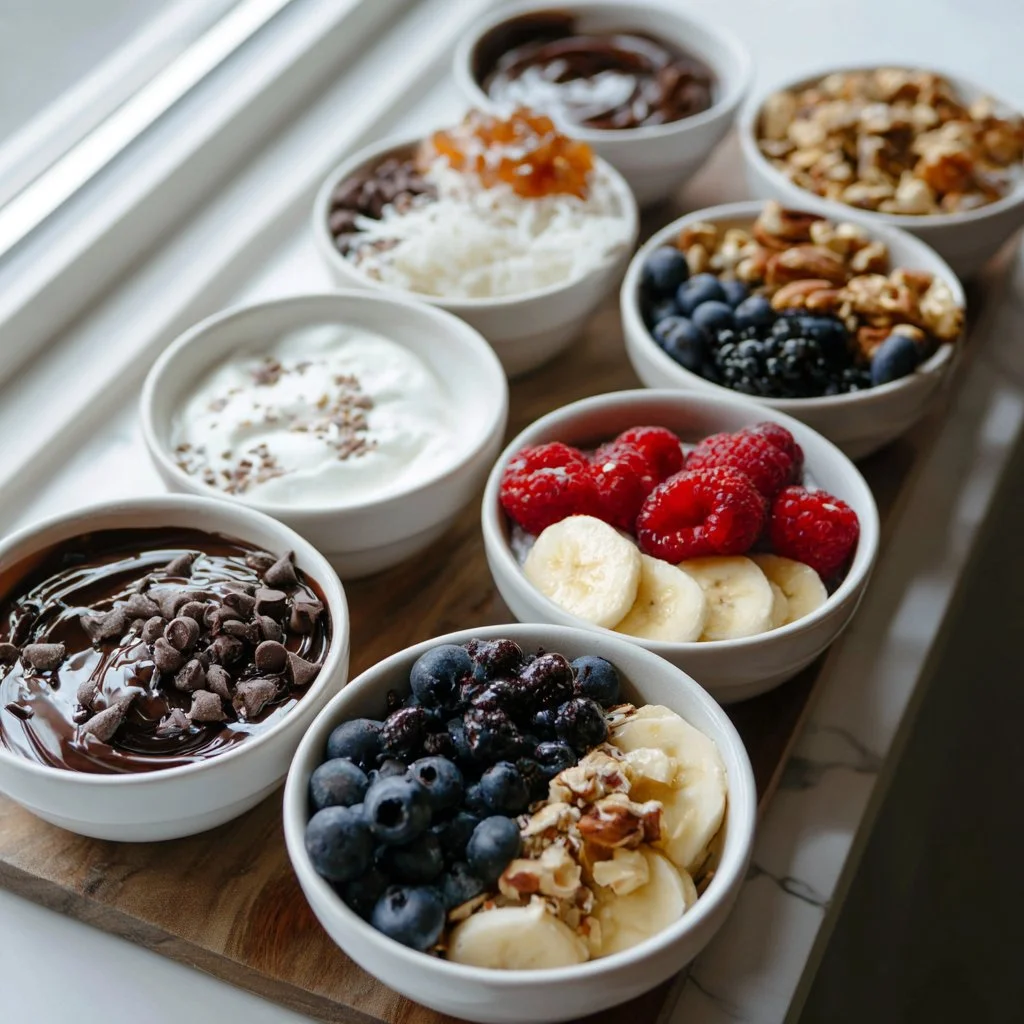
Full Ingredient List for Baked Magic Shell Yogurt Bowls
- 1 cup of yogurt (Greek or regular)
- 1/2 cup of chocolate chips
- 1 tablespoon of coconut oil
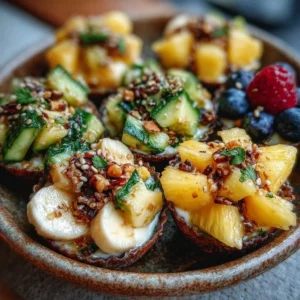
- Assorted fruits (bananas, berries, etc.)
- Nuts (almonds, walnuts, etc.)
- Granola
Step-by-Step Instructions for Baked Magic Shell Yogurt Bowls
Step 1: Preheat your oven to 350°F (175°C).
Give the oven a full preheat so the chocolate sets evenly when it starts to firm.
Pro Tip: The oven should feel warm and steady — not fluctuating — before you place molds inside.
Step 2: Melt the chocolate chips and coconut oil in a microwave-safe bowl.
Heat in 30-second bursts, stirring between each burst until the mixture is smooth and glossy.
Pro Tip: The final mixture should pour like thick syrup and shine; if it looks grainy, heat another 10–15 seconds and stir until smooth.
This method echoes tempering principles used in other oven-chocolate recipes like Anna Olson’s oven baked s’mores.
Step 3: Pour and swirl the melted chocolate into silicone molds or muffin tins to coat the bottoms and sides.
Tilt and spin the mold gently so the chocolate forms an even shell about 1–2 mm thick.
Pro Tip: You should see a uniform glossy coat with no thin spots; thin patches will crack more easily after cooling.
Step 4: Place the molds in the oven for 5–7 minutes to help the shell set slightly.
The brief warm bath firms the chocolate’s outer surface while keeping it workable.
Pro Tip: After 5 minutes the shell will look matte at the edges and still shiny in the center — that’s the sign to remove it.
Step 5: Remove molds and let them cool completely at room temperature.
Cooling slowly prevents cracks and preserves a glossy finish.
Pro Tip: The shell should snap when you press it lightly and no longer feel tacky to the touch.
Step 6: Carefully fill each hardened shell with chilled yogurt and top with fruits, nuts, and granola.
Work quickly to keep the shell intact; spoon yogurt gently to avoid cracking the chocolate walls.
Pro Tip: The yogurt should sit snugly inside the shell and create a small dome; if it overflows the rim, you filled too much.
Step 7: Serve immediately and enjoy your delightful Baked Magic Shell Yogurt Bowls!
A quick garnish of fresh fruit and a sprinkle of granola makes them visually irresistible.
Pro Tip: The first bite should crack audibly and reveal a cool, creamy center; if it bends instead, the shell is too thin.
Expert Tips for Baked Magic Shell Yogurt Bowls
- Temperature tip: Keep the yogurt well chilled (iced cold) so the chocolate sets firm on contact and the shell stays crisp longer.
- Texture troubleshooting: If the shell is soggy after an hour, your chocolate mix was too thin; increase chocolate-to-oil ratio next time.
- Equipment tip: Use silicone molds for easy release and consistent shapes; metal tins work but need extra care on release.
- Common mistake: Overfilling shells with hot or warm yogurt will soften the shell — always use cold yogurt.
- Chocolate quality: Higher-quality chocolate melts smoother and yields a shinier shell; avoid candy melts if you want real chocolate flavor.
- Coconut oil ratio: One tablespoon per half cup of chips is a good starting point; too much oil makes the shell greasy and less crunchy.
- Visual cue tip: Aim for a 1–2 mm thick shell; if you can see light through it before baking, coat again.
- Serving tip: For portable bowls, refrigerate the filled shells for 10–15 minutes to lock the shell before transporting.
Storage & Freezing for Baked Magic Shell Yogurt Bowls
Fridge storage: Store filled bowls covered in an airtight container for up to 24 hours for best texture.
Longer fridge times soften the shell as moisture migrates from yogurt to chocolate.
Freezer storage: Shells (unfilled) freeze well for up to 1 month in a sealed bag or rigid container.
Freeze yogurt-filled bowls only if yogurt is thick; frozen yogurt can become icy and alter texture.
Thawing: Thaw unfilled shells at room temperature for 10–15 minutes before filling.
If you thaw filled bowls, do so in the fridge for a few hours to prevent condensation and sogginess.
Reheating: Avoid reheating — the concept is cold center with a crisp shell.
If the shell softens, place bowls in the fridge to re-harden for 10–30 minutes depending on thickness.
Best containers: Rigid plastic or small glass containers with tight lids prevent crushing and reduce moisture transfer.
Wrap silicone molds with plastic wrap if stacking in the freezer to protect edges.
Variations & Substitutions for Baked Magic Shell Yogurt Bowls
Dark chocolate coconut shell: Swap semi-sweet chips for 70% dark chocolate and use less coconut oil for a more bitter, sophisticated shell.
Result: Deeper chocolate flavor and a crisper snap.
White chocolate lemon bowls: Use white chocolate chips and add a little lemon zest to the yogurt before filling.
Result: A bright, dessert-like bowl with tangy yogurt and sweet floral notes.
Nut-butter core: Mix 1 tablespoon of almond or peanut butter into the yogurt before filling for added protein and richness.
Result: A creamier center and a satiny flavor that pairs well with banana slices.
Crunch swap: Replace granola with toasted oats and toasted seeds (pumpkin, sunflower) for a lower-sugar crunch.
Result: Heartier texture and a savory balance to the sweet chocolate.
Frequently Asked Questions About Baked Magic Shell Yogurt Bowls
Q1: Can I use non-dairy yogurt for Baked Magic Shell Yogurt Bowls?
A1: Yes. Coconut, almond, or soy yogurts work well, but textures vary. Coconut yogurt is thicker and mimics Greek yogurt, while almond and soy can be more watery. Chill non-dairy yogurts thoroughly; you may need to strain thinner varieties to prevent the shell from softening quickly.
Q2: How long will the chocolate shell stay crisp on top of yogurt?
A2: At room temperature, expect crispness for 20–30 minutes. In the fridge, the shell will remain noticeably crisp for up to a few hours but slowly absorbs moisture. For best results serve within an hour, or refrigerate filled bowls briefly before serving to re-harden.
Q3: Why did my chocolate seize or become grainy when melting?
A3: Seizing usually happens when water contacts melted chocolate or when it’s overheated. Use dry utensils and bowls and melt in short bursts, stirring often. Adding the coconut oil as a liquid fat helps smoothness; if it seizes, stirring in a small splash of warm cream or more oil can sometimes rescue it.
Q4: Can I make the shells ahead of time and fill them later?
A4: Absolutely. Make and chill the shells, then store them (unfilled) in an airtight container in the fridge for 3–4 days or in the freezer up to a month. Fill just before serving for peak texture.
Q5: What are good pairings or serving ideas for Baked Magic Shell Yogurt Bowls?
A5: Serve with warm fruit compotes or baked seasonal sides. For an autumn brunch pairing, try them alongside the cozy baked apples with feta, honey and cranberries for contrasting temperatures and flavors.
Final Thoughts on Baked Magic Shell Yogurt Bowls
These bowls are a tiny showstopper with minimal effort and big flavor payoff.
If you try the recipe, please leave a star rating in the recipe card below and pin it to Pinterest.
Baked Magic Shell Yogurt Bowls
Ingredients
For the Chocolate Shell
- 1/2 cup chocolate chips Use semi-sweet or dark chocolate chips.
- 1 tablespoon coconut oil Can be substituted with butter or vegetable oil, but may affect the shell's firmness.
For the Yogurt Bowls
- 1 cup yogurt Full-fat Greek yogurt is preferred for a rich texture.
- 1 cup assorted fruits Bananas, berries, or any preferred fruits.
- 1/2 cup nuts Almonds or walnuts recommended for added crunch.
- 1/2 cup granola Use a chunky, low-sugar granola for a better texture.
Instructions
Preparation
- Preheat your oven to 350°F (175°C). Ensure the oven is fully preheated for even chocolate setting.
- Melt the chocolate chips and coconut oil in a microwave-safe bowl in 30-second bursts, stirring in between until smooth.
- Pour the melted chocolate into silicone molds or muffin tins, ensuring even coating of the sides and bottom.
- Place molds in the oven for 5–7 minutes to help the chocolate set slightly. Remove once edges look matte but center is still shiny.
- Let molds cool completely at room temperature before removing the shells.
- Fill each hardened shell with chilled yogurt and top with fruits, nuts, and granola.
- Serve immediately and enjoy your delightful Baked Magic Shell Yogurt Bowls.