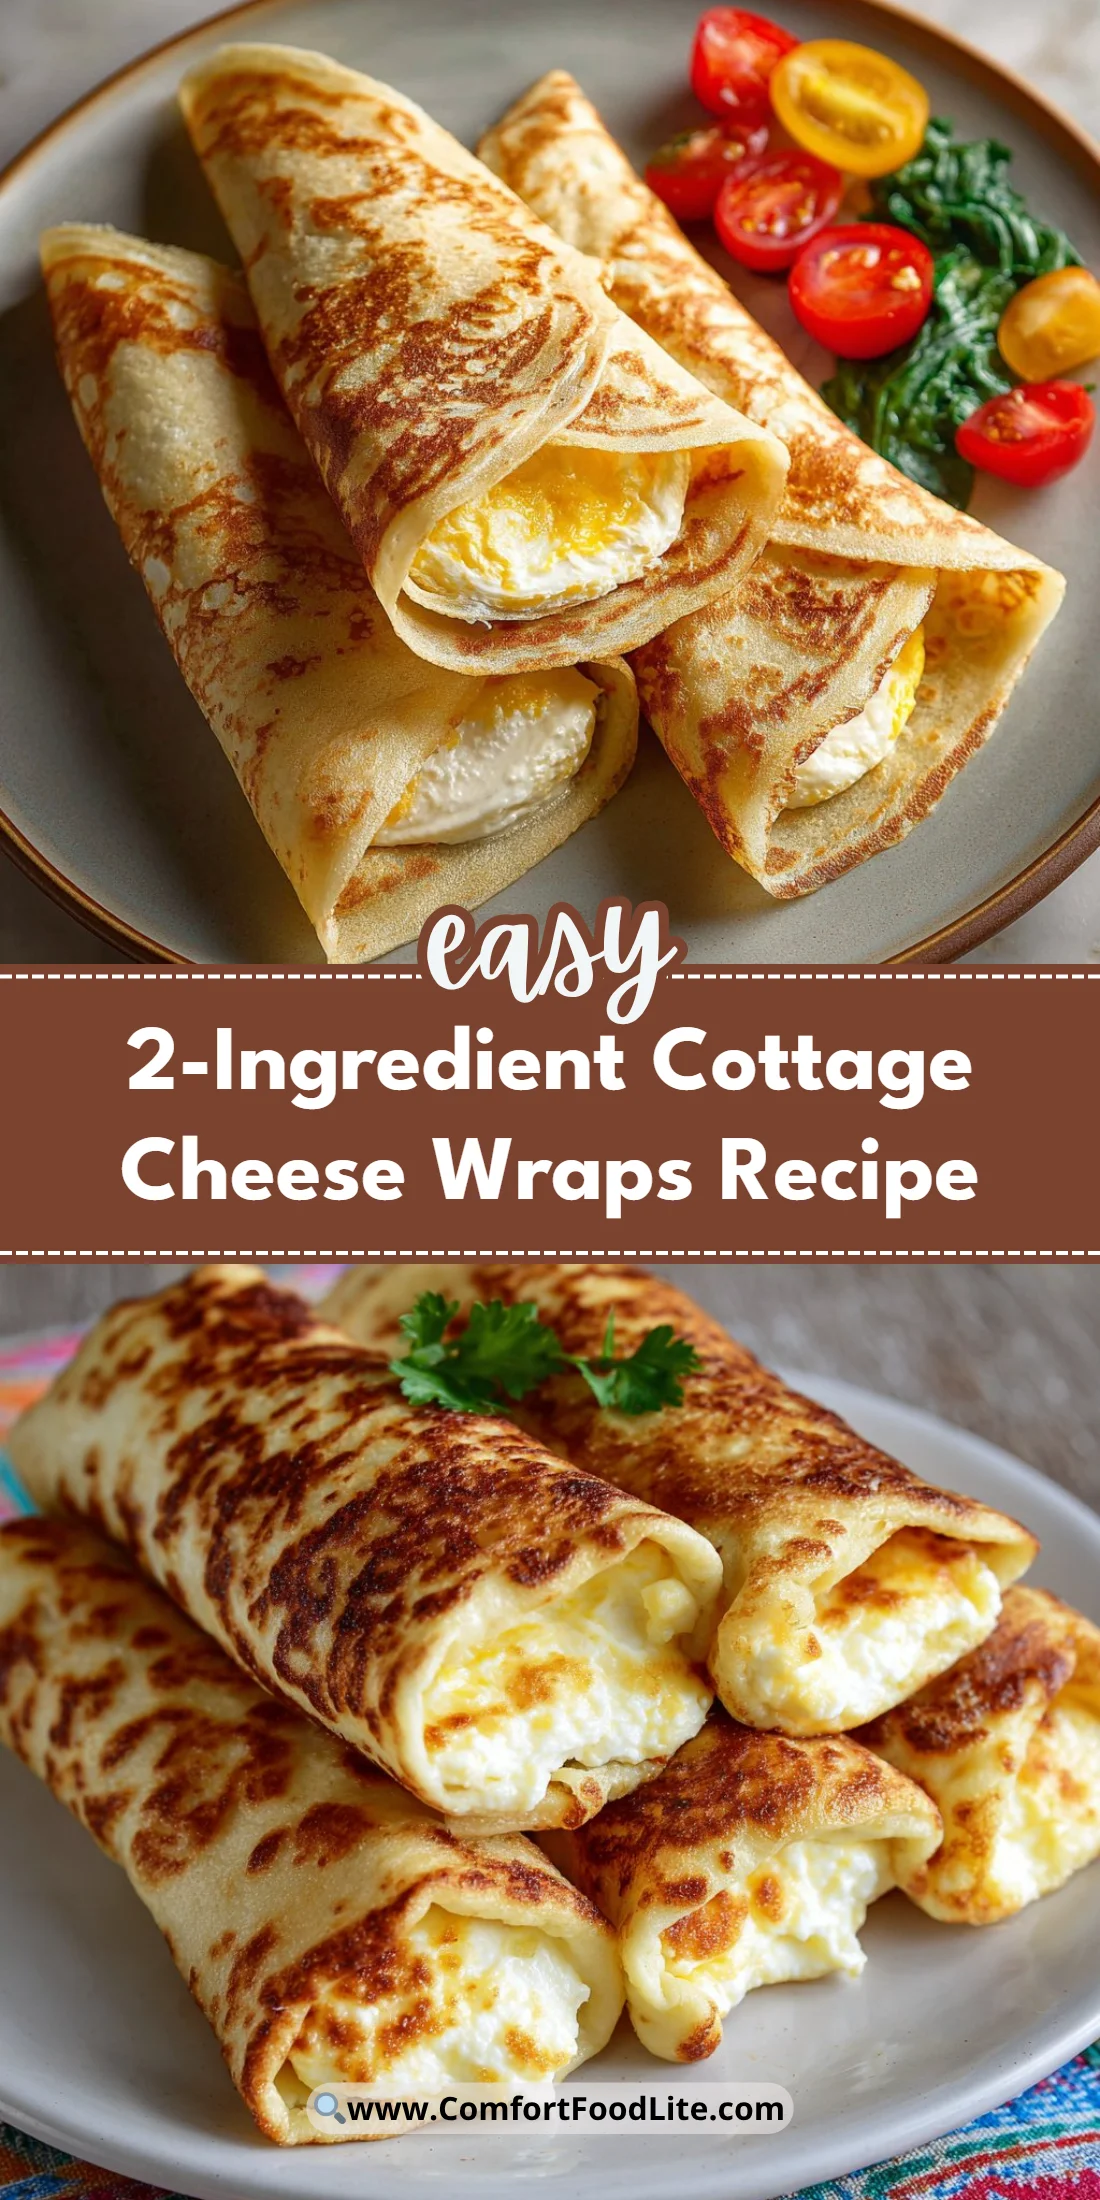
The first time I made these cottage cheese wraps I thought they sounded too simple to work.
Two ingredients, one blender, and a skillet later I had flexible, protein-rich thin wraps that actually tasted great.
They’re quick to make, endlessly adaptable, and perfect for busy mornings or light dinners.
If you’re looking for a low-carb tortilla alternative or a neutral flatbread to fill with savory or sweet fillings, this recipe is a winner.
It’s forgiving, fast, and yields wraps you can roll, fold, or stack like pancakes.
For a quick cottage-cheese breakfast twist, try pairing with a smoothie for a balanced meal.
I like this paired with a creamy fruit smoothie for contrast — and yes, I tested that combo and loved it. Try a cottage cheese smoothie idea.
Why You’ll Love This Recipe
- Only two pantry staples: cottage cheese and eggs.
- High in protein and low in carbs compared with flour tortillas.
- Texture that sits between a crepe and a thin omelet — flexible but sturdy.
- Fast: from blender to plate in about 10–15 minutes hands-on.
- Customizable: goes sweet or savory depending on your fillings.
The texture is a pleasant surprise: think soft crepe with a slight curd-like silk from the cottage cheese.
Edges can crisp a touch while the center remains supple enough to fold without breaking.
Flavor is mild and slightly tangy, so it acts like a blank canvas for herbs, meats, spreads, or fruit.
“I made these on a whim and now I use them every week — they fold without cracking and hold up to fillings. Five stars!” — Emma, Reader
Key Ingredients
Cottage cheese (1 cup). The cottage cheese is the backbone of these wraps.
Full-fat cottage cheese gives richer flavor and more flexible wraps; low-fat will work and reduce calories but may yield a slightly drier result.
If you can, choose a small-curd variety for a smoother blend; brands like Good Culture or your local creamery tend to have higher-quality curds and better flavor.
Eggs (2 large). Eggs provide structure, bind the batter, and help the wraps set like a thin pancake.
Room-temperature eggs blend more evenly into the cottage cheese and produce a silkier batter.
Use large eggs for consistent ratios; if your eggs are unusually small or large, the texture may change slightly.
Nonstick skillet (equipment note). A quality nonstick pan or a well-seasoned crepe pan prevents tearing and ensures even browning.
If your skillet is old or spotty, the wraps may stick and break, so consider a light mist of oil before each one.
Optional oil spray. A neutral oil spray (avocado or canola) keeps the pan slick without pooling oil on the surface.
A tiny amount of fat helps the edges caramelize and makes flipping easier.
Ingredients List:
- 1 cup cottage cheese (full-fat or low-fat)
- 2 large eggs
Step-by-Step Instructions
Step 1: Blend the batter
Combine 1 cup cottage cheese and 2 large eggs in a blender.
Blend until completely smooth, about 20–30 seconds.
You’re aiming for a lump-free, pourable batter that looks glossy and slightly thick.
Pro Tip: If your blender struggles, pulse and scrape down the sides once; the batter should flow slowly off a spoon when ready.
Step 2: Heat the pan
Heat a nonstick skillet over medium heat and lightly spray with oil.
Test the pan by flicking a few drops of water — they should sizzle and evaporate quickly.
Pro Tip: Medium heat is key; too hot and the wrap browns before the center sets, too cool and it won’t brown or may stick.
Step 3: Cook each wrap
Pour about half the batter (around 1/2 cup) into the center of the pan, then tilt the skillet to spread the batter thin like a crepe.
Let cook undisturbed for 3–4 minutes until the edges lift and the surface looks dry.
Gently flip and cook the other side for 1–2 minutes until lightly golden.
Pro Tip: You’ll know it’s time to flip when the top surface looks set (not glossy) and the edges release easily from the pan.
Step 4: Cool and repeat
Transfer the cooked wrap to a plate and let it cool 2–3 minutes; this helps it finish setting and makes handling easier.
Repeat with the remaining batter until all wraps are cooked.
Pro Tip: Stacking them on a paper towel-lined plate absorbs any excess moisture; if you plan to use immediately, keep them covered with a clean towel to stay pliable.
Step 5: Fill and serve
Once slightly cooled, use these as you would a tortilla — fill, roll, or fold with savory or sweet fillings.
They work beautifully with smoked salmon and greens, scrambled eggs and cheese, or sliced fruit and nut butter.
Pro Tip: For burrito-style wraps, warm briefly in the pan rolled seam-side down to seal and make them easier to eat.

Expert Tips for Success
- Temperature control matters. Medium heat produces even cooking and prevents the centers from being underdone while the edges burn. If your pan runs hot, drop to medium-low; if too cool, the wraps will be pale and rubbery.
- Use a good blender or immersion blender. Small curds in cottage cheese can be stubborn; a powerful high-speed blender makes a truly smooth batter. If you don’t have one, let the mixture rest a minute, then stir vigorously before pouring.
- Adjust batter thickness visually. The batter should be pourable but not watery. If it’s too thick to spread, thin with a teaspoon of milk or water; if too thin, add a spoonful of cottage cheese and re-blend briefly.
- Let eggs come to room temperature. Cold eggs can cause uneven blending and small cooked flecks during frying. A quick 5–10 minute sit at room temp will help the batter emulsify.
- Keep the pan clean between wraps. Wipe out and re-spray if bits of leftover wrap start to brown; stray crumbs can cause sticking and tearing.
- Flip gently with a thin spatula. A wide, flexible spatula gives better support under the wrap and prevents tears when you turn it.
- Make a test wrap first. The first one often reveals if you need to tweak heat or oil amounts. Treat the first as a guide — it’s your quality-control pancake.
- Don’t overcook. These wraps should be lightly golden and flexible, not crispy sheets. Cook the second side only until it sets.
- If you want a chewier edge, let the wrap cook an extra 20–30 seconds before flipping. This gives a pleasant contrast to the soft center.
- For savory herbs or spices, add them into the blender. Chopped chives, dill, or a pinch of garlic powder blend in and give even flavor without affecting texture.
- Use a silicone spatula for delicate handling. Metal utensils can snag the edge and create holes.
- If your batter separates after sitting, whisk briefly before using. Separation is normal; a quick stir brings it back.
Also, for inspiration on dairy-forward comfort dishes and how similar recipes handle texture and cheese balances, check out these tips in other cheesy recipes which have taught me a lot about working with soft dairy. See how low-carb cheese recipes handle texture.
Storage & Freezing
Fridge storage: Stack cooled wraps with parchment or wax paper between each to prevent sticking.
Place in an airtight container or zip-top bag and refrigerate up to 4 days.
Freezer storage: Freeze individually on a baking sheet until solid, then transfer to a freezer bag with parchment between each layer.
They keep well for up to 2 months.
Reheating from fridge: Rewarm in a skillet over low-medium heat, 30–60 seconds per side, until warmed through and pliable.
Alternatively, wrap in a damp paper towel and microwave 20–30 seconds.
Reheating from frozen: Thaw in the fridge overnight for best texture, then reheat in a skillet.
If reheating directly from frozen, use a low heat and cover the pan briefly to let the center warm without burning the exterior.
Make-ahead tip: You can cook a big batch and freeze; this makes weekday breakfasts or quick lunches effortless.
Variations & Substitutions
Savory herb wraps: Blend a tablespoon of chopped fresh chives or dill into the batter for an herby profile.
These are perfect for smoked fish or garden-fresh salads. For ideas on pairing savory cottage cheese dishes with baked goods, I often borrow flavor-balancing tips from richer recipes like buttery garlic rolls. Inspiration from buttery cheese recipes.
Cheesy add-in: Stir 1–2 tablespoons of finely grated Parmesan into the blender for a nutty boost.
This slightly changes texture but creates a deliciously savory wrap for sandwich fillings.
Sweet cinnamon wraps: Add 1 teaspoon cinnamon and a teaspoon of vanilla to the batter for dessert-style wraps.
Fill with sliced banana and a smear of nut butter for an easy sweet snack. For sweet-cottage-cheese pairing ideas, consider how cheesecake-style combos work in desserts. Try ideas from sweet cottage cheese variations.
Dairy-free swap (not true to the original but useful): For an egg-free or dairy-free diet you’ll need a different base; this recipe relies on eggs for structure so substitutes change the technique.
If avoiding cow dairy, try plant-based ricotta alternatives, but note texture and cook time will differ.
Stuffed roll-up idea: Use these as a base for breakfast burritos: layer scrambled eggs, avocado, and salsa inside and roll tight.
Vegetable-packed option: Sauté thinly sliced vegetables and use them as a hearty filling for a veggie-forward lunch.
Frequently Asked Questions
Q: Are these wraps gluten-free?
A: Yes — with only cottage cheese and eggs, this recipe is naturally gluten-free.
Cross-contact in your kitchen could be an issue if you share surfaces with gluten-containing flours, so clean surfaces if you need strict gluten-free preparation.
Q: Can I use large curd cottage cheese?
A: You can, but small-curd blends produce a smoother batter.
If using large-curd, blend a bit longer or strain briefly to remove excess whey for a tighter texture.
Q: How many wraps does this recipe yield?
A: Expect about 4–6 thin wraps depending on how thinly you spread each one.
Using ~1/2 cup batter per wrap gives four medium-sized crepe-like wraps; thinner spreads yield more.
Q: Can I make the batter ahead of time?
A: You can blend and refrigerate the batter up to 24 hours.
Give it a quick stir or re-blend briefly before using to reincorporate any separation.
Q: Why did my wraps tear?
A: Tears usually come from high heat, a sticky pan, or a batter that’s too thin.
Make sure the pan is lightly oiled and at medium heat, and use a thin spatula to flip. A slightly thicker batter gives more structure and reduces tearing.
Final Thoughts
This two-ingredient cottage cheese wrap is one of those recipes that feels like a small kitchen magic trick — simple ingredients, versatile results.
Keep a bag in the freezer and you’ll have a quick blank-slate wrap for breakfasts, lunches, or light dinners.
Please leave a star rating in the recipe card below if you tried this, and don’t forget to pin this to Pinterest for later.
Conclusion
For more two-ingredient approaches and ideas for using cottage cheese as a base, see this detailed write-up on Two Ingredient Cottage Cheese Wrap (Gluten Free, High Protein) which inspired some technique variations.
If you’d like another practical take on the same concept, check this guide for slightly different proportions and tips: 2 Ingredient Cottage Cheese Wraps – The Modern Nonna.

Cottage Cheese Wraps
Ingredients
Main Ingredients
- 1 cup cottage cheese (full-fat or low-fat) Small-curd variety recommended for a smoother blend.
- 2 large eggs For best results, use room-temperature eggs.
Instructions
Preparation
- Combine 1 cup cottage cheese and 2 large eggs in a blender and blend until completely smooth, about 20-30 seconds.
- Heat a nonstick skillet over medium heat and lightly spray with oil.
Cooking
- Pour about half the batter (around 1/2 cup) into the center of the pan, then tilt the skillet to spread the batter thin like a crepe.
- Let cook undisturbed for 3-4 minutes until the edges lift and the surface looks dry.
- Gently flip and cook the other side for 1-2 minutes until lightly golden.
Serving
- Transfer the cooked wrap to a plate and let it cool for 2-3 minutes before repeating with the remaining batter.
- Fill, roll, or fold the wraps with your choice of savory or sweet fillings.