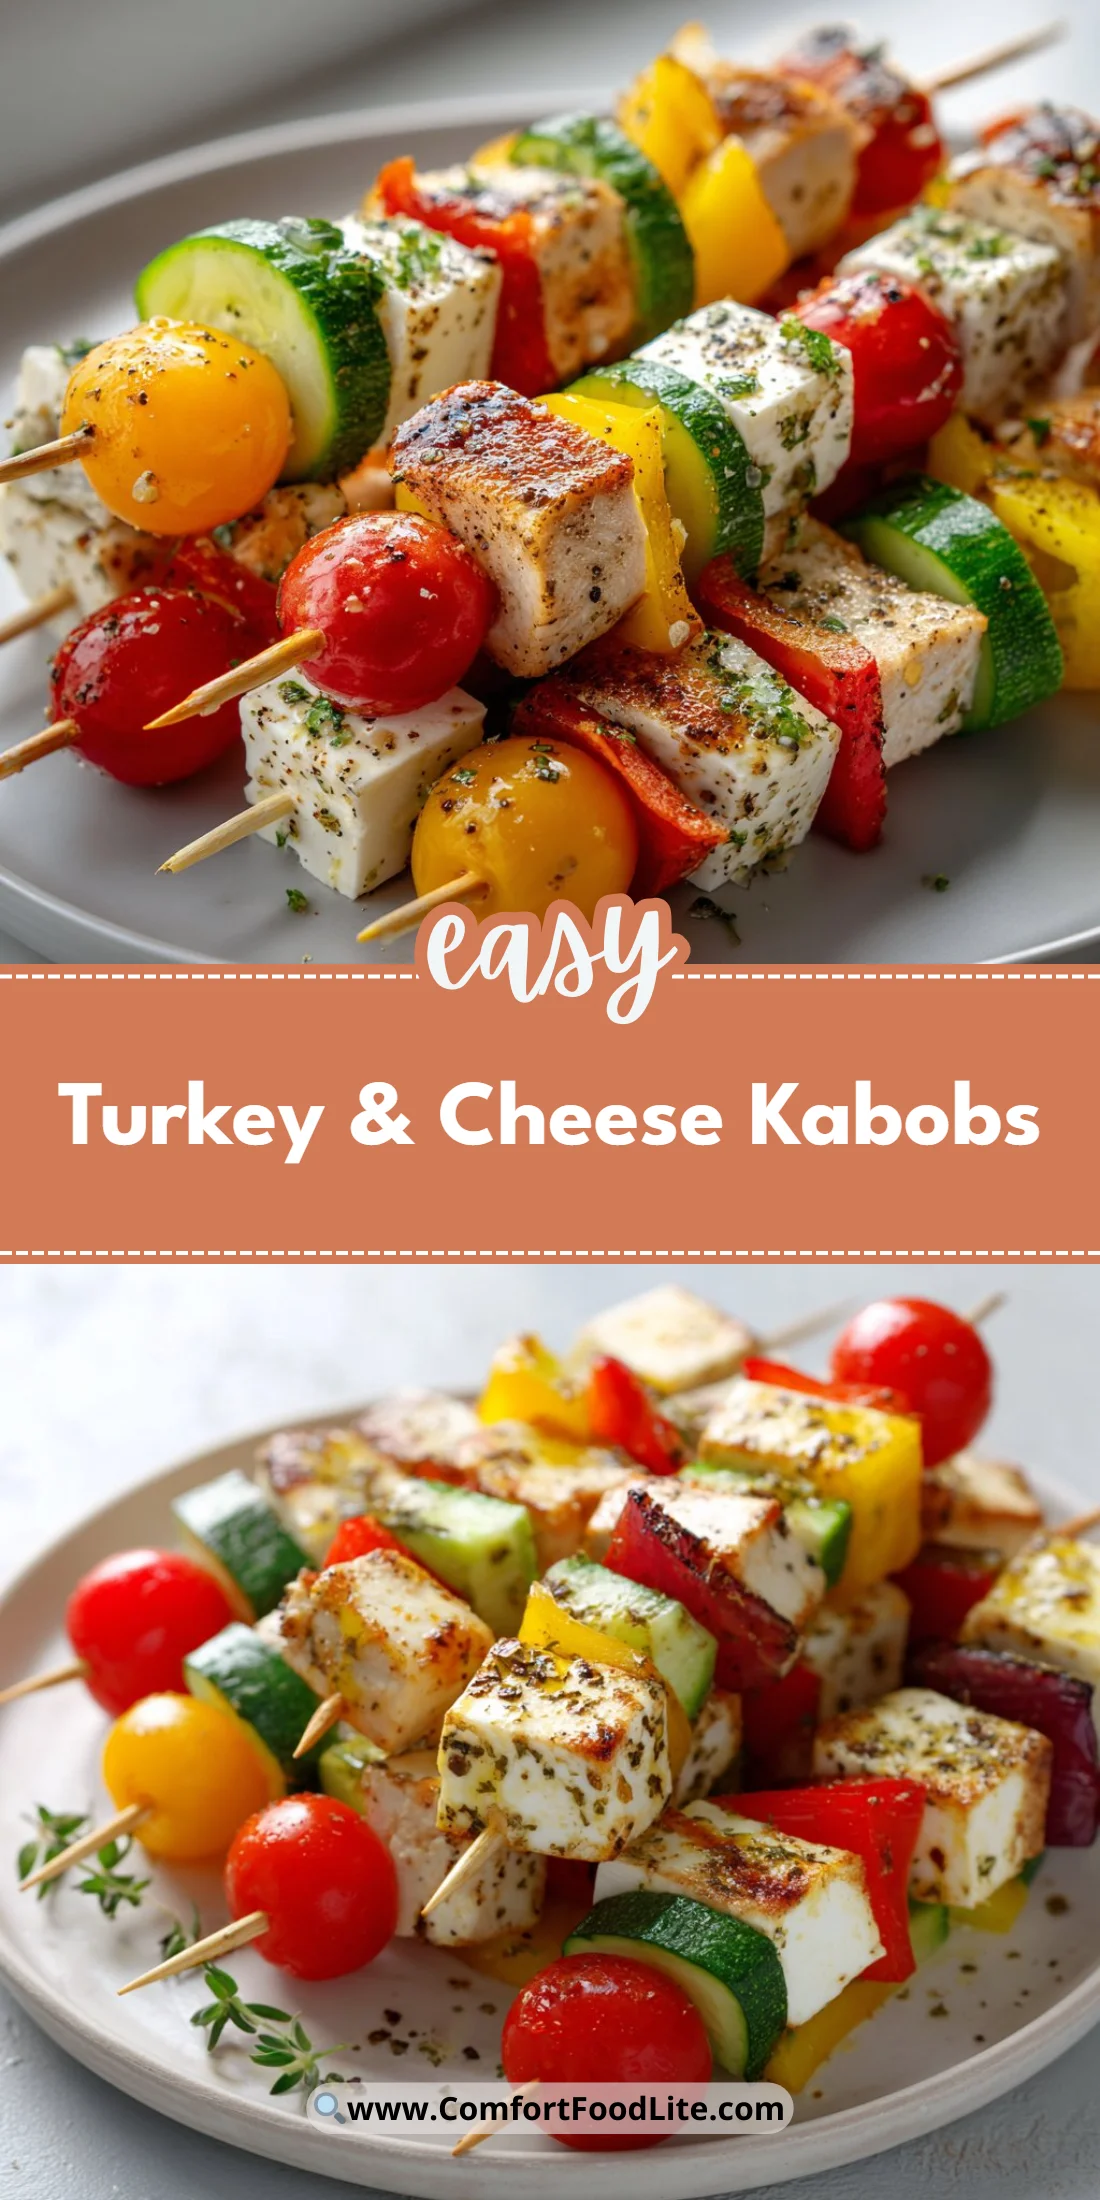
Start with a quick hook: the easiest, prettiest picnic snack that doubles as a protein-rich appetizer and a kid-friendly finger food.
These kabobs come together in minutes and travel beautifully.
They balance savory turkey, melty cheese, and crisp vegetables for fresh bites everyone will reach for.
If you’re packing a lunchbox or prepping for a party, these are the no-fuss answer.
turkey and cheese sliders make a great follow-up idea if you want a warm sandwich version.
Why You’ll Love This Turkey & Cheese Kabobs
- Quick assembly — ready in under 10 minutes with cooked turkey.
- High in protein — keeps kids and adults satisfied longer.
- Portable and mess-free — perfect for picnics and lunchboxes.
- Colorful and customizable — easy to adapt to tastes and seasons.
- Low-prep cleanup — minimal dishes and no baking required.
- Kid-approved — fun skewers that encourage veggie bites.
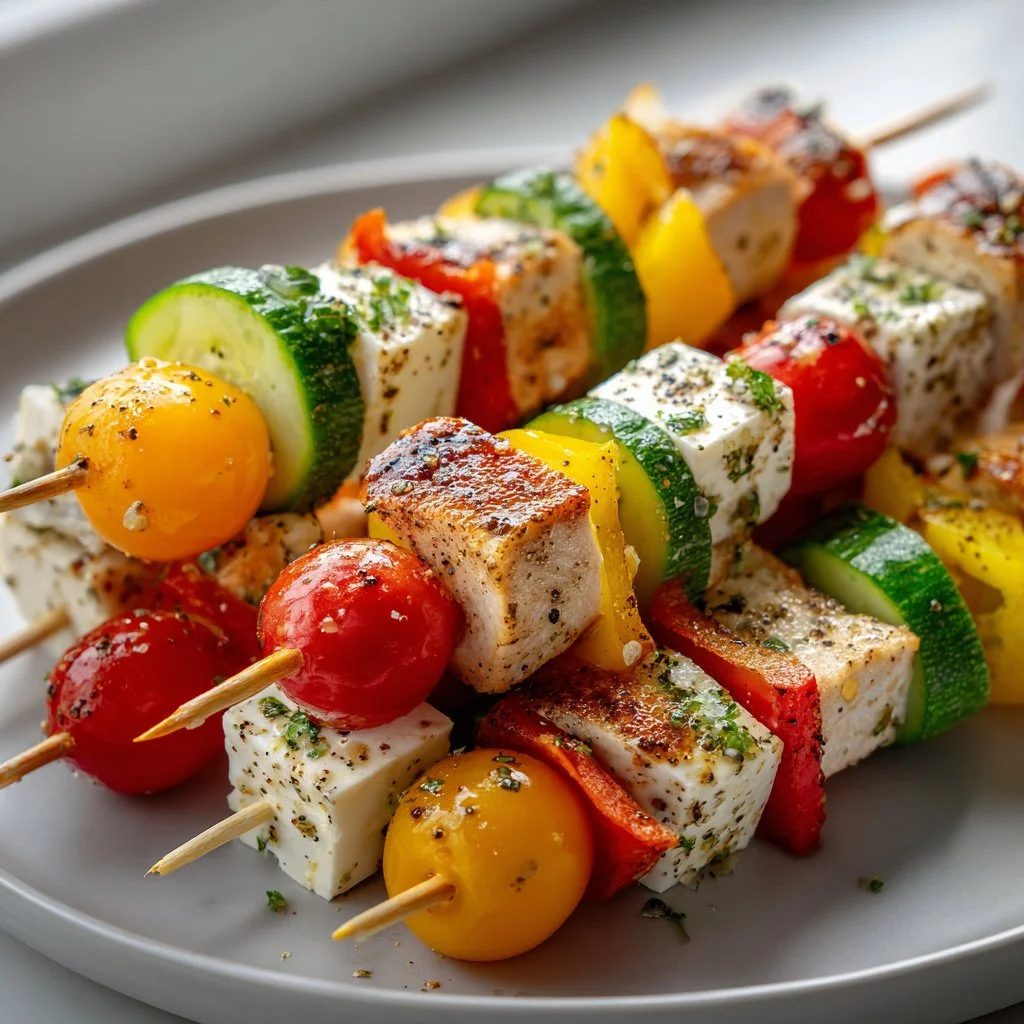
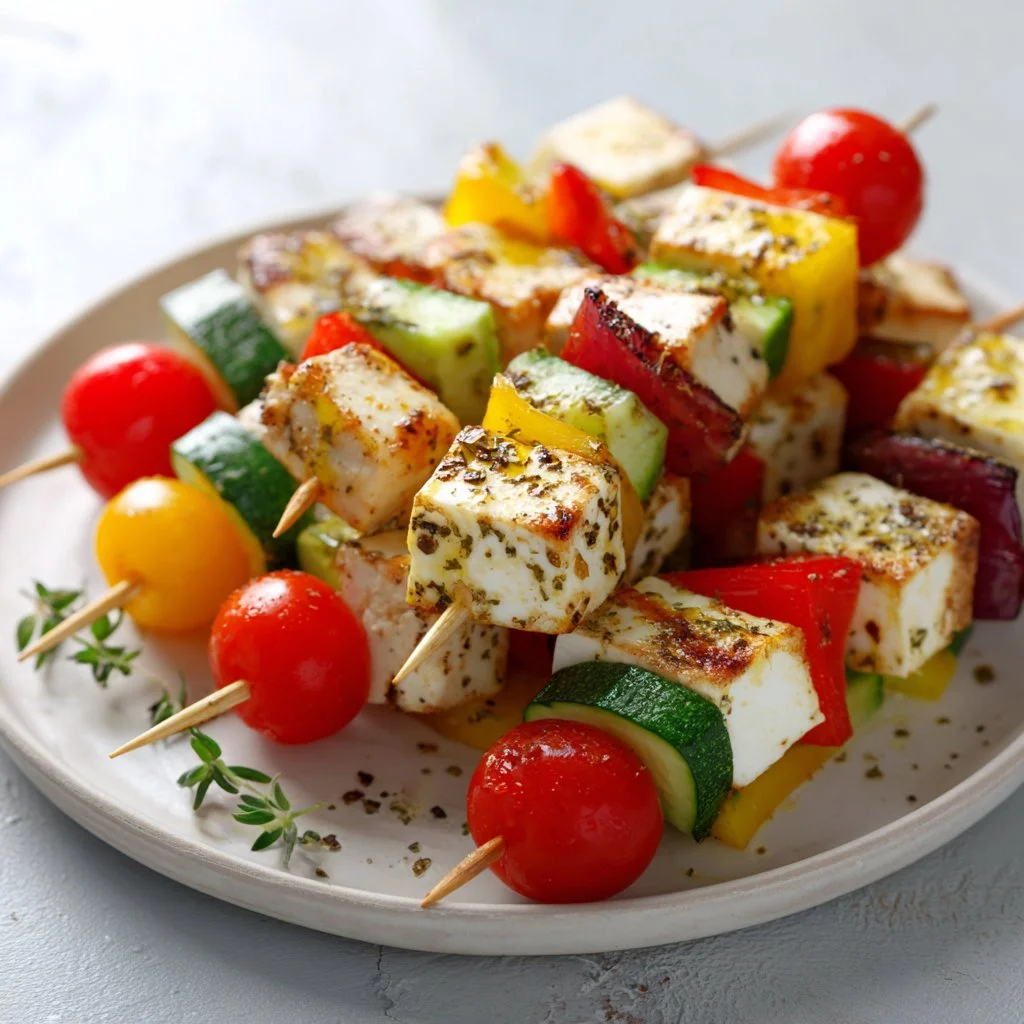
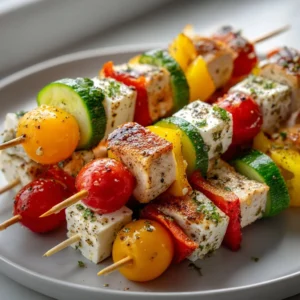
Turkey & Cheese Kabobs provide a satisfying mix of textures: tender turkey cubes, creamy or slightly springy cheese, and crisp, juicy vegetables. The contrast between savory meat and fresh veggies makes every bite interesting and moreish.
★★★★★ “Made these for a backyard potluck and they disappeared in 10 minutes — simple, fresh, and everyone loved the variety!” — Emma R.
Key Ingredients for Turkey & Cheese Kabobs
Turkey breast, cooked and cut into cubes
Turkey breast is the protein backbone here. Use roasted or leftover holiday turkey for richer flavor, or roasted deli-style turkey breast for a leaner bite. If you substitute with chicken, expect a milder flavor and slightly firmer texture.
Cheese (such as cheddar or mozzarella), cut into cubes
Cheddar gives sharpness and holds its shape; mozzarella offers a milder, creamier pull. Buy block cheese and cut your own cubes for the best texture; pre-shredded cheeses can become dry or powdery on skewers. If you swap for a crumbly cheese like feta, pack the kabobs for immediate consumption to avoid leaking.
Bell peppers, cut into squares
Bell peppers add crunch, color, and a touch of sweetness that balances the savory elements. Choose mixed colors (red, yellow, orange) for visual appeal. If you replace with roasted peppers, the kabobs will taste smokier and softer — great for a different profile but less crisp.
Cherry tomatoes
Cherry tomatoes offer juicy bursts that brighten the overall bite. Pick firm, glossy tomatoes without wrinkles. If using grape tomatoes or halved larger tomatoes, the moisture release changes the texture and can make skewers wetter.
For recipe inspiration using cottage cheese in other easy bites, consider 2-ingredient cottage cheese wraps which are another low-prep option for lunches.
Full Ingredient List for Turkey & Cheese Kabobs
- Turkey breast, cooked and cut into cubes
- Cheese (such as cheddar or mozzarella), cut into cubes
- Bell peppers, cut into squares
- Cherry tomatoes
- Cucumber, sliced
- Olive oil
- Salt and pepper to taste
- Skewers
Step-by-Step Instructions for Turkey & Cheese Kabobs
Step 1: Assemble the skewers by alternating pieces of turkey, cheese, and vegetables.
Thread the skewer through a cube of turkey, then a cheese cube, then a piece of bell pepper, and a cherry tomato. Alternate ingredients to create visual contrast and even distribution of flavors across the skewer. Leave about 1/2 inch of skewer at each end for easy handling and trimming if necessary.
Pro Tip: The finished skewer should look balanced and colorful — each one should have at least three different items visible and feel evenly weighted when held.
Step 2: Brush with olive oil and season with salt and pepper.
Lightly brush each assembled skewer with olive oil to add shine and prevent the cucumber and tomatoes from drying out. Season sparingly with salt and freshly cracked black pepper to taste — remember the cheese adds saltiness too. If transporting, place them in a single layer on a platter lined with parchment.
Pro Tip: Visually, the oil gives a subtle glossy sheen and the pepper specks should be visible on cheese and vegetables.
Step 3: Serve immediately or refrigerate until ready to take to your picnic.
If serving right away, place on a platter and offer small bowls of extra olive oil or a simple dip. For travel, cover tightly and refrigerate up to a few hours; pack in a cooler with ice packs. These hold well for short trips but are best eaten within the day for texture integrity.
Pro Tip: When chilled, the cheese firms up slightly and the vegetables look plumper; the skewers should still feel firm, not soggy.
Expert Tips for Turkey & Cheese Kabobs
- Temperature tips: Keep cooked turkey chilled below 40°F (4°C) until just before serving to prevent bacterial growth. If using hot-roasted turkey, cool it completely before assembling.
- Texture troubleshooting: If cheese slides off, switch to firmer cheeses like aged cheddar or choose thicker cubes to stay put. For too-wet veggies, pat them dry to prevent slip and sogginess.
- Equipment tips: Use flat bamboo skewers to prevent rolling on the platter; metal skewers are reusable and eco-friendly. If serving to kids, use shorter skewers to reduce sharp ends.
- Assembly technique: Pierce ingredients near the center so items are balanced, and stagger denser pieces (turkey) with lighter ones (tomato) for a steady skewer.
- Seasoning tip: Add a light herb sprinkle (dried oregano or fresh basil chiffonade) after oiling for freshness without overpowering the turkey flavor.
- Common mistakes: Overcrowding the skewer causes uneven bites; leave a small gap between pieces to maintain airflow and texture.
- Visual cues: Aim for a repeating color pattern every 2–3 pieces for an attractive presentation that photographs well for social sharing.
- Pairing equipment: Bring small dipping cups for mustard or a vinaigrette; they elevate the snack without making skewers soggy.
For a creative pairing idea, try serving these with a light citrus dessert like the 4-ingredient lemon cream cheese dump cake at the end of a picnic.
Storage & Freezing for Turkey & Cheese Kabobs
Fridge storage: Store assembled skewers in an airtight container or covered platter in the refrigerator for up to 24 hours. Use shallow containers so pieces are not crushed; a single layer in a shallow, lidded dish is ideal.
Freezer storage: Freezing assembled skewers is not recommended because vegetables and cheese suffer texture loss. If you must, freeze turkey cubes separately in a single layer before bagging, and thaw before assembling.
Thawing: If turkey was frozen, thaw it overnight in the refrigerator and blot away any excess moisture before cubing. Avoid room-temperature thawing for more than 2 hours.
Reheating: These are best served cold or at room temperature. If you want warm turkey, reheat turkey cubes separately to a safe internal temperature of 165°F (74°C) and then assemble with cheese and raw vegetables.
Containers and timing: Use airtight glass containers for best odor control; refrigerate up to 1 day assembled, or keep components separate (turkey and veg) up to 3 days for peak freshness. For transport, pack on ice packs inside an insulated cooler.
For a sweet grab-and-go snack to accompany leftovers, consider air fryer blueberry cottage cheese donut holes as a portable dessert.
Variations & Substitutions for Turkey & Cheese Kabobs
Mediterranean twist: Swap cheddar for cubed halloumi or feta (firm cubes). Add cucumber, olives, and a drizzle of lemon-oregano vinaigrette for a briny, bright result.
BBQ-style skewers: Use smoked turkey or toss turkey cubes in a light BBQ rub; add grilled bell pepper pieces instead of raw. The result is smoky, slightly charred, and hearty — great warmed slightly.
Fruit and cheese combo: Replace cherry tomatoes with seedless grapes or pineapple chunks and pair with mild cheddar. This yields a sweet-savory pop and a juicier mouthfeel that kids often love.
Vegetarian swap: Replace turkey with firm marinated tofu or tempeh cubes for a plant-based version. Texture becomes chewier and the protein profile shifts, so season tofu well before assembling.
Frequently Asked Questions About Turkey & Cheese Kabobs
Q: How long can turkey and cheese kabobs sit out at a picnic?
A: Per food safety guidelines, perishable foods should not sit out more than 2 hours at temperatures below 90°F (32°C). If the temperature is above 90°F, reduce that to 1 hour. Keep kabobs on ice packs or in a cooler whenever possible to maintain below 40°F.
Q: Can I make these ahead and keep them fresh?
A: Yes — assemble up to a few hours ahead and refrigerate covered. For best texture, store turkey and cheese separately from juicy vegetables, or pat tomatoes dry and keep a paper towel in the container to absorb excess moisture.
Q: What dips pair well with Turkey & Cheese Kabobs?
A: Try a honey mustard, tzatziki, balsamic glaze, or a creamy herb dip. Choose a dip that complements the cheese — sharper cheeses pair nicely with sweeter dips, and fresh herbs work well with mild cheeses.
Q: Are these suitable for kids and school lunches?
A: Absolutely. Use shorter, blunt-ended skewers for safety and choose milder cheese and sweet pepper colors. Follow school rules about raw produce and packaging; packing kabobs in a sealed container with an ice pack keeps them fresh.
Q: How can I keep the cherry tomatoes from making the skewers soggy?
A: Choose firm tomatoes, and place a small cucumber or cheese cube between tomatoes and softer items. Blot tomato moisture with paper towels before assembling if they’re particularly ripe.
Final Thoughts on Turkey & Cheese Kabobs
These Turkey & Cheese Kabobs are a simple, flexible snack that travels well and satisfies a crowd. If you enjoyed the recipe, please leave a star rating in the recipe card below or pin it to Pinterest for later.
For more kid-friendly kabob ideas, check out Cheese & Turkey Kebabs – a fun lunchbox idea! and for a sweet pairing idea see Turkey Apple & Cheese Kabobs for Kids – Crayons & Cravings. If you want other simple skewered recipes, browse Turkey and Cheese Skewers – Pint-sized Treasures.
Turkey & Cheese Kabobs
Ingredients
Main Ingredients
- 1 lb Turkey breast, cooked and cut into cubes Roasted or leftover turkey provides richer flavor.
- 8 oz Cheese (cheddar or mozzarella), cut into cubes Use block cheese for best texture.
- 2 medium Bell peppers, cut into squares Mixed colors add visual appeal.
- 1 cup Cherry tomatoes Choose firm, glossy tomatoes for best results.
- 1 medium Cucumber, sliced Adds crunch to the kabobs.
- 2 tbsp Olive oil For brushing on skewers.
- to taste Salt and pepper Season to taste for balance.
- 8 Skewers Bamboo or metal, flat skewers help prevent rolling.
Instructions
Assembly
- Assemble the skewers by alternating pieces of turkey, cheese, and vegetables: thread a piece of turkey, then a cheese cube, followed by a bell pepper piece, and a cherry tomato.
- Ensure at least three different items are visible on each skewer for a balanced appearance.
Brushing and Seasoning
- Lightly brush the assembled skewers with olive oil and season with salt and pepper to taste.
- If transporting, place them in a single layer on a platter lined with parchment.
Serving
- Serve immediately or refrigerate until ready for the picnic.
- If serving right away, offer small bowls of extra olive oil or a simple dip.