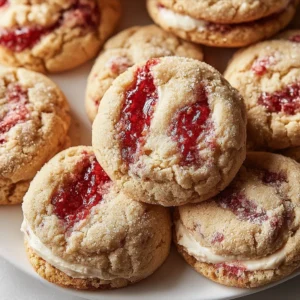
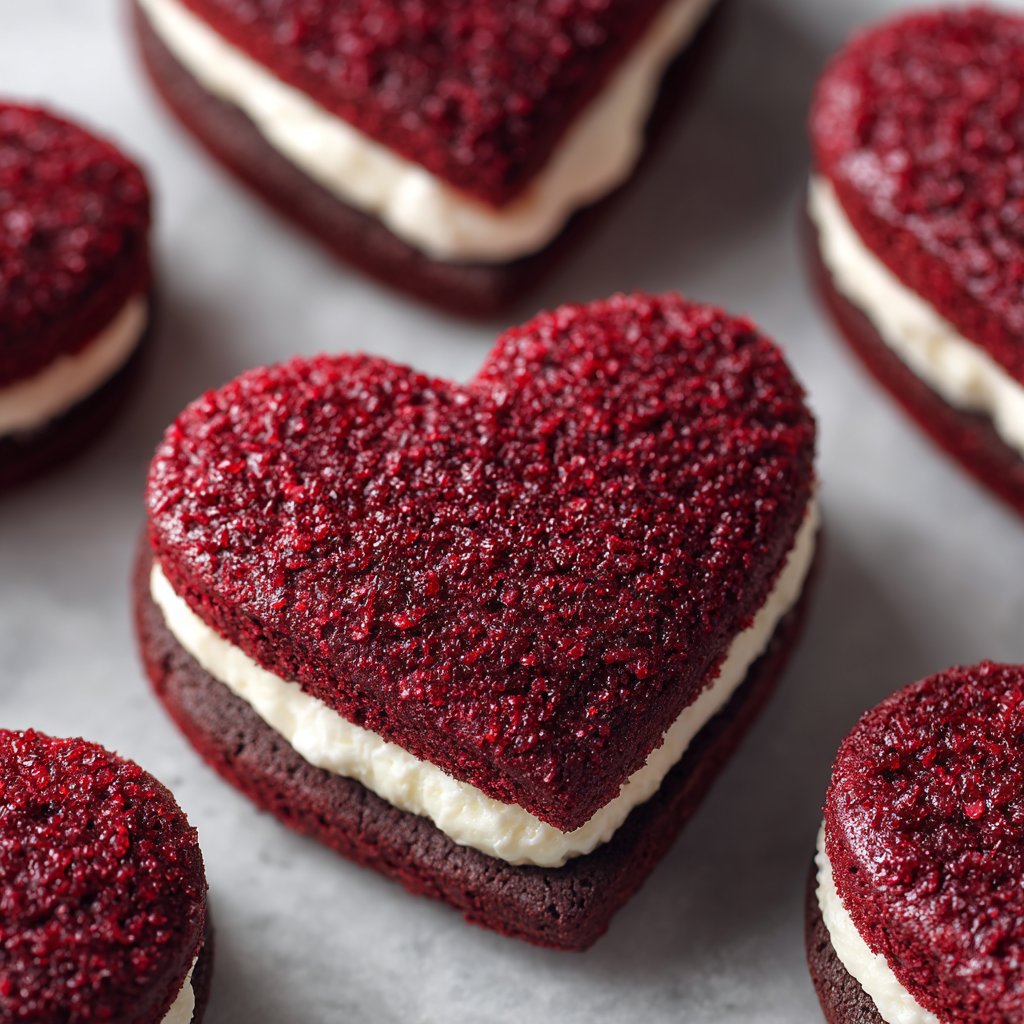
I’ve been making these stuffed heart-shaped red velvet cookies for years when I want a showy, nostalgic dessert that still feels homemade. They’re soft, chewy red velvet cookies wrapped around a tangy cream cheese center — perfect for Valentine’s Day, bridal showers, or any time you want a pretty, indulgent treat that travels well once cooled and packaged.
Why you’ll love this dish
This recipe delivers the best of both worlds: the cocoa-tinted tenderness of red velvet and the bright, creamy pop of a cream cheese heart inside each cookie. They’re impressive enough for guests but simple enough to pull together in a few focused steps. Make them for holidays, bake sales, or to send as homemade gifts — they hold their shape, slice easily for photos, and taste like a bakery treat.
“Like a mini red velvet cake wrapped in a cookie — the cream cheese center gives every bite a little surprise.” — a regular baker’s review
What makes these cookies especially useful is that most of the work is make-ahead friendly: the filling freezes firm, dough chills to prevent spreading, and finished cookies keep well when wrapped individually.
How this recipe comes together
Step-by-step overview: you’ll make a rich red velvet cookie dough and chill it so the cookies don’t spread. Meanwhile, whip full-fat cream cheese with a little sugar and vanilla, portion into small balls and freeze until solid. Then take dough portions, flatten or cut hearts, encase each frozen cream cheese ball (completely sealing the edges), and bake until the edges are set but the center stays soft and chewy. Cool fully before wrapping or gifting.
This quick overview helps you plan timing: dough chilling and freezing filling are the longest waits, but both can be done ahead so baking is fast.
Key Ingredients
- All-purpose flour — for structure. (Whole-wheat pastry flour can be used for a nuttier result; reduce by 2 tablespoons if using.)
- Granulated sugar — balances cocoa and cream cheese tang.
- Unsalted butter, softened — gives tenderness and flavor. (You can use salted, but reduce added salt.)
- Large egg — binds the dough.
- High-quality Dutch-process cocoa powder — crucial for that deep chocolatey red velvet flavor and darker color.
- Baking soda and a pinch of fine sea salt — for lift and balance.
- Red food gel — more concentrated than liquid dye; gives an even, vivid red without thinning the dough.
- Vanilla extract — rounds the flavor.
- Cream cheese (full fat) — for the classic tangy, creamy filling.
- Large, sturdy heart-shaped cookie cutter — useful if you want uniform hearts or to sandwich two heart cutouts around the filling. (A round cutter or freehand shaping works too.)
- Optional: powdered sugar for dusting or extra sweetness.
Notes: if you prefer natural coloring, beet powder or concentrated beet juice can replace red gel (color may be subtler). If you can’t find Dutch-process cocoa, use natural cocoa and add 1/4 tsp baking powder in place of part of the baking soda to adjust acidity.
Directions to follow
- Make the cookie dough: Cream the softened butter and granulated sugar until light. Beat in the egg and vanilla. Add red food gel until you reach a vibrant red. Sift together flour, Dutch-process cocoa, baking soda, and salt, then fold into the wet mix to form a soft dough. Chill the dough for 20–30 minutes to make it easier to handle and to prevent spreading in the oven.
- Prepare the filling: Beat full-fat cream cheese with a tablespoon of sugar and a small splash of vanilla until smooth. Portion into 1–1½ tablespoon-sized balls using a small cookie scoop. Place the balls on a parchment-lined tray and freeze until solid, at least 1 hour.
- Shape and assemble: If using a cookie cutter method, roll chilled dough between sheets of parchment to about 1/4-inch thickness. Cut heart shapes and transfer to a baking sheet. For each cookie, place a frozen cream cheese ball on one heart, brush the edges of the dough lightly with water or egg wash, and top with a second heart. Press the edges gently to seal; smooth seams so filling is fully enclosed. Alternatively, portion dough into balls, flatten into discs, set a frozen filling ball in the center, then wrap the dough around it and roll into a sealed ball.
- Chill briefly before baking: Place assembled cookies on the baking sheet and chill in the fridge 10–15 minutes. This extra chill helps the cookies hold shape and reduces leaking.
- Bake: Preheat your oven to 350°F (175°C). Bake cookies 10–13 minutes for small rounds or 12–15 minutes for larger hearts. They should look set at the edges but feel soft in the center — that gives a chewy bite with a creamy core.
- Cool completely: Transfer to a wire rack and cool fully before packaging. Cooling allows the filling to firm again and prevents steam from making the exterior soggy.
Best ways to enjoy it
Enjoy these cookies slightly warm for the melty cream cheese effect, or at room temperature for a firmer, more portable center. Plate them on a simple white platter for contrast, or stack them with parchment squares between layers for gifting. Pair with:
- A small glass of cold milk or a latte to balance sweetness.
- Espresso or bitter black tea if you want contrast.
- A scoop of vanilla ice cream for an indulgent dessert plate.
For gifting, wrap each cookie individually in clear bakery bags and tie with ribbon, or arrange in a low box with tissue paper to protect the delicate hearts.
Storage and reheating tips
- Room temperature: Store baked cookies in an airtight container in one layer (or with parchment between layers) for up to 2 days. Because of the cream cheese center, don’t leave them at room temperature for more than 2 hours if ambient temps are warm — refrigerate instead.
- Refrigerator: Keep cookies in an airtight container in the fridge for up to 5 days. Bring to room temperature before serving for best texture.
- Freezing: Freeze baked cookies in a single layer on a tray until solid, then transfer to a freezer-safe container or bag for up to 2 months. Thaw overnight in the fridge or at room temperature for an hour.
- Reheating: Warm a cookie for 8–10 seconds in a microwave on medium to make the center soft again, or 4–6 minutes in a 300°F (150°C) oven from refrigerated for a fresher-baked texture (watch closely to avoid melting the filling).
Food safety note: because cream cheese is perishable, always cool cookies fully and refrigerate for longer storage. Do not leave filled cookies at room temperature for extended periods (more than 2 hours).
Pro chef tips
- Freeze the filling solid — that’s the single best trick to prevent leaking. A frozen core slows down the filling’s temperature rise while the cookie bakes.
- Use Dutch-process cocoa for deeper color and less acidity, which helps the red tone pop when you add red gel.
- Gel food coloring gives brighter results without thinning the dough. Add color gradually; a little gel goes a long way.
- Weighing ingredients improves consistency. If you don’t have a scale, scoop flour with a spoon into the measuring cup and level it off.
- Seal seams by pressing the edges together and smoothing with a fingertip dipped in a little water; avoid over-handling the dough to prevent warmth from making it sticky.
- If seams look thin, re-chill assembled cookies for 10 minutes on the baking sheet before baking.
Recipe variations
- Caramel-stuffed: Replace the cream cheese core with frozen caramel bites or a caramel ball for a gooey center. For inspiration see a caramel-stuffed version at Chez CateyLou.
- Mini cupcakes: Pipe the cream cheese into mini liners and bake in a muffin tin with a small cookie crust for a hybrid treat.
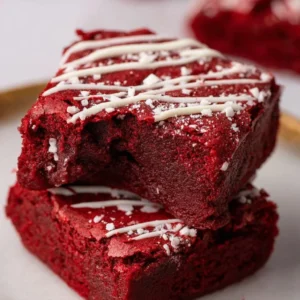
- Chocolate chip twist: Fold a handful of mini chocolate chips into the dough for extra texture.
- Vegan option: Use vegan cream cheese and a plant-based butter and egg replacer. Chill the dough longer to make it easier to handle.
- Spiced red velvet: Add 1/4 teaspoon cinnamon and a pinch of nutmeg to the dough for a warm spice note.
Common questions
Q: How long does it take from start to finish?
A: Active prep is about 45–60 minutes (including mixing, shaping, and assembly). With chilling and freezing, plan 2–3 hours total unless you make components ahead.
Q: Can I make the cream cheese filling ahead?
A: Yes. Portion and freeze the cream cheese balls for up to a month in a sealed container, then use directly from frozen. Thaw in the fridge before baking only if you plan to assemble and bake later.
Q: My filling leaked while baking. What went wrong?
A: Most leaks happen when the filling isn’t fully frozen, seams aren’t sealed, or the dough is too thin at the edges. Re-freeze filling until rock solid, seal seams well (use a tiny bit of egg wash or water), and chill assembled cookies before baking.
Q: Can I use natural (non-Dutch) cocoa?
A: You can, but the color and acidity differ. With natural cocoa, the dough may be slightly brighter; consider adding 1/4 teaspoon baking powder to balance leavening.
Q: Are these safe for kids?
A: Yes, with adult supervision in the kitchen. Note the raw cream cheese/dough should not be eaten uncooked; always bake fully and cool before serving to children.
Conclusion
These stuffed heart-shaped red velvet cookies are a lovely make-ahead dessert that looks bakery-ready but is entirely doable at home. If you like creative stuffed cookies, check out this caramel-stuffed approach for a different sweet center at Caramel-stuffed red velvet cookies, or compare techniques with a classic cream cheese-stuffed version at Cream Cheese Stuffed Red Velvet Cookies for extra ideas and inspiration.

Stuffed Heart-Shaped Red Velvet Cookies
Ingredients
Cookie Dough Ingredients
- 2 cups All-purpose flour (Whole-wheat pastry flour can be used for a nuttier result; reduce by 2 tablespoons if using.)
- 1 cup Granulated sugar Balances cocoa and cream cheese tang.
- 1/2 cup Unsalted butter, softened Gives tenderness and flavor.
- 1 large Egg Binds the dough.
- 2 tablespoons High-quality Dutch-process cocoa powder Crucial for that deep chocolatey red velvet flavor.
- 1 teaspoon Baking soda For lift.
- 1/4 teaspoon Fine sea salt For balance.
- 1 tablespoon Red food gel Gives an even, vivid red without thinning the dough.
- 1 teaspoon Vanilla extract Rounds the flavor.
Cream Cheese Filling
- 8 ounces Cream cheese (full fat) For the classic tangy, creamy filling.
- 1 tablespoon Granulated sugar For sweetness.
- 1 teaspoon Vanilla extract For flavor enhancement.
Optional Ingredients
- Powdered sugar to taste Powdered sugar for dusting Optional for extra sweetness.
Instructions
Make the Cookie Dough
- Cream the softened butter and granulated sugar until light.
- Beat in the egg and vanilla.
- Add red food gel until you reach a vibrant red.
- Sift together flour, Dutch-process cocoa, baking soda, and salt, then fold into the wet mix to form a soft dough.
- Chill the dough for 20–30 minutes to make it easier to handle and prevent spreading.
Prepare the Filling
- Beat the full-fat cream cheese with a tablespoon of sugar and a small splash of vanilla until smooth.
- Portion into 1–1½ tablespoon-sized balls and freeze until solid, at least 1 hour.
Shape and Assemble
- Roll chilled dough between sheets of parchment to about 1/4-inch thickness.
- Cut heart shapes and transfer to a baking sheet.
- Place a frozen cream cheese ball on one heart, brush the edges of the dough lightly with water or egg wash, and top with a second heart.
- Press the edges gently to seal; smooth seams so filling is fully enclosed.
Chill and Bake
- Place assembled cookies on the baking sheet and chill in the fridge for 10–15 minutes.
- Preheat your oven to 350°F (175°C) and bake cookies for 10–13 minutes for small rounds or 12–15 minutes for larger hearts.
- The cookies should look set at the edges but feel soft in the center.
Cool Completely
- Transfer cookies to a wire rack and cool fully before packaging.