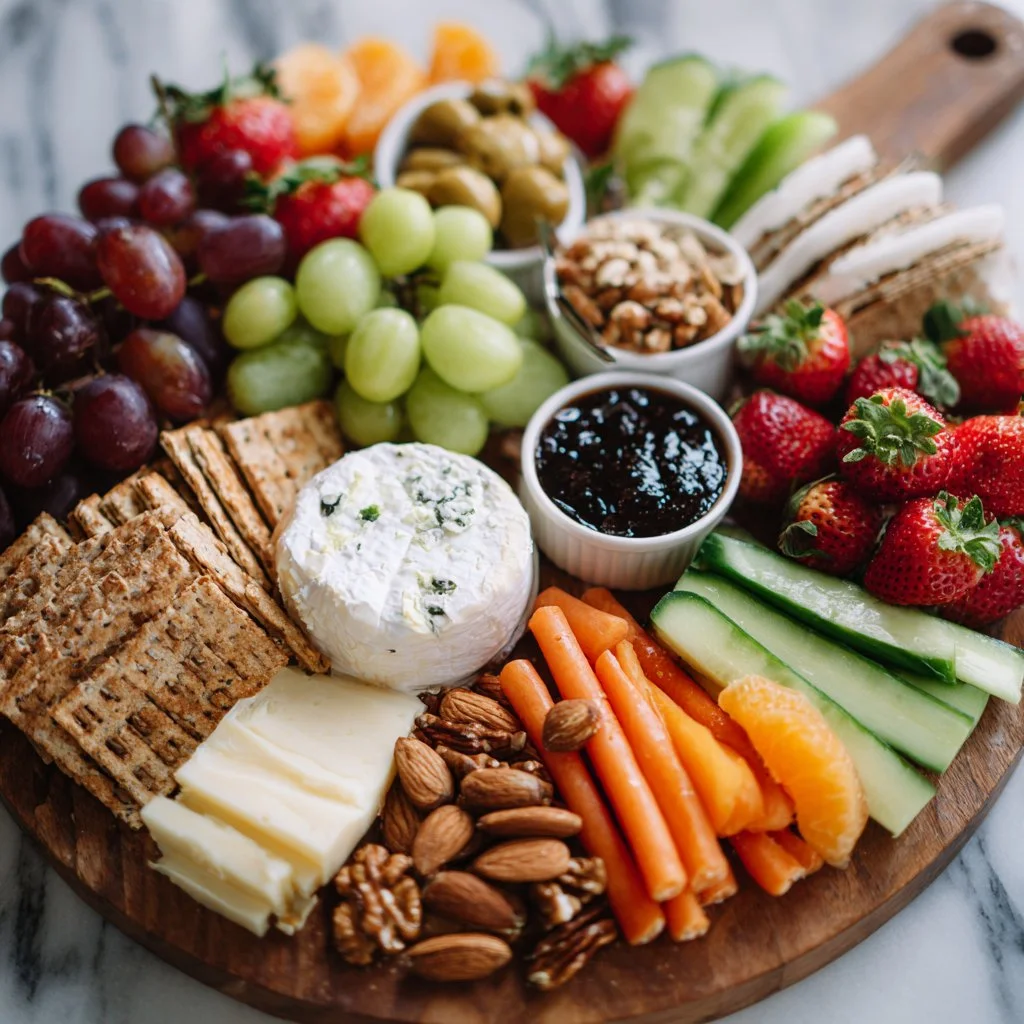
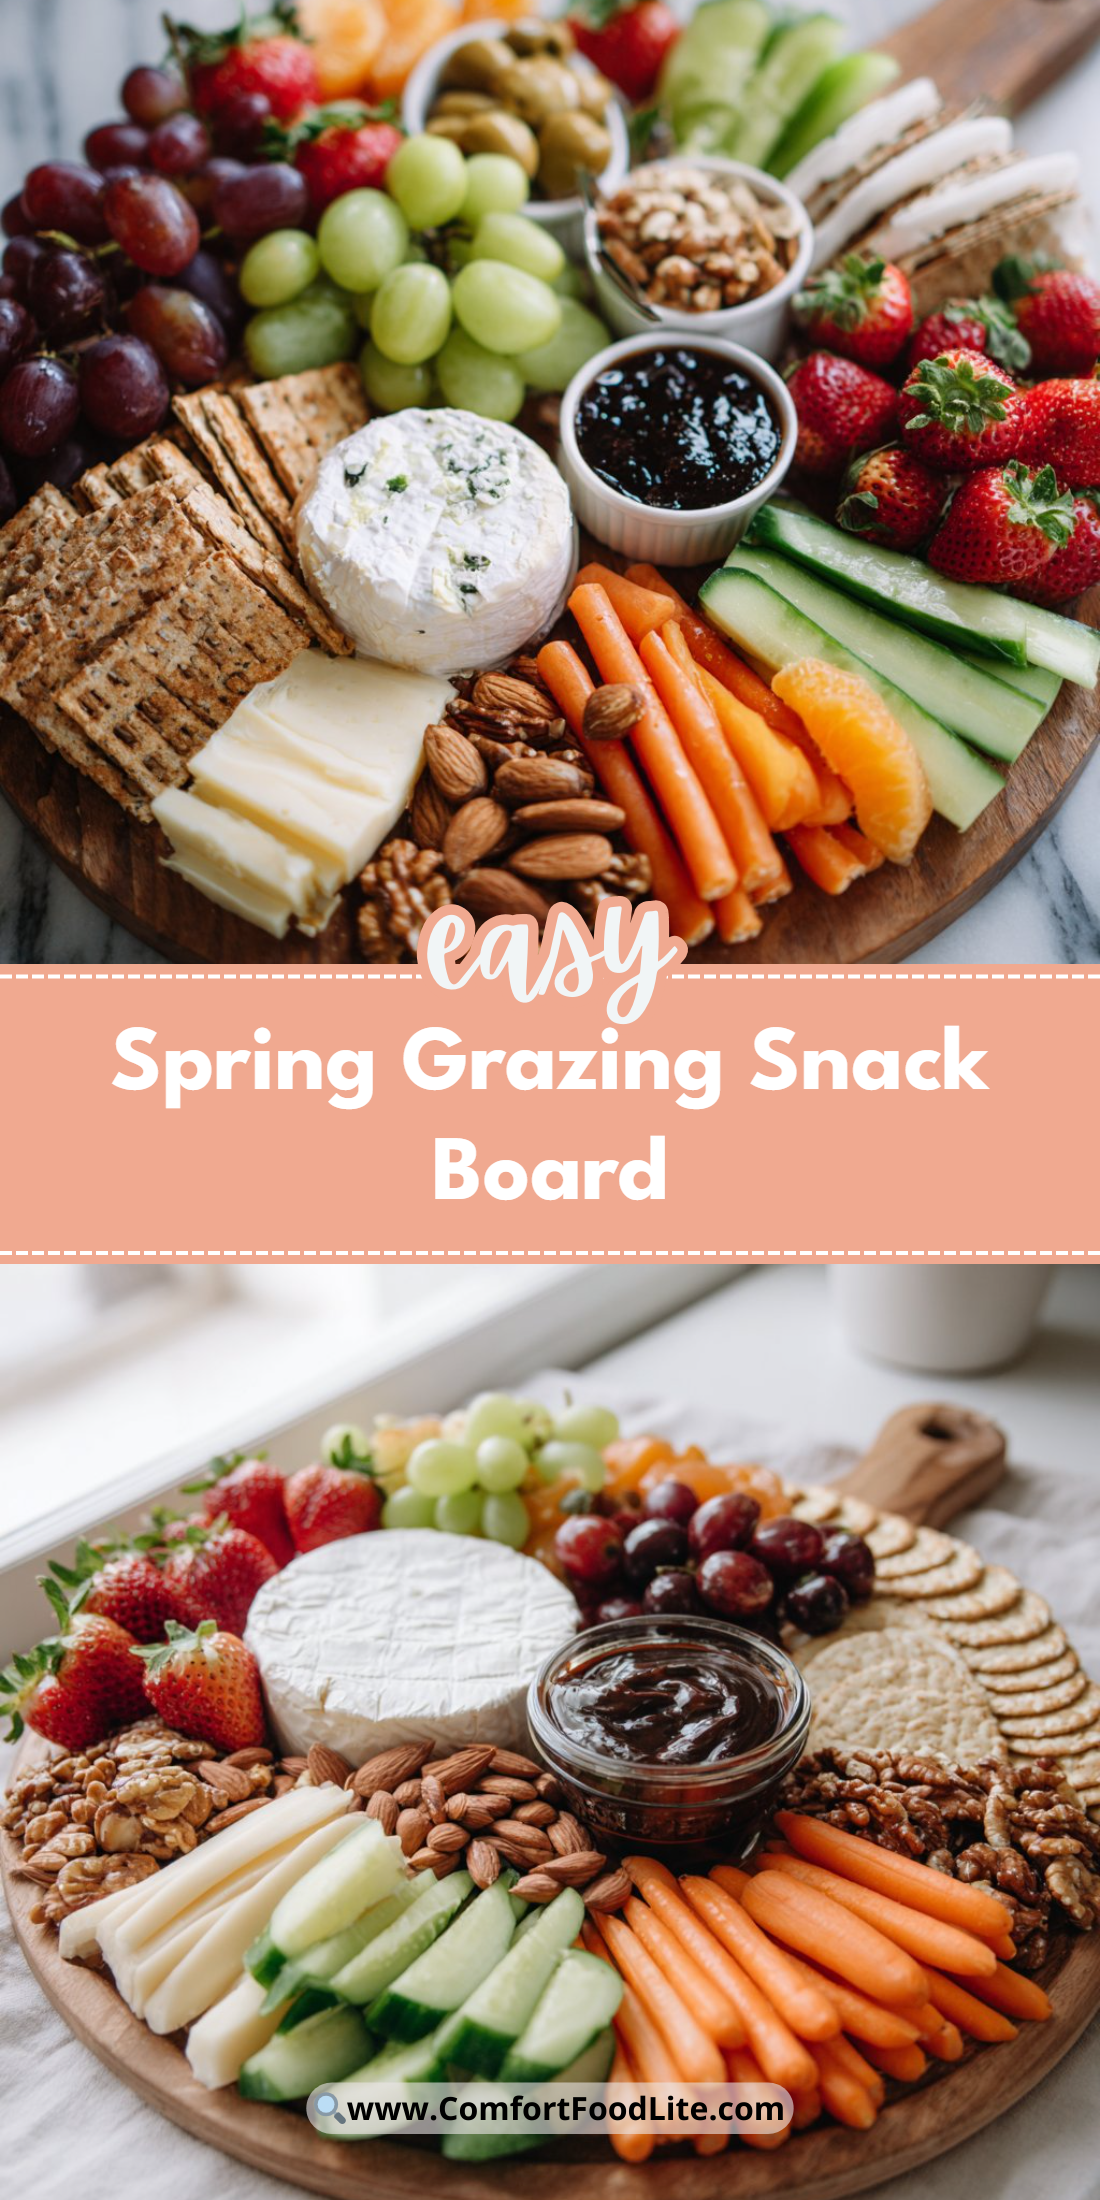
Fresh, colorful, and endlessly shareable — this Spring Grazing Snack Board is the kind of platter that turns a small gathering into an event. It’s quick to assemble and even quicker to disappear.
You’ll love how the sweet fruit, creamy cheeses, crunchy nuts, and vibrant veggies play together. It’s perfect for backyard brunches, bridal showers, or an easy family snack.
If you want inspiration for themed snack boards, check out a festive take I liked for St. Patrick’s Day here: St. Patrick’s Day snack board ideas.
Why You’ll Love This Spring Grazing Snack Board
- Visually stunning with minimal effort.
- Mix of sweet, salty, creamy, and crunchy.
- Makes feeding a crowd easy and flexible.
- Mostly no-cook; great for warm weather.
- Easy to customize for dietary needs.
- Works as a centerpiece and appetizer in one.
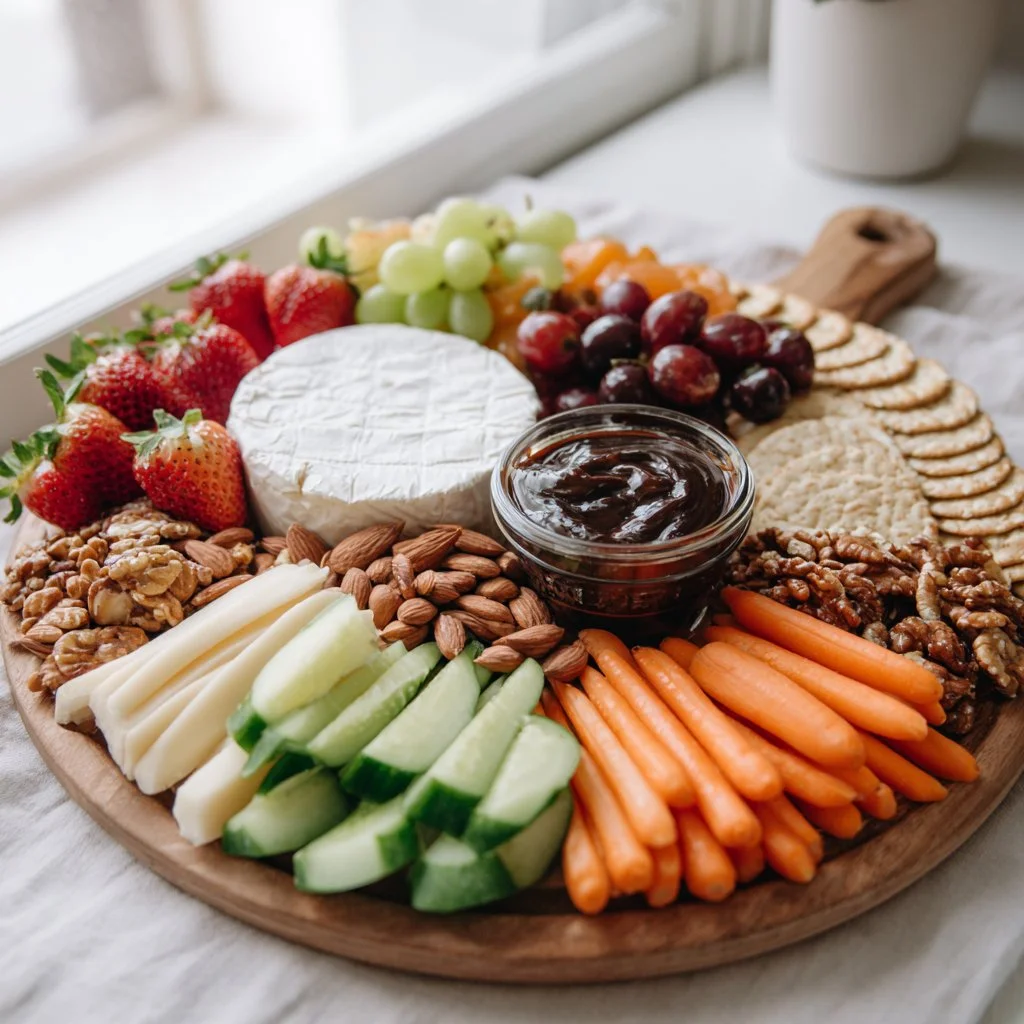
This board delivers bright, fresh flavors with a contrast of textures: soft Brie and goat cheese against crisp cucumbers and toasted nuts, plus juicy strawberries and melon that add bursty sweetness. The overall mouthfeel moves from creamy to crunchy to juicy in satisfying bites that keep guests coming back.
★★★★★ “I assembled this Spring Grazing Snack Board for a family brunch and it was a showstopper — so simple, so beautiful, and everyone loved the combinations!” — Megan R.
Key Ingredients for Spring Grazing Snack Board
Pick high-quality Brie cheese for a creamy center. Choose a triple-cream or classic Brie with a thin white rind; it should be slightly yielding at room temperature. If you substitute with camembert, expect similar creaminess but a stronger mushroomy note.
Strawberries add bright sweetness and color. Buy firm, glossy berries with green tops intact for freshness and shelf life. If you swap strawberries for raspberries, you’ll get more delicate texture and a tarter bite, so handle them gently.
Grapes are perfect for bite-sized snacking and natural sweetness. Look for firm clusters with no shriveled stems; seedless varieties are guest-friendly. Swap to sliced apples if you need a crunchier fruit, but brush with lemon to prevent browning.
Cheddar cheese gives a sharp, savory counterpoint. Choose a medium-aged cheddar for balance; pre-sliced or a block you can crumble the corner of adds rustic shape. If replaced with a milder cheese like Monterey Jack, the board will skew sweeter and lose some of the savory snap.
Full Ingredient List for Spring Grazing Snack Board
- Brie cheese
- Strawberries
- Grapes
- Melon (cantaloupe or honeydew)
- Carrots (baby or sliced)
- Cucumbers (sliced)
- Cherry tomatoes
- Almonds
- Walnuts
- Cheddar cheese
- Goat cheese
- Hummus
- Pesto
- Yogurt dip
- Crackers or breadsticks
- Olives
- Honey or chocolate (for drizzling)
Step-by-Step Instructions for Spring Grazing Snack Board
Step 1: Collect ingredients, tools, and lay out a large board or platter. Rinse and dry all produce thoroughly.
Gather cheeses, fruits, vegetables, nuts, dips, and crackers. Use a large wooden board, marble slab, or sheet tray depending on the crowd size. Rinse berries and delicate greens last and pat dry to avoid water pooling.
Pro Tip: The board should look clean and spacious; no wet patches and all fruit glossed but not dripping.
Step 2: Cut and place the cheeses first to create focal points on the board.
Trim a wedge from the Brie so guests can easily spoon out the creamy center. Place the goat cheese log and a block of cheddar with a small knife or cheese plane next to each focal cheese. Spread cheeses out to create visual anchors and natural flow for arranging other items.
Pro Tip: Each cheese should be easy to access and show its texture; the Brie should look soft at the edges and intact at the center.
Step 3: Arrange the fruits in clusters to enhance visual appeal.
Group strawberries, grapes, and melon in separate clusters around the cheeses. Keep similar colors near each other to create color blocks, and alternate warm and cool tones for contrast. Use whole grapes in small bunches and sliced melon in fan shapes.
Pro Tip: Fruit clusters should look abundant and juicy; grapes shine when they reflect light and strawberries show green caps.
Step 4: Prepare the vegetables and arrange them near the dips.
Slice cucumbers and cherry tomatoes, and arrange carrots either in neat bundles or fanned piles. Position hummus, pesto, and a yogurt dip in small bowls close to these vegetables so guests reach naturally from veggies to dips.
Pro Tip: The dip area should look inviting and clean; dips should not be overfilled and should have a smooth, glossy surface.
Step 5: Distribute small bowls of dips and scatter nuts across the board.
Place almonds and walnuts in small piles or tiny bowls to prevent rolling. Scatter a few nuts around the board to fill gaps and add texture. Add olives in a small dish near savory cheeses.
Pro Tip: Nuts and bowls act as bridge elements; they should appear casually scattered but not messy.
Step 6: Finalize with olives and drizzle honey or chocolate over the fruits, positioning crackers last for freshness.
Drizzle honey lightly over the Brie or fruits for shine and sweetness, or gently drizzle melted dark chocolate over melon for a decadent touch. Arrange crackers and breadsticks at the edge of the board so they stay crisp.
Pro Tip: The finished board should smell sweet and savory, look layered, and have crackers crisp and separate from moist fruit.
Expert Tips for Spring Grazing Snack Board
- Chill harder cheeses and leave soft cheeses at room temperature for 20–30 minutes to reach ideal creaminess.
- Use a variety of textures: add something soft, something crunchy, something juicy, and something creamy.
- For texture troubleshooting, thin-slice cucumbers for crispness and roast nuts briefly for added crunch if they feel stale.
- Use small bowls for wet items (hummus, olives) to keep the board from getting soggy.
- Invest in a large, flat board or removable sections so you can refill pieces without disturbing the layout.
- Avoid tiny seeds (like pomegranate without a spoon) unless you include a spoon; seeds can become messy.
- Keep crackers and breadsticks off the main surface until serving time to maintain crunch.
- Common mistake: overcrowding. Leave small gaps to let each cluster breathe visually and make the board easier to navigate.
Storage & Freezing for Spring Grazing Snack Board
Refrigerator storage: Store leftover cheeses wrapped in wax paper and placed in an airtight container. Keep cut fruit and sliced vegetables in separate airtight containers; use within 2–3 days for best texture.
Freezer storage: Whole nuts freeze well for up to 3 months; store in freezer bags with as much air removed as possible. Soft cheeses and fresh fruit do not freeze well — texture will suffer — so avoid freezing the assembled board.
Thawing and reheating: Thaw nuts in the fridge or at room temperature for 30–60 minutes before serving. If you refrigerate leftover assembled components, let cheeses sit at room temperature 20–30 minutes before serving to regain creaminess.
Best containers: Use shallow airtight containers for fruit and vegetables to avoid crushing. For cheeses, small paper-wrapped parcels inside a rigid container prevent flavor transfer.
Variations & Substitutions for Spring Grazing Snack Board
Mediterranean variation: Swap cheddar for feta chunks and add marinated artichokes, roasted red peppers, and pita chips. The board will take on tangy, herby notes and pair well with olive-forward bites.
Kid-friendly variation: Replace walnuts with sunflower seeds and add sliced apples and mini sandwiches. This softens flavors, removes choking hazards for small kids, and keeps things simple.
Vegan variation: Use a plant-based Brie alternative, hummus as the creamy center, and roasted chickpeas for crunch. The board remains visually rich and satisfying without dairy.
Sweet-and-salty dessert board: Use dark chocolate drizzles, honey on Brie, candied nuts, and add figs or dried apricots. This version leans dessert-forward and pairs beautifully with dessert wines or coffee.
Frequently Asked Questions About Spring Grazing Snack Board
Q: How long before serving should I assemble the Spring Grazing Snack Board?
A: Assemble most of the board 15–30 minutes before guests arrive. Keep crackers off until the last 5–10 minutes to preserve crunch. Soft cheeses are best pulled from the fridge 20–30 minutes before serving so they reach creamy texture.
Q: What are good allergy-friendly swaps for nuts on the Spring Grazing Snack Board?
A: Replace nuts with roasted chickpeas, pumpkin seeds, or crunchy rice crackers to maintain texture. Label the swap clearly and separate allergy-friendly items in their own bowls to prevent cross-contact.
Q: Can I make the Spring Grazing Snack Board ahead of time?
A: You can prep elements up to a day ahead — wash and dry fruit, cut melon, slice cucumbers, and toast nuts. Store components separately in airtight containers and assemble the board within 1–2 hours of serving for best presentation.
Q: How do I keep berries from getting soggy on the Spring Grazing Snack Board?
A: Rinse berries only right before arranging and dry them thoroughly. Line a tray with paper towel when storing prepped berries to absorb excess moisture and arrange them on the board just before guests arrive.
Q: What size board should I use for the Spring Grazing Snack Board?
A: For 6–8 people, choose a board at least 18×12 inches; for larger crowds, use a 24×18-inch board or multiple boards. Use a mix of small bowls and direct placement to create layers without overcrowding.
Final Thoughts on Spring Grazing Snack Board
If you loved this assembly guide, please leave a star rating in the recipe card below or pin this board to your party planning board on Pinterest. For more layout inspiration and large-board ideas, see this helpful roundup from The Ultimate Spring Grazing Board – The Original Dish, a great oversized option at Giant Spring Grazing Board for a Crowd – Gathered Living, and an easy spring setup from Easy Spring Charcuterie Board – Reluctant Entertainer.

Spring Grazing Snack Board
Ingredients
Cheeses
- 1 wheel Brie cheese Choose high-quality Brie for creaminess.
- 1 block Cheddar cheese Use medium-aged cheddar for balance.
- 1 log Goat cheese Soft and creamy texture.
Fruits
- 1 cup Strawberries Choose firm and glossy berries.
- 1 cup Grapes Seedless varieties are preferable.
- 1 cup Melon Cantaloupe or honeydew, sliced.
Vegetables
- 1 cup Carrots Baby or sliced.
- 1 cup Cucumbers Sliced.
- 1 cup Cherry tomatoes Sliced or whole.
Nuts and Dips
- 1/2 cup Almonds Can be placed in small bowls.
- 1/2 cup Walnuts Can be placed in small bowls.
- 1 cup Hummus For dipping vegetables.
- 1 cup Pesto For dipping vegetables.
- 1 cup Yogurt dip For dipping vegetables.
Other Ingredients
- 1 Crackers or breadsticks To serve with the board.
- 1/2 cup Olives For a savory touch.
- 2 tbsp Honey or chocolate For drizzling.
Instructions
Preparation
- Collect ingredients, tools, and lay out a large board or platter. Rinse and dry all produce thoroughly.
- Cut and place the cheeses first to create focal points on the board.
- Arrange the fruits in clusters to enhance visual appeal.
- Prepare the vegetables and arrange them near the dips.
- Distribute small bowls of dips and scatter nuts across the board.
- Finalize with olives and drizzle honey or chocolate over the fruits, positioning crackers last for freshness.