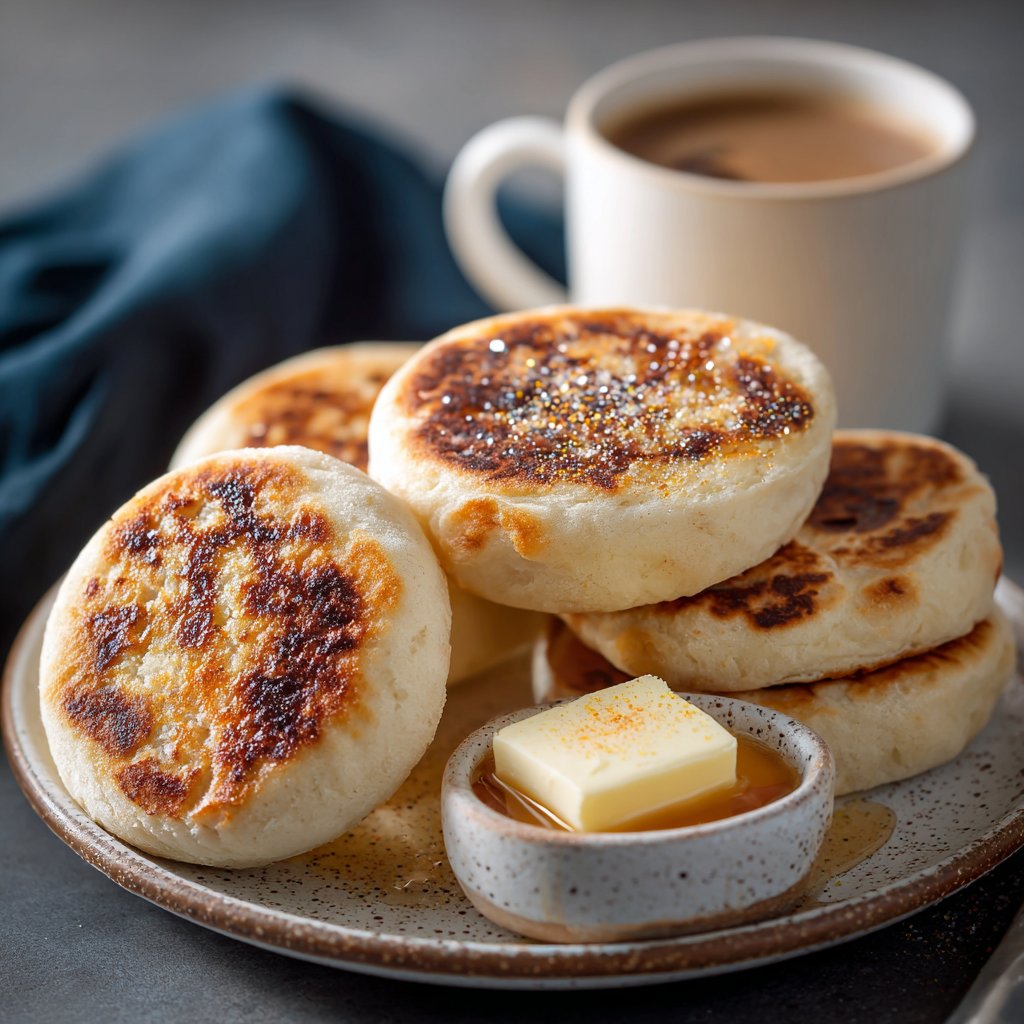
I learned to love these Sourdough English Muffins the first time I flipped one and saw that perfect, lacy interior—those nooks and crannies that trap butter and jam like tiny flavor pockets. This recipe uses a fed sourdough starter and a quick skillet-cook method so you get tangy, chewy muffins that toast up beautifully for weekend brunches, breakfast sandwiches, or anytime you want something more interesting than store-bought muffins.
Why you’ll love this dish
Homemade sourdough English muffins bring a depth of flavor and texture that store versions rarely match. The natural tang from the starter, combined with a short rise and a skillet finish, gives a crusty exterior and a soft, open crumb—ideal for toasting and piling with eggs, avocado, or smoked salmon. They’re forgiving, budget-friendly, and kid-approved once they hit the toaster.
“These have the perfect chew and a buttery, tangy flavor—my family asks for them every weekend.” — A home baker who swapped store-bought for homemade
Reasons to try it:
- Fast-ish: uses an active starter and a 1–2 hour rise instead of an overnight dough.
- Versatile: make breakfast sandwiches, dinner sides, or sweet toasts.
- Economical: basic pantry staples, no specialty equipment required.
- Rewarding: the visible nooks and crannies are worth the small amount of hands-on time.
How this recipe comes together
Overview: Mix the fed starter with milk and sugar, fold in flour and leavening, then knead briefly. Let the dough rise until doubled, shape into rounds, rest on a cornmeal-dusted sheet, and cook gently on a preheated skillet until golden on both sides. Split, toast, and serve.
Expect about 2–3 hours total, most of it inactive rising time. Active hands-on time is roughly 20–30 minutes.
What you’ll need
- 1 cup sourdough starter (active and bubbly; fed within 4–8 hours)
- 2 cups all-purpose flour (substitute 50/50 whole wheat for a nuttier flavor; you may need an extra tablespoon water)
- 1/2 cup milk (dairy or unsweetened plant milk)
- 2 tablespoons sugar (or honey/maple syrup)
- 1/2 teaspoon salt
- 1/2 teaspoon baking soda
- 2 tablespoons unsalted butter (melted; use oil for dairy-free)
- Cornmeal for dusting
Notes: If your starter is very stiff, loosen it with a tablespoon of water before measuring. The baking soda gives a little extra lift and helps that open crumb—don’t skip it unless you want a denser muffin.
Step-by-step instructions
- Whisk the sourdough starter, milk, and sugar in a large bowl until blended.
- Add the flour, salt, and baking soda gradually. Stir until a shaggy dough forms.
- Add the melted butter and knead on a lightly floured surface for about 5 minutes. You want a smooth, slightly tacky dough.
- Return the dough to the bowl, cover with a clean towel or plastic wrap, and let it rise in a warm spot for 1–2 hours, or until roughly doubled.
- Gently deflate the dough and divide it into equal pieces (6–8 pieces, depending on desired size). Shape each into a round, about 3–4 inches across.
- Dust a baking sheet with cornmeal and place the rounds on it, leaving space between them.
- Cover and let the rounds rest and puff for 30 minutes.
- Preheat a heavy skillet or griddle over medium heat. Cook each muffin 5–7 minutes per side, until golden brown and cooked through—lower heat slightly if they brown too fast.
- Transfer to a rack to cool. Split with a fork for the classic nooks-and-crannies texture, then toast and serve.
Best ways to enjoy it
- Classic: split, toast, and slather with butter and jam.
- Breakfast sandwich: cheddar, a fried egg, and bacon or sauteed greens.
- Savory brunch: smear with cream cheese, smoked salmon, capers, and dill.
- Sweet twist: cinnamon butter and sliced banana for a simple dessert-style toast.
Pair with a strong coffee or a citrusy tea to balance the sourdough tang.
Storage and reheating tips
- Short-term: Store cooled muffins in an airtight container at room temperature for up to 2 days.
- Refrigerate: Keep in the fridge for up to 5 days; bring to room temperature or toast before serving.
- Freeze: Split the muffins, wrap individually in plastic wrap or foil, and freeze up to 3 months. Reheat from frozen in a toaster or oven at 350°F (175°C) for 8–12 minutes.
- Food safety note: because these are bread, spoilage risk is low, but look for mold or off smells—discard if present.
Helpful cooking tips
- Use an active starter: The starter should be bubbly and responsive for best flavor and rise.
- Control the pan heat: Medium is best. If the outside browns too quickly, lower the heat so the interior cooks without burning.
- Don’t smash when splitting: Use a fork or a serrated bread knife to split—this preserves the interior texture for excellent toasting.
- Cornmeal prevents sticking: Don’t skip it; it adds texture and keeps muffins from sticking to the sheet.
- Make uniform sizes: Use a kitchen scale or measure dough into equal pieces for even cooking.
Creative twists
- Whole-grain: Replace up to half the flour with whole wheat and add a tablespoon of honey for balance.
- Seeded tops: Brush rounds with a little water and sprinkle sesame or poppy seeds before the second rise.
- Cheesy: Fold 1/2 cup grated cheddar into the dough for savory muffins.
- Overnight option: After shaping, refrigerate the rounds overnight (covered) and cook from cold in the morning—add a few extra minutes per side.
- Vegan: Use plant-based milk and oil or vegan butter instead of dairy.
FAQ
Q: Can I use unfed or discard starter?
A: Discard starter (unfed) will produce a milder flavor and may give less rise. For best texture and tang, use an active, fed starter.
Q: What if I don’t have a skillet—can I bake them?
A: Yes. Bake at 375°F (190°C) for 12–18 minutes on a cornmeal-dusted sheet. You won’t get the same griddle crust, but the interior will be similar.
Q: Why add baking soda? Can I skip it?
A: Baking soda reacts with the acidic starter to add lift and a more open crumb. Skipping it yields denser, chewier muffins—still tasty, but different.
Q: Can I make these gluten-free?
A: Gluten-free flours behave differently. You’ll need a blend formulated for yeast breads and likely xantham gum for structure. Expect texture to vary.
Q: How do I know they’re done cooking on the skillet?
A: They should be golden brown on both sides and sound hollow when tapped. A thermometer in the center should read around 190–200°F (88–93°C) for fully baked bread.
Conclusion
If you want additional variations or a longer, overnight approach, this roundup from Sourdough English Muffins – Easy Overnight Recipe! – Little Spoon has helpful tweaks. For another tested method with great photos and a soft, puffy result, see Soft & Puffy Sourdough English Muffins | Heartbeet Kitchen.

Sourdough English Muffins
Ingredients
Main ingredients
- 1 cup sourdough starter (active and bubbly; fed within 4–8 hours) Ensure it's active for best results.
- 2 cups all-purpose flour Can substitute half with whole wheat for a nuttier flavor.
- 1/2 cup milk (dairy or unsweetened plant milk) Use for moisture.
- 2 tablespoons sugar (or honey/maple syrup) Sweetens the muffins.
- 1/2 teaspoon salt Enhances flavor.
- 1/2 teaspoon baking soda Adds lift for a lighter texture.
- 2 tablespoons unsalted butter (melted; use oil for dairy-free) Adds richness.
- Cornmeal for dusting Prevents sticking to the baking sheet.
Instructions
Preparation
- Whisk the sourdough starter, milk, and sugar in a large bowl until blended.
- Add the flour, salt, and baking soda gradually. Stir until a shaggy dough forms.
- Add the melted butter and knead on a lightly floured surface for about 5 minutes, until you have a smooth, slightly tacky dough.
- Return the dough to the bowl, cover with a clean towel or plastic wrap, and let it rise in a warm spot for 1–2 hours, or until roughly doubled.
- Gently deflate the dough and divide it into 6–8 equal pieces. Shape each into a round, about 3–4 inches across.
- Dust a baking sheet with cornmeal and place the rounds on it, leaving space between them.
- Cover and let the rounds rest and puff for 30 minutes.
Cooking
- Preheat a heavy skillet or griddle over medium heat.
- Cook each muffin 5–7 minutes per side until golden brown and cooked through—lower heat slightly if they brown too fast.
- Transfer to a rack to cool. Split with a fork for the classic nooks-and-crannies texture, then toast and serve.