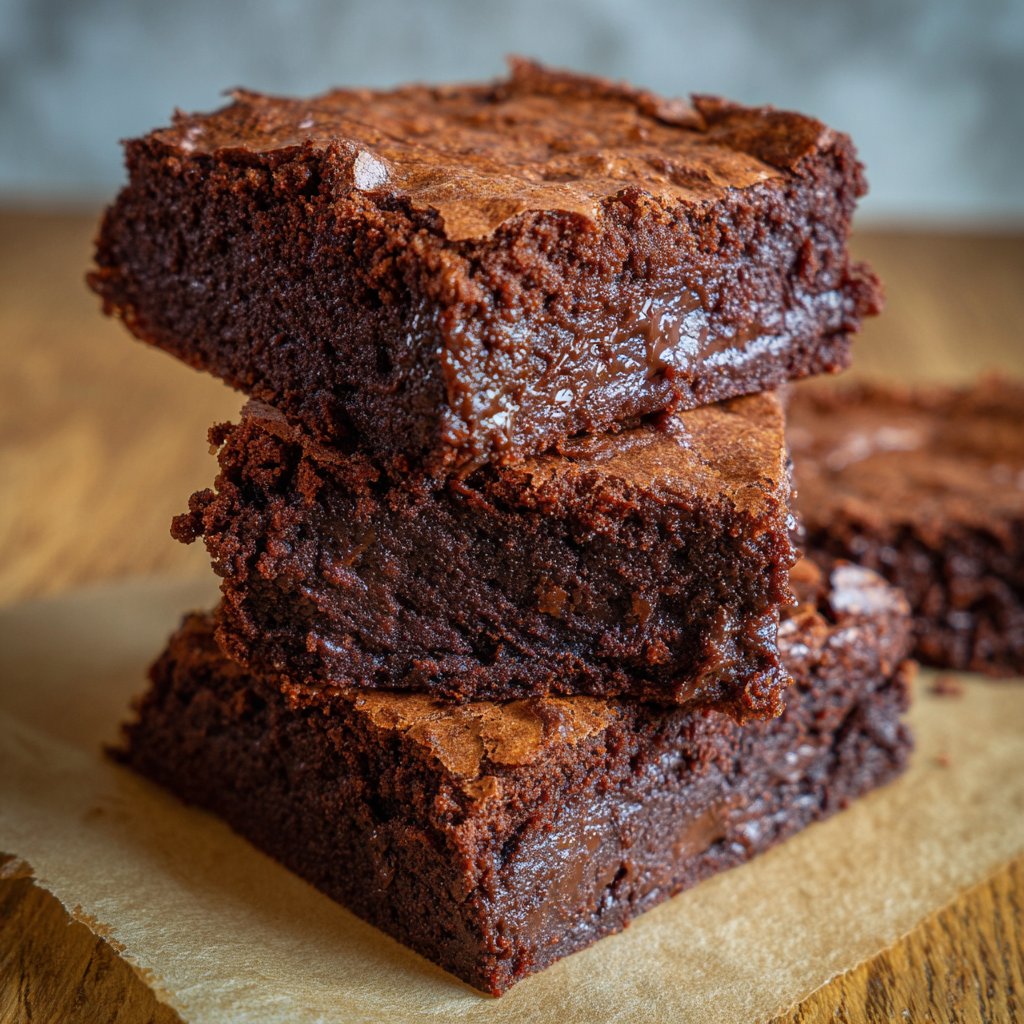
I first made these brownies on a rainy afternoon when my starter was in need of a haircut. The result was a rich, deeply chocolatey pan of brownies that somehow tasted both classic and a little tangy from the sourdough discard. These are dense, slightly fudgy brownies that use discard to add moisture and depth — and they’re surprisingly foolproof once you follow the timing and baking notes below.
Why you’ll love this dish
This recipe turns leftover sourdough starter into something everyone fights over. It’s an easy way to reduce waste and amplify flavor without changing the technique you already know for brownies. The brownies are:
- Deeply chocolatey from Dutch-processed cocoa and lots of chocolate chips.
- Moist and slightly tangy thanks to ½ cup sourdough discard.
- Make-ahead friendly — bake one pan for a crowd or keep bites in the freezer for later.
These are perfect for potlucks, school bake sales, or any time you want a crowd-pleasing bar that feels a little elevated. The long bake time produces an even set center (using an aluminum pan is critical — more on that below).
“Dense, chocolatey, and unexpectedly tangy — the perfect way to use up starter discard. I couldn’t stop at one square.” — a friend who requested these weekly
The cooking process explained
Quick overview so you know what to expect:
- Prep and line an 8-inch aluminum square pan. Aluminum helps brownies cook through evenly.
- Melt butter, whisk in sugar until glossy, then temper in whole eggs and yolks off heat.
- Stir in cocoa, discard, vanilla, coffee (optional), baking powder, and salt.
- Fold in chocolate chips (they mostly melt into the batter) and gently incorporate flour.
- Bake low and slow (60–75 minutes) until set; cool fully before cutting.
This is mostly a stovetop mixing method with a long bake. No mixer required — which keeps the crumb dense and fudgy.
What you’ll need
- 1 cup (227 grams, 2 sticks) unsalted butter
- 2 ⅓ cups (450 grams) granulated sugar
- 2 large (100 grams) eggs
- 2 large (36 grams) egg yolks
- 1 cup (106 grams) Dutch-processed cocoa
- ½ cup (100 grams) sourdough starter discard
- 1 tablespoon vanilla extract
- 1 tablespoon brewed coffee (optional — deepens chocolate flavor)
- 1 teaspoon baking powder
- 1 teaspoon (3 grams) Diamond Crystal Kosher Salt (if using table salt or Morton’s, reduce by half or weigh precisely)
- 2 cups (340 grams) semi-sweet chocolate chips
- 1 cup + 1 tablespoon (130 grams) all-purpose flour
Notes and substitutions:
- Dutch-processed cocoa gives a darker, smoother chocolate flavor. If you only have natural cocoa, the flavor will still be great but slightly brighter; you may lose a bit of that deep color.
- You can swap some or all of the semi-sweet chips for chopped dark chocolate for a more intense chocolate hit.
- For dairy-free, use a vegan butter substitute and dairy-free chocolate — texture may vary.
Directions to follow
- Preheat the oven to 350°F (175°C). Position a rack in the middle of the oven. Butter an 8-inch aluminum square pan and line it with parchment, leaving an overhang to lift brownies out later. Using an aluminum pan helps these brownies cook through evenly; glass or dark pans will change bake time.
- In a medium saucepan, melt the butter over medium-low heat. Once completely melted, add the granulated sugar. Whisk constantly for 2–3 minutes until the mixture is glossy and slightly thickened. This step helps dissolve some sugar and gives a smoother top.
- Remove the pan from heat. Whisk in the whole eggs, one at a time, then the yolks, whisking until smooth and glossy. Work quickly so the eggs warm but don’t scramble.
- Add the Dutch-processed cocoa, sourdough discard, vanilla extract, brewed coffee (if using), baking powder, and salt. Whisk until fully combined into a homogeneous batter.
- Stir in the chocolate chips. Fold until the chips are mostly melted into the hot batter; you’ll still see some chips. This yields ribbons of melted chocolate and pockets of chip.
- Gently fold in the flour until just combined. Don’t overmix — you want a dense, fudgy texture, not a cakey one.
- Pour the batter into the prepared pan and smooth the top with an offset spatula or back of a spoon.
- Bake for 60–75 minutes. Start checking at 60 minutes: insert a toothpick into the center. It should come out clean (this recipe bakes until set rather than fudgy-wet). If the top darkens too fast, loosely tent with foil for the remaining bake time.
- Remove from oven and let cool in the pan for 1 hour — this resting time is important so the brownies finish setting. Use the parchment overhang to lift brownies out and finish cooling on a wire rack.
- Once fully cooled, slice into 16 squares. Serve room temperature or warm with a scoop of ice cream.
Best ways to enjoy it
- Classic: a single warm square with a dusting of flaky sea salt on top.
- Sundae: top a warm brownie with vanilla or sourdough ice cream and chocolate sauce.
- Crowds: plate on a wooden board with espresso shots or strong coffee — these stand up to bold drinks.
- Kid-friendly: add mini marshmallows or top with a smear of chocolate-hazelnut spread for parties.
Storage and reheating tips
- Room temperature: Store in an airtight container for up to 3 days. Keep slices layered with parchment to prevent sticking.
- Refrigerator: For longer life, refrigerate up to 7 days. Bring back to room temperature before serving for best texture.
- Freezing: Wrap individual squares tightly in plastic, then place in a freezer bag for up to 3 months. Thaw at room temperature or warm gently in a low oven (275°F) for 8–10 minutes.
Food safety note: these brownies are fully baked (contain cooked eggs), so refrigeration is mainly for freshness, not safety. Discard if you notice off smells, mold, or excessive dryness.
Helpful cooking tips
- Aluminum pan matters: this recipe was developed for an 8-inch aluminum pan — it conducts heat differently than glass or ceramic. If you use glass or a dark pan, reduce oven temperature by 25°F and check earlier.
- Warm batter helps the chips melt: fold chips into warm batter so they soften and make a glossy ribbon through the brownies.
- Don’t overbeat after flour: stirring flour too much develops gluten and produces cakier brownies.
- Toothpick test: these bake until a toothpick comes out clean, which may feel counterintuitive if you like ultra-fudgy brownies. If you prefer gooey centers, reduce bake time by 10–15 minutes and accept a looser set.
- Tent with foil: if top is browning too fast, tent lightly with foil to protect color while center finishes.
Creative twists
- Salted oat crust: press ½ cup crushed graham crackers or oats mixed with 2 tbsp melted butter on the bottom before pouring batter for a crunch layer.
- Nutty swap: fold in 1 cup toasted walnuts or pecans for texture.
- Espresso boost: use 2 tablespoons brewed espresso instead of 1 tablespoon coffee for a deeper mocha note.
- Gluten-free: replace the all-purpose flour with a 1:1 gluten-free flour blend and add 1/8 teaspoon xanthan gum if your blend lacks it.
- Boozy: fold 1 tablespoon bourbon into the batter for a grown-up note after baking.
Helpful answers
Q: How long does prep take?
A: Active hands-on time is ~20 minutes. The total time including baking and cooling is about 2.5–3 hours.
Q: Can I use fresh starter instead of discard?
A: Use discard (unfed starter) as written. If you use recently fed starter the extra acidity and hydration may alter texture slightly.
Q: Why does this recipe call for a long bake time?
A: The recipe bakes longer to produce an evenly set center in an 8-inch aluminum pan. That low-and-slow approach avoids underdone middles while still keeping density.
Q: Are these brownies safe with raw eggs?
A: Eggs in this recipe are fully baked during the long bake, so they’re safe to eat when properly baked and cooled.
Q: Can I halve the recipe for a smaller pan?
A: Yes — halve ingredients and use a smaller pan. Reduce bake time and watch closely; center will set sooner.
Conclusion
If you want more ways people are using sourdough discard in desserts, check this version of Sourdough Brownies (Discard Recipe) – Little Spoon Farm for another take. For a deep-dive into why discard makes such fudgy brownies, read the King Arthur Baking post on The fudgiest brownies are sourdough discard brownies | King Arthur.
Sourdough Discard Brownies
Ingredients
Brownie Base Ingredients
- 2 sticks 1 cup (227 grams) unsalted butter
- 2 ⅓ cups 450 grams granulated sugar
- 2 large 2 large (100 grams) eggs
- 2 large 2 large (36 grams) egg yolks
- 1 cup 1 cup (106 grams) Dutch-processed cocoa
- ½ cup ½ cup (100 grams) sourdough starter discard
- 1 tablespoon 1 tablespoon vanilla extract
- 1 tablespoon 1 tablespoon brewed coffee (optional) Deepens chocolate flavor
- 1 teaspoon 1 teaspoon baking powder
- 1 teaspoon 1 teaspoon (3 grams) Diamond Crystal Kosher Salt If using table salt or Morton’s, reduce by half or weigh precisely
- 2 cups 2 cups (340 grams) semi-sweet chocolate chips
- 1 cup + 1 1 cup + 1 tablespoon (130 grams) all-purpose flour
Instructions
Preparation
- Preheat the oven to 350°F (175°C) and position a rack in the middle of the oven.
- Butter an 8-inch aluminum square pan and line it with parchment, leaving an overhang for easy removal.
Mixing
- In a medium saucepan, melt the butter over medium-low heat.
- Once completely melted, whisk in the granulated sugar for 2–3 minutes until glossy.
- Remove from heat and quickly whisk in the eggs and yolks until smooth.
- Add cocoa, sourdough discard, vanilla, optional coffee, baking powder, and salt; whisk until homogeneous.
- Stir in the chocolate chips until mostly melted, then gently fold in the flour.
Baking
- Pour the batter into the prepared pan and smooth the top.
- Bake for 60–75 minutes. Start checking at 60 minutes with a toothpick; it should come out clean.
- Let cool in the pan for 1 hour before lifting out using parchment overhang and cooling on a wire rack.
- Once fully cooled, slice into 16 squares.