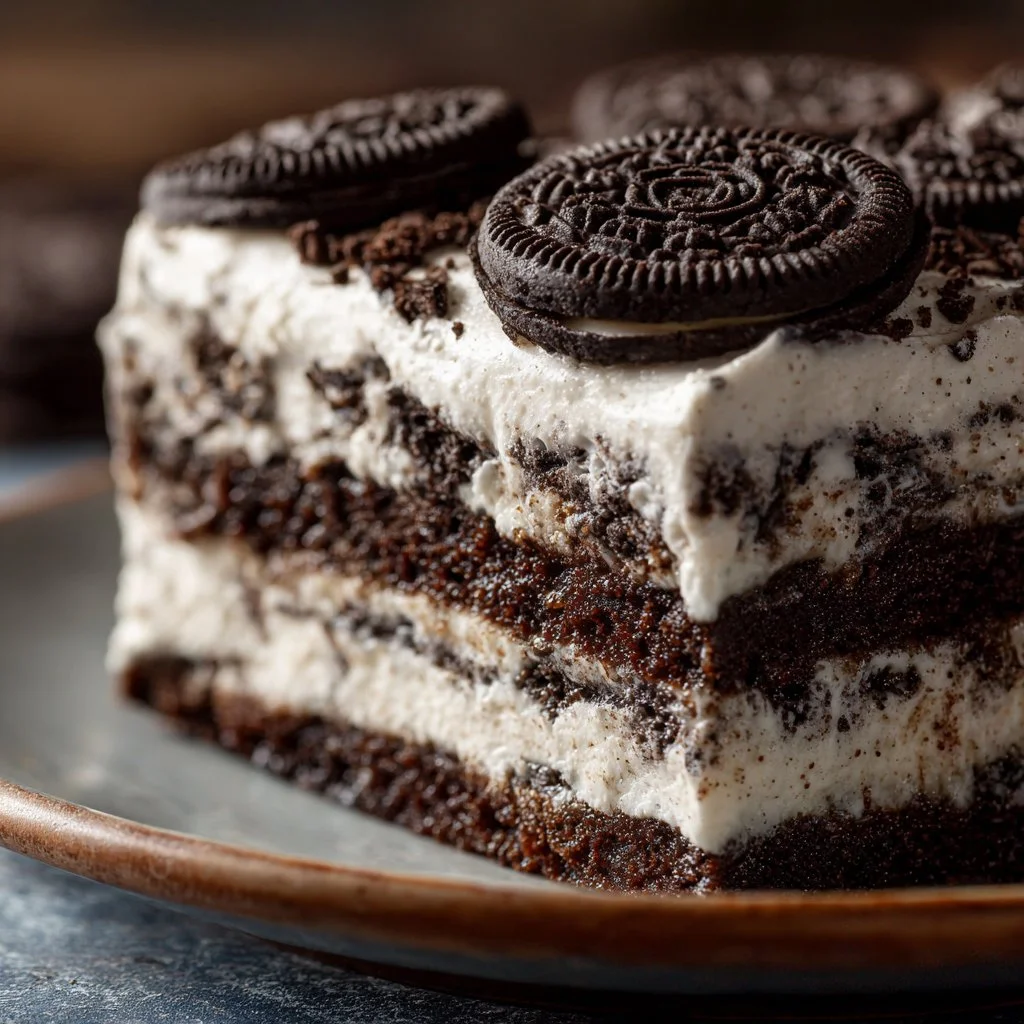
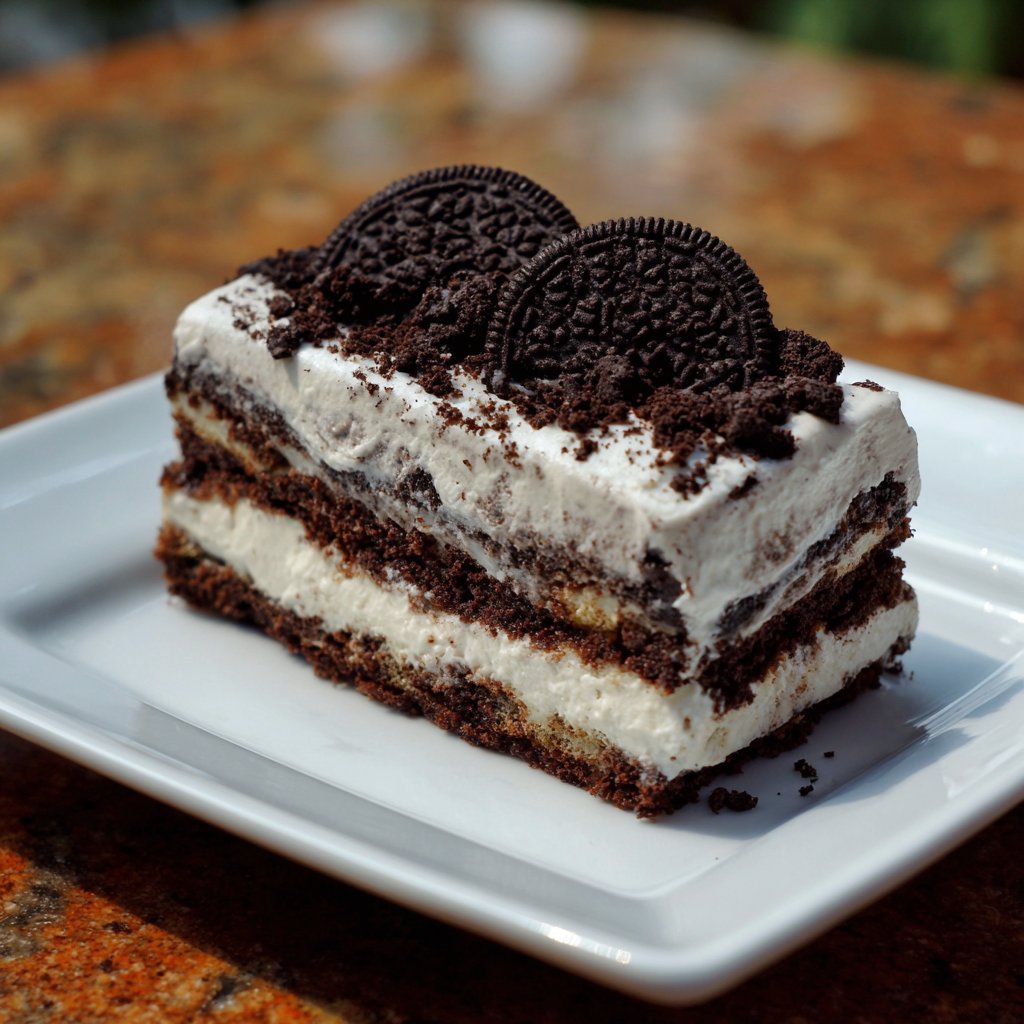
My family calls this the “fast-party cake” — Oreo Icebox Cake layers crushed cookies and whipped cream, then chills into a fudgy, sliceable dessert with zero baking. It’s the kind of no-fuss showstopper you pull out for potlucks, hot afternoons, or last-minute guests. The contrast between softened Oreo layers and light whipped filling keeps kids and adults reaching for seconds.
Why you’ll love this dish
This recipe is delightfully simple but feels decadent. No oven, minimal hands-on time, and the ingredients are pantry-friendly. It’s ideal for summer get-togethers, after-dinner treats, or when you want something impressive without fuss.
“We made this for my son’s birthday and everyone thought it was store-bought. Rich, chocolatey, and effortless — a repeat for sure.”
- Kid-approved: kids adore the Oreo crunch and creamy filling.
- Budget-friendly: a few packages of Oreos and cream deliver a crowd-pleaser.
- Make-ahead friendly: assemble a day ahead to deepen the flavor and texture.
If you like crowd-pleasing desserts that require little active time, you might also enjoy this layered fall dessert, which has a similar “make ahead” comfort-food appeal: Apple Crumble Cheesecake — Layered Version.
Step-by-step overview
Think of this as building a chilled, no-bake cake in a loaf pan or springform. You whip a stabilized cream (or use whipped topping), spread a thin layer in the pan, lay down Oreos, repeat until full, then chill long enough for the cookies to soften and the layers to set. The whole process is mostly assembly — about 20 minutes of work and several hours of hands-off chilling.
Key stages:
- Whip the cream (or beat cream cheese + cream for tang).
- Layer cream and Oreos, pressing gently to compact.
- Chill 4–8 hours (overnight is best).
- Slice carefully and serve chilled.
What you’ll need
- 3–4 cups heavy whipping cream (or 2 cups heavy cream + 8 oz cream cheese for a tangy version)
- 1/2–3/4 cup powdered sugar, sifted (to taste)
- 1 tsp vanilla extract
- 36–40 Oreos (regular or double-stuf), whole or slightly crushed depending on preference
- Pinch of salt
Substitutions and notes:
- For a stabilized whipped cream that holds longer, fold 1 tablespoon of instant vanilla pudding mix into the whipped cream.
- Use gluten-free sandwich cookies if you need a gluten-free dessert.
- If you prefer less sweetness, replace half the powdered sugar with a teaspoon of espresso powder to intensify chocolate flavor without adding sugar.
You might also like a bite-sized no-bake option if you’re entertaining: Baileys Cheesecake Balls — similar no-bake convenience in a party-friendly format.
Step-by-step instructions
- Chill your mixing bowl and beaters for 10 minutes — cold tools whip cream faster and more stably.
- Pour heavy cream into the chilled bowl. Add powdered sugar and vanilla. Beat on medium-high until soft peaks form. If using cream cheese, beat it first until smooth, then fold in whipped cream to combine.
- Line a loaf pan (or 9×9 pan) with plastic wrap, leaving excess to cover the top later.
- Spread a thin, even layer of whipped cream on the bottom of the pan (this prevents cookies from sliding).
- Place a single layer of whole Oreos over the cream. Press gently — don’t crush them flat.
- Spread another layer of whipped cream over the cookies, about 1/3 inch thick. Smooth it out.
- Repeat layering: Oreos, then whipped cream. Finish with a generous layer of whipped cream on top.
- Cover the pan with the overhanging plastic wrap and refrigerate at least 4 hours, preferably overnight. The cookies will soften into cake-like layers.
- To serve, remove from pan using the plastic wrap, invert onto a cutting board, peel off plastic, and slice with a sharp knife dipped in hot water between cuts for clean slices.
Best ways to enjoy it
- Slice and serve chilled with a dusting of cocoa or extra crushed Oreos on top.
- For a fancier presentation, pipe rosettes of whipped cream and add chocolate shavings.
- Pair with cold milk, espresso, or a dollop of salted caramel for contrast.
- Cut into bars for potlucks or make individual mason-jar versions for picnics.
If you want a dessert that looks company-ready but is still easy, try pairing small slices with a scoop of vanilla bean ice cream or a sharp espresso; they balance the sweetness beautifully.
Storage and reheating tips
- Refrigerate: Keep leftover slices covered in an airtight container for up to 4–5 days. The texture will continue to soften each day.
- Freeze: Wrap individual slices tightly in plastic wrap and place in a freezer-safe container. Freeze up to 2 months. Thaw overnight in the refrigerator.
- Do not leave at room temperature for more than 2 hours (1 hour in hot conditions). Because the filling contains dairy, handle using standard cold-food safety rules.
Pro chef tips
- Use cold equipment: chilling the bowl and beaters makes whipping faster and more stable.
- Don’t overwhip: stop when you get stiff peaks to avoid buttering the cream.
- Press gently: compact the layers just enough to eliminate large air pockets; crushing the Oreos flattens texture too much.
- Stabilize for warm events: if serving outdoors, add 1 tablespoon gelatin (bloomed and dissolved) or 1 tablespoon instant pudding mix to the whipped cream to hold shape.
- For neater slices, run the knife under hot water and dry between cuts.
For another visually striking, celebration-style dessert that’s easy to assemble, see this fun birthday cake idea: Birthday Cake with Bows.
Creative twists
- Chocolate ganache drizzle: warm 1/2 cup heavy cream, pour over 4 oz chopped chocolate, cool slightly, then drizzle over the chilled cake.
- Mint Oreo: swap half the Oreos for mint-flavored cookies and add 1/4 tsp peppermint extract to the cream.
- Berry layer: add a thin layer of mascarpone mixed with lemon zest and fresh raspberries between Oreo layers for brightness.
- Gluten-free: use gluten-free sandwich cookies or thin chocolate wafers.
- Double chocolate: fold 1/2 cup crushed Oreos into the whipped cream for a marbled filling.
Your questions answered
Q: How long does it take to make this from start to finish?
A: Active time is about 15–25 minutes. Chill at least 4 hours; overnight is best for best texture.
Q: Can I use Cool Whip or non-dairy whipped topping instead of whipped cream?
A: Yes. Premade whipped topping works and is convenient, but it will taste different and be sweeter. For best stability with real cream, consider stabilizers (gelatin or pudding mix).
Q: Can I use different cookies instead of Oreos?
A: Absolutely. Chocolate sandwich cookies, graham crackers, or thin chocolate wafers all work. Texture and sweetness will change slightly.
Q: Is this safe to make ahead for a party?
A: Yes — make it 24 hours ahead. Keep chilled until 30 minutes before serving for best mouthfeel.
Q: Will the cookies get soggy?
A: They soften — that’s the point. They become cake-like. If you prefer more crunch, use crushed Oreos between layers to maintain some textural contrast.
Conclusion
If you want another tried-and-true take on the classic icebox approach, check this recipe that uses fresh whipped cream for a light finish: Easy Oreo Icebox Cake with Fresh Whipped Cream – Little Sunny Kitchen. For a slightly richer, more chocolate-forward version and extra assembly tips, this write-up is a great companion: Oreo Icebox Cake – Chocolate Chocolate and More!.

Oreo Icebox Cake
Ingredients
For the Cake Layers
- 3-4 cups heavy whipping cream or 2 cups heavy cream + 8 oz cream cheese for a tangy version
- 1/2-3/4 cup powdered sugar, sifted to taste
- 1 tsp vanilla extract
- 36-40 pieces Oreos regular or double-stuf, whole or slightly crushed
- 1 pinch of salt
Instructions
Preparation
- Chill your mixing bowl and beaters for 10 minutes — cold tools whip cream faster and more stably.
- Pour heavy cream into the chilled bowl. Add powdered sugar and vanilla. Beat on medium-high until soft peaks form.
- If using cream cheese, beat it first until smooth, then fold in whipped cream to combine.
- Line a loaf pan (or 9x9 pan) with plastic wrap, leaving excess to cover the top later.
- Spread a thin, even layer of whipped cream on the bottom of the pan.
- Place a single layer of whole Oreos over the cream. Press gently — don’t crush them flat.
- Spread another layer of whipped cream over the cookies, about 1/3 inch thick.
- Repeat layering: Oreos, then whipped cream. Finish with a generous layer of whipped cream on top.
- Cover the pan with the overhanging plastic wrap and refrigerate at least 4 hours, preferably overnight.
- To serve, remove from pan using the plastic wrap, invert onto a cutting board, peel off plastic, and slice.