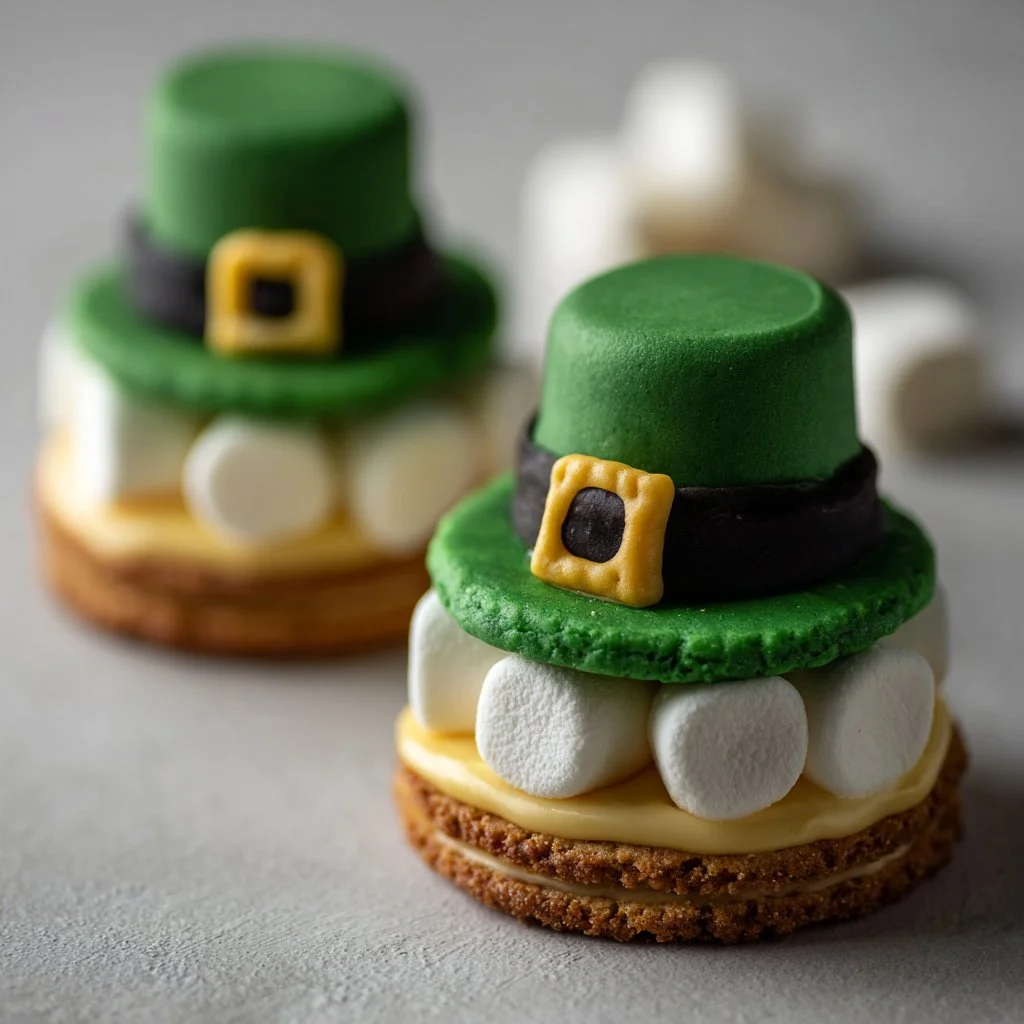
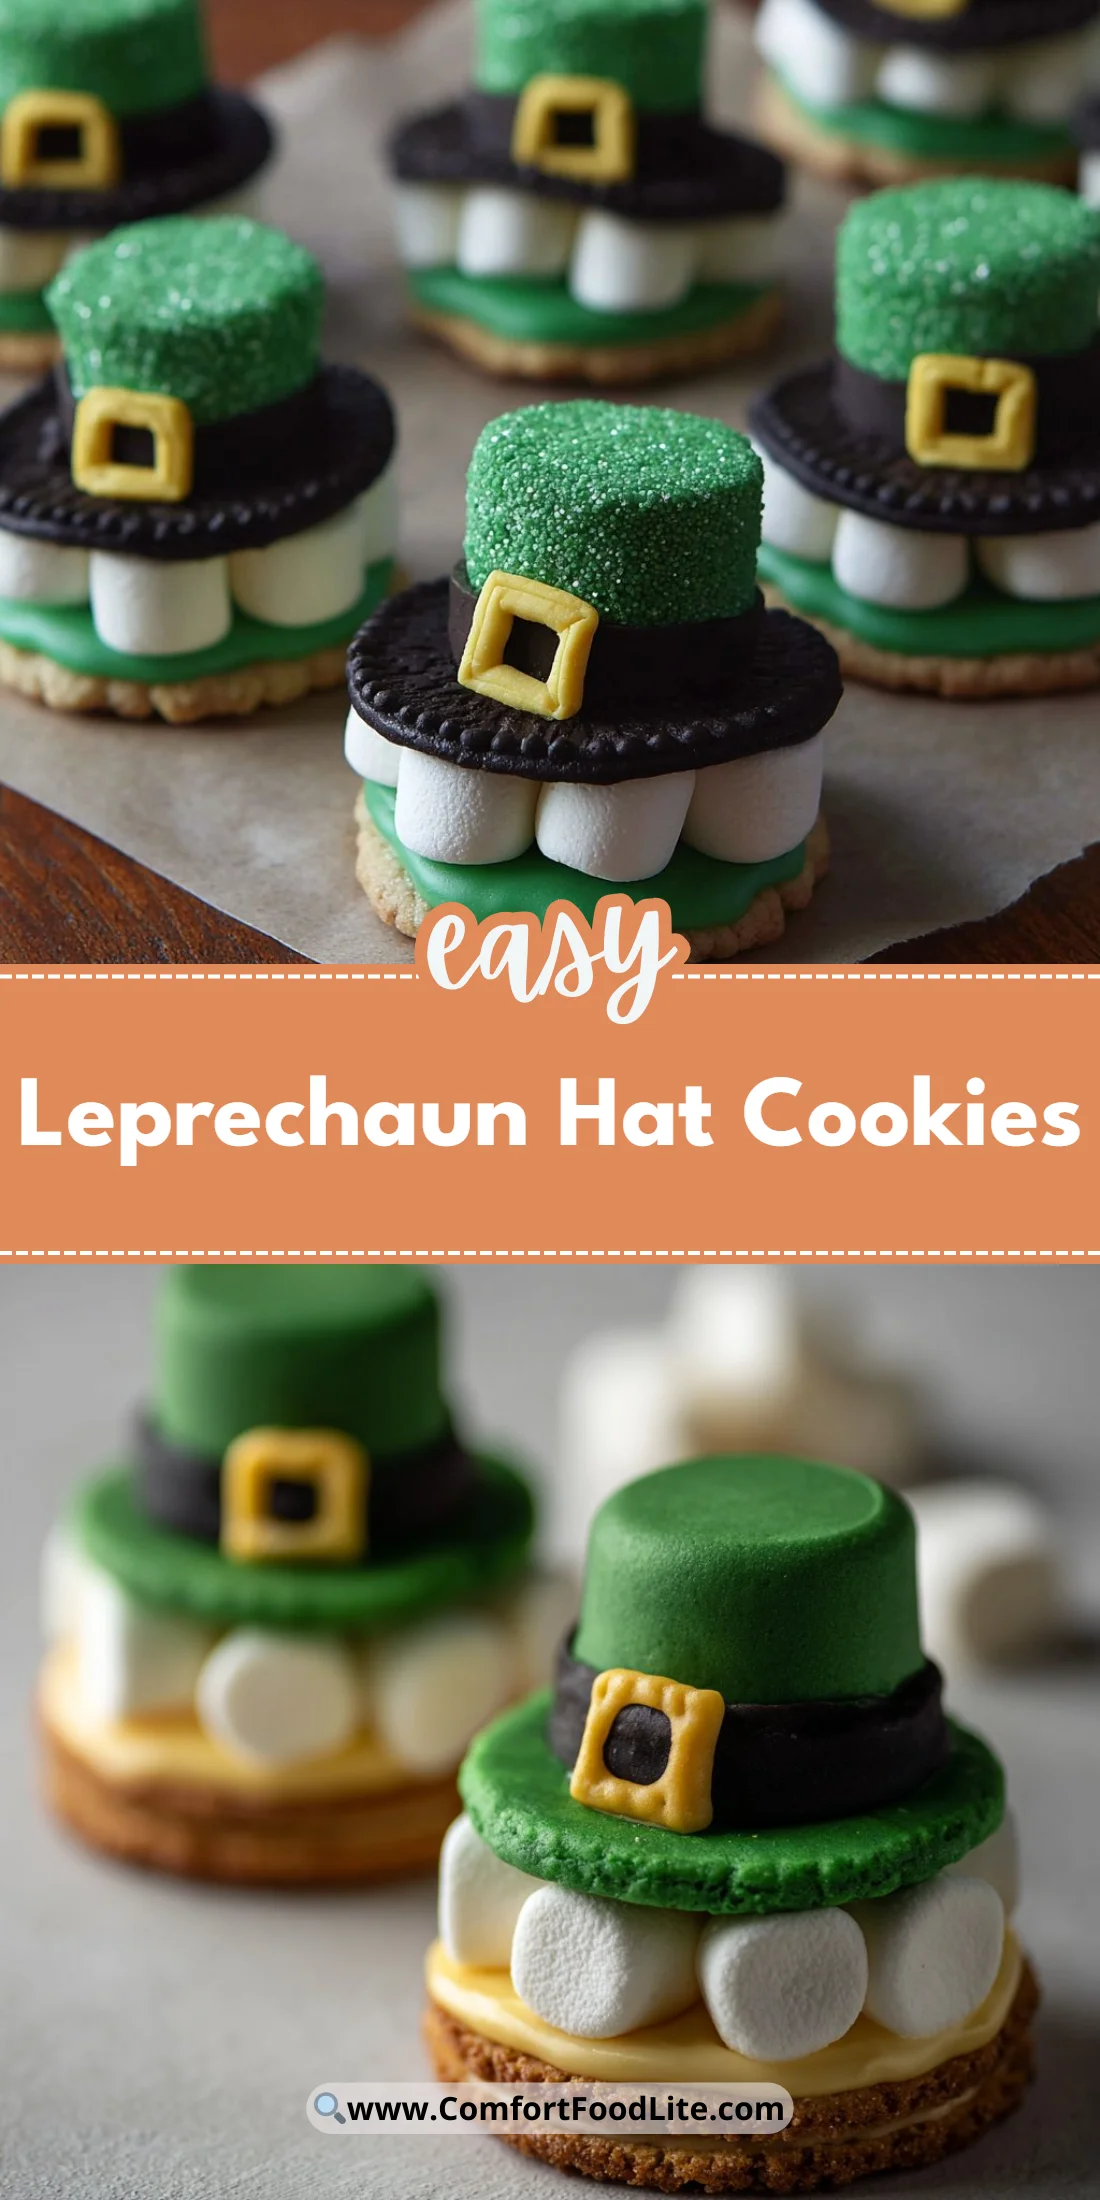
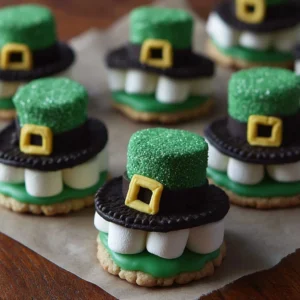
A quick, festive treat that transforms simple pantry staples into tiny edible top hats.
These Leprechaun Hat Cookies are playful, easy, and perfect for a St. Patrick’s Day snack or classroom party.
They take minutes to assemble and look impressive on a platter.
Keep a few extra marshmallows and candy melts on hand for last-minute decorating.
These cookies share the same spirit of crowd-pleasing bites as other viral cookie recipes, and if you love soft, irresistible cookies, try my take on soft oatmeal chocolate chip cookies for another speedy bake.
Why You’ll Love This Leprechaun Hat Cookies
– Fun for kids and adults alike — whimsical look without fussy piping.
– Quick assembly — no baking required beyond melting candy coating.
– Versatile decorations — use sanding sugar, sprinkles, or edible glitter.
– Crowd-pleasing texture — crunchy cookie base with pillowy marshmallow top.
– Make-ahead friendly — components can be prepped in stages.
– Great project for parties or school events with minimal equipment.
The taste balances the buttery, shortbread flavor of Sandies with the sweet, smooth candy coating and marshmallow center. Textures are a highlight: crisp cookie, soft marshmallow, and a crisp candy shell with each bite yielding a satisfying contrast.
"These were a hit at our St. Patrick’s Day brunch — adorable, surprisingly easy, and every kid asked for seconds!" — 5-star reader review
Key Ingredients for Leprechaun Hat Cookies
Green candy melts
Green candy melts are the visual backbone of these Leprechaun Hat Cookies. Choose a high-quality brand that melts smoothly and sets with a glossy finish to avoid streaks and clumping. If you substitute with white candy melts colored with oil-based coloring, test a small batch because water-based color can seize the coating.
Sandies cookies
Sandies or shortbread rounds provide a sturdy, buttery base that contrasts the sweet topping. Buy the classic Sandies or any firm shortbread cookie with a flat top for best adhesion. If you swap in a softer cookie, it may become soggy under the coating and lose its hat shape.
Marshmallows
Standard-sized marshmallows form the hat crown and give the treat its iconic silhouette. Use fresh, pillowy marshmallows for the most even coating and best texture. Mini marshmallows will look disproportionately small, and jumbo marshmallows will tip the balance and may need wider cookie bases.
Black and yellow fondant (or colored fondant)
Fondant creates the hat band and buckle details for a tidy, finished look. Ready-colored black and yellow fondant saves time and prevents overworking the sugar paste. If you color white fondant yourself, use gel food coloring to avoid weakening the fondant with liquid; knead until color is even.
Full Ingredient List for Leprechaun Hat Cookies
– 2 cups green candy melts
– 12 Sandies cookies (or flat shortbread rounds)
– 12 marshmallows (standard size)
– Black fondant
– Yellow fondant
– White fondant (if coloring your own)
– Food coloring (if coloring your own)
– Optional: green sanding sugar or themed sprinkles
– Toothpicks (optional, for securing marshmallows while they set)
– Parchment paper
Step-by-Step Instructions for Leprechaun Hat Cookies
Step 1: Melt the green candy melts in a microwave-safe bowl
Place the candy melts in a dry microwave-safe bowl and heat for 30 seconds, then stir. Continue in 15-second bursts, stirring between each, until the mixture is smooth and fully melted.
Pro Tip: The coating should look glossy and pourable with no lumps; if it becomes too thick, add a drop of vegetable oil and stir to restore shine.
Step 2: Dip each Sandies cookie into the melted green coating
Hold a cookie by the edge or use tongs and dip it into the melted candy, coating the top completely. Lift, let excess drip back into the bowl, then set the cookie top-side up on parchment paper to harden.
Pro Tip: The cookie surface should be evenly coated with a smooth shell; if you see bubbles, tap the tray gently to level the coating.
Step 3: Coat each marshmallow and place it on the cookie
Using a fork or dipping tool, coat a marshmallow in the green candy and immediately center it on a coated cookie. If it wobbles, insert a toothpick through the marshmallow into the cookie to anchor it until set.
Pro Tip: The marshmallow should sit centered with a thin glazed seam where it meets the cookie; if the coating pools, blot gently with parchment.
Step 4: Color white fondant if needed and cut strips for hat bands
If you’re tinting white fondant, knead black gel into small batches until uniformly dark. Roll the black fondant to about 1/8-inch thickness and cut strips long enough to wrap around the marshmallow base.
Pro Tip: The band strip should be flexible but not sticky; dust lightly with cornstarch if it clings to your rolling surface.
Step 5: Wrap black fondant strips around marshmallow bases
Press the black fondant strips gently around the base of each marshmallow, smoothing seams with a fingertip or small tool so the band adheres to the candy coating.
Pro Tip: The seam should be nearly invisible; if it lifts, press briefly against the candy shell so the fondant warms and bonds.
Step 6: Roll yellow fondant into buckles and attach
Form small yellow rectangles or buckle shapes and position them in the center of each black band. Press lightly so they stick, trimming any excess fondant for a polished look.
Pro Tip: The buckles should sit flush against the band and appear slightly raised; if they slump, chill briefly to firm up the fondant.
Step 7: Add optional sanding sugar or sprinkles before coating fully hardens
While the coating is still tacky, sprinkle green sanding sugar or themed sprinkles around the hat for sparkle and texture.
Pro Tip: Sprinkles should stick cleanly without sinking; if they slide, the coating is too liquid — wait a few seconds to thicken before sprinkling.
Step 8: Chill cookies to firm up the coating quickly
Place the finished hats in the refrigerator for 10–15 minutes to set the candy shell and firm the fondant.
Pro Tip: The coating should feel hard to the touch after chilling; avoid prolonged refrigeration that can cause condensation when returned to room temperature.
Step 9: Store remaining fondant properly
Wrap any unused fondant tightly in plastic wrap and store at room temperature away from heat and direct sunlight.
Pro Tip: Properly wrapped fondant should feel pliable and not dried out; if it develops cracks, knead in a small amount of vegetable shortening.
Expert Tips for Leprechaun Hat Cookies
– Temperature tips: Keep candy melts warm but never overheated; stir frequently and use short bursts in the microwave to avoid scorching.
– Texture troubleshooting: If the coating is grainy, it overheated; discard and start with a fresh batch or add a small amount of neutral oil and reheat gently.
– Equipment tips: Use silicone utensils and bowls for easier cleanup and non-stick handling of melted candy.
– Band adhesion: If the fondant won’t stick, very lightly brush the candy shell with a tad of corn syrup to act as edible glue.
– Common mistake: Dipping marshmallows too early can cause them to collapse; let the cookie coating set for a minute so the base is firmer.
– Visual cues: Doughy or soft fondant suggests excess moisture; knead in cornstarch sparingly to firm without altering color.
– Crowd scaling: For large batches, melt candy melts in a double boiler to maintain consistent temper and avoid repeated microwave cycles.
– Finishing finesse: Use a small clean paintbrush dipped in water to smooth tiny fondant seams — a little water goes a long way.
Storage & Freezing for Leprechaun Hat Cookies
Fridge storage: Store finished Leprechaun Hat Cookies in an airtight container lined with parchment paper. Refrigerate for up to 5 days for the candy shell to remain crisp and the fondant to stay firm.
Freezer storage: Layer cookies between parchment in a freezer-safe container and freeze for up to 1 month. Freeze only once; repeated thaw cycles can make cookies soggy.
Thawing: Thaw frozen cookies in the refrigerator for a few hours before bringing to room temperature to avoid condensation forming on the candy shell. Unwrap only after fully thawed.
Reheating: Do not microwave finished cookies. If the coating dulls, a quick 10–20 second blast at low power can re-melt candy on a test cookie, but this risks changing texture — proceed with caution and only for small fixes.
You can find crowd-pleasing cookie inspiration in my round-up of best-ever chocolate chip cookies, which offer tips on texture balance that apply here too.
Variations & Substitutions for Leprechaun Hat Cookies
Chocolate-dipped base: Swap Sandies for chocolate wafer cookies and dip in dark green coating; you’ll get a richer, deeper flavor that balances the marshmallow sweetness. The result is more adult-friendly and visually striking.
Mini hat version: Use mini marshmallows and smaller cookie rounds for bite-sized party favors. Expect less stable toppers; toothpicks or a firmer fondant band help keep proportions balanced.
White-chocolate colored coating: Start with white candy melts and tint to a pastel green for a softer hue. This allows precise color control but requires oil-based gel coloring for the best result.
Nutty base substitution: Replace Sandies with almond-teff or nut-based shortbread for a nutty note and firmer structure. Ensure the cookie is dry and sturdy; oily or crumbly cookies will not support the marshmallow.
Frequently Asked Questions About Leprechaun Hat Cookies
Q: Can I make Leprechaun Hat Cookies ahead of time for a party?
A: Yes. Assemble the hats up to 24 hours ahead and store in an airtight container at room temperature if the event is within a day. For longer storage, refrigerate up to 5 days, but return to room temperature before serving to avoid a cold, firm fondant texture.
Q: What’s the best way to color candy melts without seizing them?
A: Use oil-based gel colorings formulated for chocolate and candy melts. Add sparingly and mix thoroughly. Avoid water-based colors which can cause the candy to seize and grain.
Q: How do I fix fondant that’s too sticky or too dry?
A: If sticky, knead in a touch of cornstarch or powdered sugar to reduce tackiness. If too dry and crumbly, a tiny bit of vegetable shortening will soften it; add a little at a time until pliable.
Q: Can I use store-bought candy coating sprays instead of melting candy?
A: Candy coating sprays can work for an overall finish but won’t create the same smooth dip as melted candy melts. Dipping provides complete coverage and a solid shell that supports fondant details better.
Q: Are these cookies safe for classroom parties with food allergies?
A: Check ingredient labels carefully. Many candy melts and shortbreads contain milk, soy, or traces of nuts. Consider allergy-friendly brands or make clear signage and an ingredient list for caregivers.
Final Thoughts on Leprechaun Hat Cookies — Conclusion
Tiny details make these Leprechaun Hat Cookies feel special, and assembly is fast enough for last-minute celebration trays. Please leave a star rating in the recipe card below and pin this to Pinterest if you loved it.
For creative inspiration and similar themed treats, see Leprechaun Hat S’mores | The Cake Blog, a fun s’mores twist that sparks presentation ideas. You might also like the vintage approach at St. Patrick’s Day Leprechaun Hats – The Country Cook for alternative assembly methods. For a professional recipe reference and variations, check Leprechaun Hat Cookies Recipe – BettyCrocker.com.
Leprechaun Hat Cookies
Ingredients
Cookie Base
- 12 pieces Sandies cookies (or flat shortbread rounds) Buy the classic Sandies or any firm shortbread cookie with a flat top for best adhesion.
Toppings
- 2 cups green candy melts Choose a high-quality brand that melts smoothly.
- 12 pieces standard-sized marshmallows Use fresh, pillowy marshmallows for the best texture.
- Black fondant Creates the hat band details.
- Yellow fondant Used for the buckle details.
- White fondant (if coloring your own) Use gel food coloring to avoid weakening the fondant.
- 1 drop vegetable oil To restore shine if coating becomes thick.
- Optional green sanding sugar or themed sprinkles For a sparkling finish.
Instructions
Preparation
- Melt the green candy melts in a microwave-safe bowl. Heat for 30 seconds, stir, then continue heating in 15-second bursts until smooth.
- Dip each Sandies cookie into the melted green coating, coating the top completely, then set aside to harden.
- Coat each marshmallow in the green candy and place it on the cookie.
- If needed, color white fondant and cut strips for hat bands. Wrap them around the marshmallow bases.
- Roll yellow fondant into buckle shapes and attach to the center of each black band.
- Add optional sanding sugar or sprinkles before the coating fully hardens.
- Chill cookies for 10–15 minutes to set the coating.
Storage
- Store finished Leprechaun Hat Cookies in an airtight container lined with parchment paper in the fridge for up to 5 days.
- Freeze cookies between parchment in a freezer-safe container for up to 1 month; thaw in the refrigerator before serving.