The first time I made caramelized onions I planned for a quick sauté and ended up with an hour-long, deeply flavored shortcut to everything delicious in my fridge.
Once you understand the slow, patient method, it becomes one of those go-to techniques that turns ordinary meals into restaurant-level comfort.
This recipe’s small ingredient list hides a big payoff—sweet, syrupy onions with a silky texture that pair with almost anything.
I sometimes pile these on burgers, fold them into mashed potatoes, or stir them into a pan of frozen corn for a fast side; if you need ideas for sides, my guide on how to freeze corn on the cob has suggestions that pair well.
If you’re reconstructing a weeknight meal around quick proteins, caramelized onions are perfect alongside a simple pan-seared breast—even recipes that start with frozen chicken work great, see my notes on how to cook frozen chicken breast.
Why You’ll Love This Recipe
- Deep sweetness from slow cooking with almost no sugar added.
- Silky, jammy texture that folds into sauces or crowns sandwiches.
- Uses pantry staples and scales easily for meal prep.
- Highly forgiving: minor temperature tweaks won’t ruin the batch.
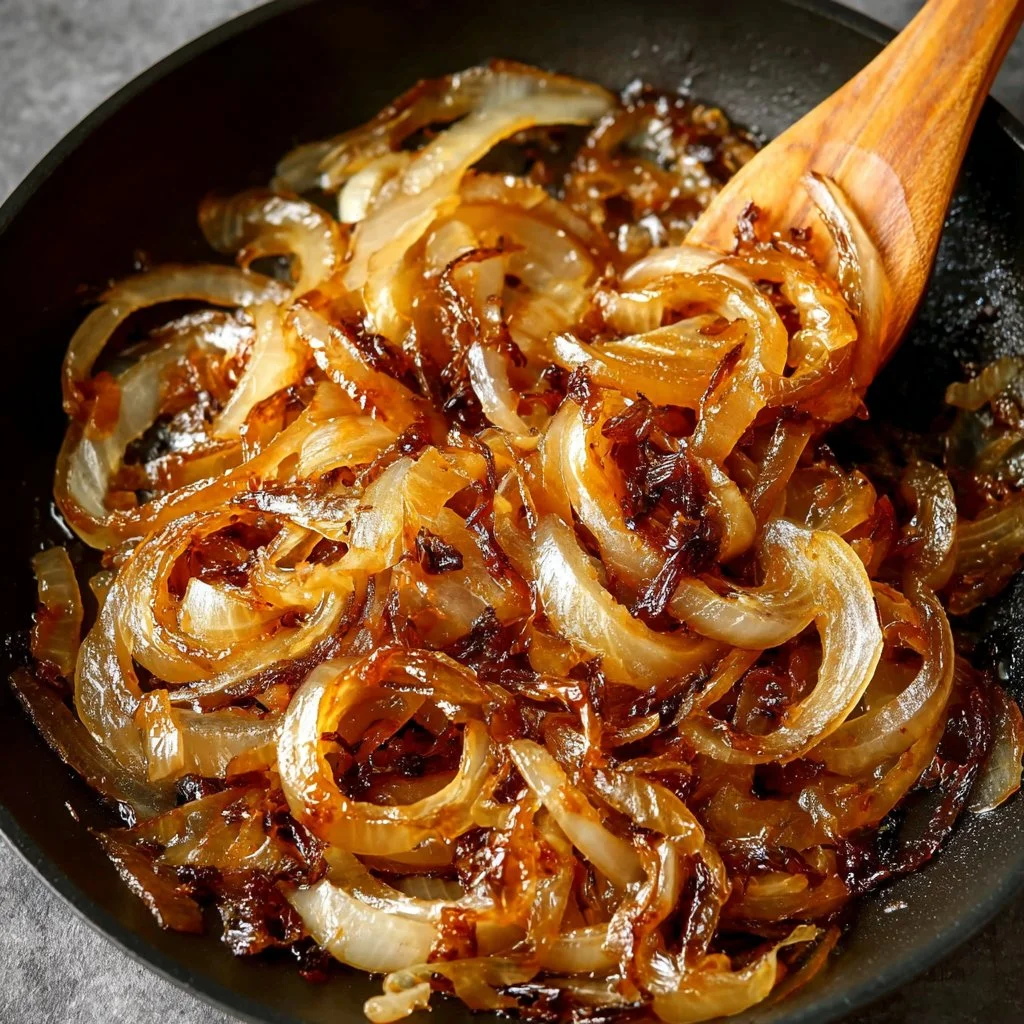
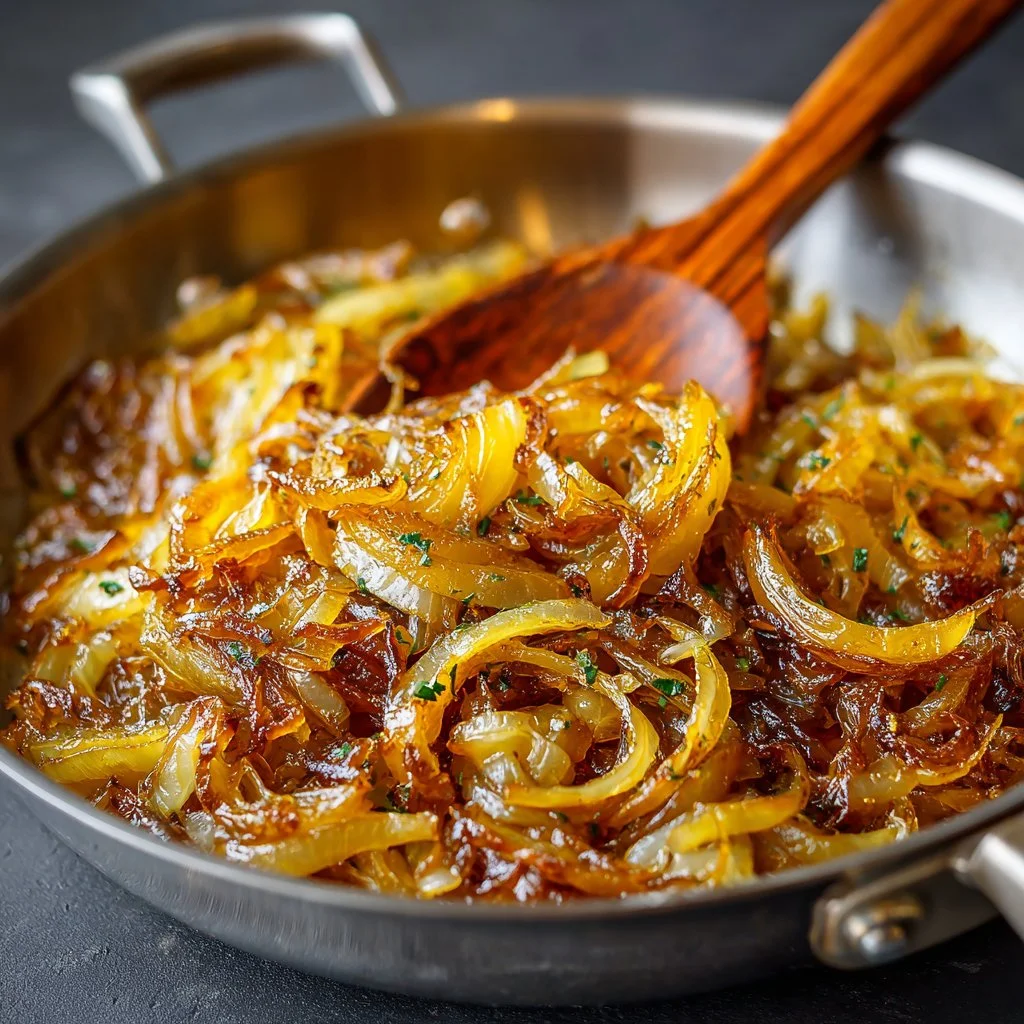
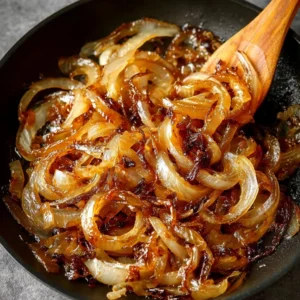
The texture is what sells it. Properly caramelized onions are soft and silky, with ribbons that break apart instead of snapping. The taste is layered—an initial mellow onion note gives way to rich, nutty, almost molasses-like sweetness when the natural sugars finish browning. That balance of savory and sweet makes them addictive on pizza, stirred into soups, or folded into a quiche batter.
“Made these exactly as written and they elevated our weeknight tacos—sweet, deeply savory, and perfectly jammy. Five stars!” — Hannah, reader
Key Ingredients
Yellow or sweet onions (2–3 large)
Yellow onions carry a firm structure that softens slowly and develops robust sweetness. Sweet onions (like Vidalia or Walla Walla) have higher sugar content, which shortens the caramelizing time and yields very sweet results; I prefer a mix of one yellow and one sweet when I want balance.
Butter or oil — 2 tablespoons (or a mix)
Butter adds nutty richness and a glossy finish, while oil tolerates higher heat without burning. Use a neutral oil (vegetable or avocado) or a 50/50 butter-oil mix to get the flavor of butter without scorching.
A pinch of salt
Salt draws moisture out of the onions and enhances their sweetness as they reduce. Don’t over-salt at the start; you can always finish with a pinch more at the end to taste.
Optional deglazing liquid: water, broth, or wine
A splash of liquid rescues fond (the tasty brown bits) from sticking or burning and helps dissolve sugar buildup on the pan. Use water for a neutral finish, broth for savory depth, or a dry white wine for a bright lift.
Full ingredient list:
- 2–3 large yellow or sweet onions
- 2 tablespoons butter or oil (or a mix)
- A pinch of salt
- Optional: water, broth, or wine for deglazing
Step-by-Step Instructions
Step 1: Slice for even cooking
Slice the onions thinly into 1/8″ to 1/4″ thick slices for even cooking.
Aim for uniform slices so some pieces don’t finish much earlier than others.
Pro Tip: Use a sharp chef’s knife or a mandoline set to 1/8″ for consistent ribbons; you’ll notice even browning across the pan when the slices match.
Step 2: Warm the fat
Heat butter or oil in a heavy-bottomed skillet over low–medium heat.
Let the fat melt and coat the pan before adding onions to prevent sticking.
Pro Tip: A heavy pan (cast iron or stainless with a thick base) distributes heat gently; if the butter foams aggressively, lower the heat immediately.
Step 3: Add onions and season
Add onions and sprinkle with a pinch of salt to draw out moisture.
Toss them in the fat so every slice gets a thin coating.
Pro Tip: The salt helps the onions sweat and release water—this water slows browning early and prevents scorching while depth of flavor develops.
Step 4: Cook slowly, stirring regularly
Cook slowly, stirring every 5 minutes, letting them develop a golden crust before each stir.
This pause between stirs lets sugars concentrate and brown on the pan surface, creating that caramelized flavor.
Pro Tip: Don’t rush by using high heat; quick browning leads to bitter spots. Aim for a gentle sizzle and adjust the flame if the pan starts to smoke.
Step 5: Deglaze when needed
If onions start to stick or brown too fast, deglaze with a splash of water, broth, or wine.
Scrape the browned bits into the onions; that fond is pure flavor.
Pro Tip: Keep a small cup of warm water or broth at the stove; a tablespoon or two at a time keeps the pan clean and integrates caramelization into the onions.
Step 6: Finish to deep golden brown
Continue cooking until they turn deep golden brown and smell sweet—about 30 to 60 minutes.
Taste as you go and pull them off the heat when most pieces are jammy and shiny.
Pro Tip: You’ll know they’re ready when the onions collapse into glossy ribbons and have a sweet, almost raisin-like aroma. If a few edges look dark, that’s okay—remove them from heat to stop the color shift.
Expert Tips for Success
- Temperature control is everything. Keep the pan at low–medium and treat the heat like a dial—too high and the exterior burns before the interior softens.
- Use a heavy-bottomed skillet. Thin pans create hotspots that char the onions instead of building even caramelization. Cast iron or thick stainless steel works best.
- Cut uniformly. Uneven slices mean uneven cooking and a mix of crunchy and overly charred pieces. A mandoline prevents unevenness.
- Mix butter and oil. A 50/50 mix gives buttery flavor without the risk of burning; oil raises the smoke point while butter adds gloss and nuttiness.
- Add a little sugar only if needed. If your onions are exceptionally mild and not sweetening after 20–30 minutes, a pinch of granulated sugar will kick-start caramelization. Use sparingly.
- Deglaze proactively. Keep a small bowl of warm water or broth nearby; a tablespoon or two every 10–15 minutes will dissolve sticky bits and deepen flavor without watering the onions down.
- Be patient for texture. The sweet, jammy stage usually takes 30–60 minutes depending on your stove and pan. Rushing will make them brittle or bitter instead of silky.
- Use a wooden or silicone spatula to scrape the pan bottom. Metal spoons can drag and tear the softening onions. Gentle scraping folds fond into the onions.
- Cook in a wide pan for more surface contact. A shallow, wide skillet allows more onions to touch the surface and encourages even browning. Crowded pans steam instead of caramelize.
- Scaling up needs time. Doubling onions doesn’t double the time exactly—you’ll often need longer because the pan temperature drops more initially. Spread the onions into a larger pan rather than a deeper pile.
Storage & Freezing
Fridge: Cool completely before transferring to an airtight container.
Stored this way, caramelized onions keep well for up to 4–5 days.
Label the container with the date to avoid mystery fridge science.
Freezer: For longer storage, portion into tablespoon or 1/2-cup amounts on a parchment-lined sheet and freeze until solid.
Once frozen, move portions into a freezer bag and use within 3 months for best flavor.
Pro Tip: Flatten portions into disks to save space and speed thawing.
Reheating: Thaw overnight in the fridge for best texture, then warm gently in a skillet with a splash of water or broth.
You can reheat from frozen by adding a small amount of liquid to a low pan and covering until fully warmed.
Avoid the microwave if you want the original silky texture—quick microwaving can make them watery.
Variations & Substitutions
Caramelized with balsamic: Add a tablespoon of balsamic vinegar in the last 5 minutes for a tangy-sweet glaze.
Try finishing with a pat of butter and a teaspoon of balsamic for a concentrated shine.
Make them with shallots: Substitute 2–3 cups of thinly sliced shallots for a more delicate, slightly floral sweetness.
Shallots caramelize faster because of their high sugar content; watch closely.
Onions + roasted peppers: Fold in roasted, sliced banana peppers for a smoky-sweet combo; if you’re canning or preserving peppers, follow safe methods like my guide to how to can banana peppers.
This adds acid and brightness to the rich onions.
Use as a condiment on pickles and sandwiches: Once cooled, they make a great topping for jarred pickles or sandwiches.
For home-canning and quick pickle ideas that pair well with caramelized onions, see easy homemade pickles.
Frequently Asked Questions
What’s the difference between sweating and caramelizing onions?
Sweating releases moisture and softens onions without browning; caramelizing takes longer and causes the natural sugars to brown, producing deep sweetness. Start by sweating to avoid burning, then continue to caramelize slowly.
Can I speed up the process?
You can increase heat or add a pinch of sugar to speed up browning, but you risk uneven color and a burnt taste. A better speed-up is using a larger, hotter pan so more onion contacts the surface at once.
Why do my onions stick and burn?
Sticking usually means the pan is too hot or there’s insufficient fat. Reduce heat and deglaze with a tablespoon of water or broth; scrape the fond into the onions and continue gently.
How long will caramelized onions keep in the freezer?
For best quality, freeze for up to 3 months. Use airtight bags and remove as much air as possible before sealing to prevent freezer burn. For other freezer techniques, you might find tips in my piece about how to freeze peaches, which shares broader freezer-prep mindset.
Can I caramelize onions in the oven?
Yes. Spread sliced onions with fat on a sheet pan and roast at 325–350°F, stirring every 10–15 minutes until deep brown. It takes roughly the same time but needs less hands-on stirring; watch for uneven browning at the edges.

Final Thoughts
Caramelized onions are the kind of technique that rewards patience and tiny adjustments.
Make a double batch—half for dinner and half to freeze—and you’ll find yourself reaching for them every week.
Conclusion
If you want a second take on technique and timing, this thoughtful guide is a useful companion: How Long Does It Take to Caramelize Onions? How to Caramelize ….
For another practical, step-by-step method, this recipe walkthrough is excellent: How to Caramelize Onions.
Please leave a star rating in the recipe card below or pin this to Pinterest if you found it helpful.
Caramelized Onions
Ingredients
Main Ingredients
- 2-3 large yellow or sweet onions Yellow onions develop robust sweetness; sweet onions (like Vidalia) yield even sweeter results.
- 2 tablespoons butter or oil (or a mix) Butter adds richness; oil tolerates higher heat.
- 1 pinch salt Enhances sweetness and draws moisture from onions.
- 1 splash water, broth, or wine for deglazing Rescues fond from sticking and adds flavor.
Instructions
Preparation
- Slice the onions thinly into 1/8" to 1/4" thick slices for even cooking.
- Heat butter or oil in a heavy-bottomed skillet over low–medium heat.
- Add onions and sprinkle with a pinch of salt to draw out moisture.
Cooking
- Cook slowly, stirring every 5 minutes, allowing a golden crust to develop.
- Deglaze with water, broth, or wine if onions start to stick.
- Continue cooking until onions turn deep golden brown, approximately 30 to 60 minutes.