The first time I made these chocolate croissants I expected a warm, chocolatey treat — but what I got was layers of flaky, buttery pastry that practically melted on my tongue.
They take a bit of patience, but the technique is simple and incredibly forgiving once you understand the dough and butter relationship.
If you want bakery-level pain au chocolat from your home oven (without buying pre-made laminated dough), this recipe is a winner.
Why You’ll Love This Recipe
- Real laminated layers without commerical puff pastry.
- Uses everyday pantry ingredients and straightforward technique.
- Small-batch: perfect when you want fresh croissants without a full-day commitment.
- Crispy exterior, tender interior, and a soft chocolate center every time.
The texture is the star: a crisp, golden outer shell gives way to delicate, paper-thin layers of butter and dough.
The interior is airy and slightly chewy, while the chocolate stays molten and intense.
This recipe balances a rich butter flavor with the subtle sweetness of the dough so the chocolate remains the focal point.
“I made these for a weekend brunch and my partner thought I bought them from a bakery. flaky, buttery, and perfectly chocolatey — five stars!” — Reader: Anna P.
Key Ingredients
Unsalted butter (1/2 cup, chilled and cubed).
Butter is the laminating agent that creates the layers.
Use high-fat European-style butter if you can (82%+ fat) for better flavor and flakiness.
Keep it very cold so it doesn’t melt into the dough during rolling.
All-purpose flour (2 cups).
AP flour gives enough protein to create structure without being too tough.
If you prefer a slightly lighter crumb, you can swap up to 25% with pastry flour for a more tender interior.
Active dry yeast (1 1/2 teaspoons).
Yeast provides the rise and those small steam pockets that help separate layers in the oven.
Proof it in warm milk so you can be sure it’s active; if it doesn’t foam in 5–10 minutes, start over with fresh yeast.
Chocolate (1/2 cup, chips or chopped).
Quality matters here — choose a chocolate you like eating on its own.
Chunky chopped chocolate melts into rivers inside each croissant; chips are convenient but may hold shape more.
Full ingredient list:
- 2 cups all-purpose flour
- 1/4 cup granulated sugar
- 1 teaspoon salt
- 1/2 cup unsalted butter, chilled and cubed
- 1/2 cup milk, warm
- 1 1/2 teaspoons active dry yeast
- 1/2 cup chocolate (chocolate chips or chopped chocolate)
- 1 egg (for egg wash)
Step-by-Step Instructions
Step 1: Activate the yeast
In a mixing bowl combine the warm milk, active dry yeast, and sugar.
Let it sit for about 5 minutes until frothy and bubbly.
Pro Tip: Milk should be warm to the touch (about 100–110°F/38–43°C); too hot and you’ll kill the yeast, too cool and it won’t activate.
Step 2: Make the dough
In another bowl, whisk together the flour and salt.
Pour in the yeast mixture and stir until a shaggy dough forms.
Pro Tip: If the dough feels too dry, add a teaspoon of warm milk at a time; it should hold together but remain slightly tacky.
Step 3: Knead and rest
Turn the dough onto a lightly floured surface and knead until smooth, about 5–7 minutes.
Roll it into a rectangle, wrap in plastic, and chill for 30 minutes to relax the gluten.
Pro Tip: Resting the dough prevents spring-back when you roll and helps the layers form cleanly.
Step 4: Prepare the butter block
Lightly flour a surface and roll the chilled butter into a flat rectangle roughly half the size of the dough rectangle.
Place the butter in the center of the dough and fold the dough over the butter, sealing the edges like an envelope.
Pro Tip: If the butter starts to soften, chill the package for 10–15 minutes; you want the butter cold but pliable.
Step 5: Laminate — roll and fold
Roll the dough over the butter into a larger rectangle, then fold it into thirds (a book or letter fold).
Chill the folded dough for 20–30 minutes, then repeat the roll-and-fold process two more times, chilling between each turn.
Pro Tip: You’re aiming for visible layers but not butter leakage; keep the dough cold and work quickly.
Step 6: Shape the croissants
Roll the final dough out into a large rectangle, about 1/8–1/4 inch thick.
Cut into triangles and place chocolate near the base of each triangle, then roll toward the point to form a crescent.
Pro Tip: For neat rolls brush the base with a little beaten egg or water to help seal and keep chocolate from oozing out.
Step 7: Proof
Place the rolled croissants on a baking sheet lined with parchment, leaving space between them.
Let rise at room temperature for about 30 minutes until slightly puffy.
Pro Tip: They don’t need to double; you’ll see small domed tops when they’re ready to bake.
Step 8: Bake
Preheat the oven to 400°F (200°C).
Brush each croissant with beaten egg for a glossy finish, then bake for 15–20 minutes until golden brown.
Pro Tip: Rotate the tray halfway if your oven has hot spots to ensure even color.
Step 9: Cool and serve
Remove from the oven and allow to cool slightly on a wire rack so the layers can set.
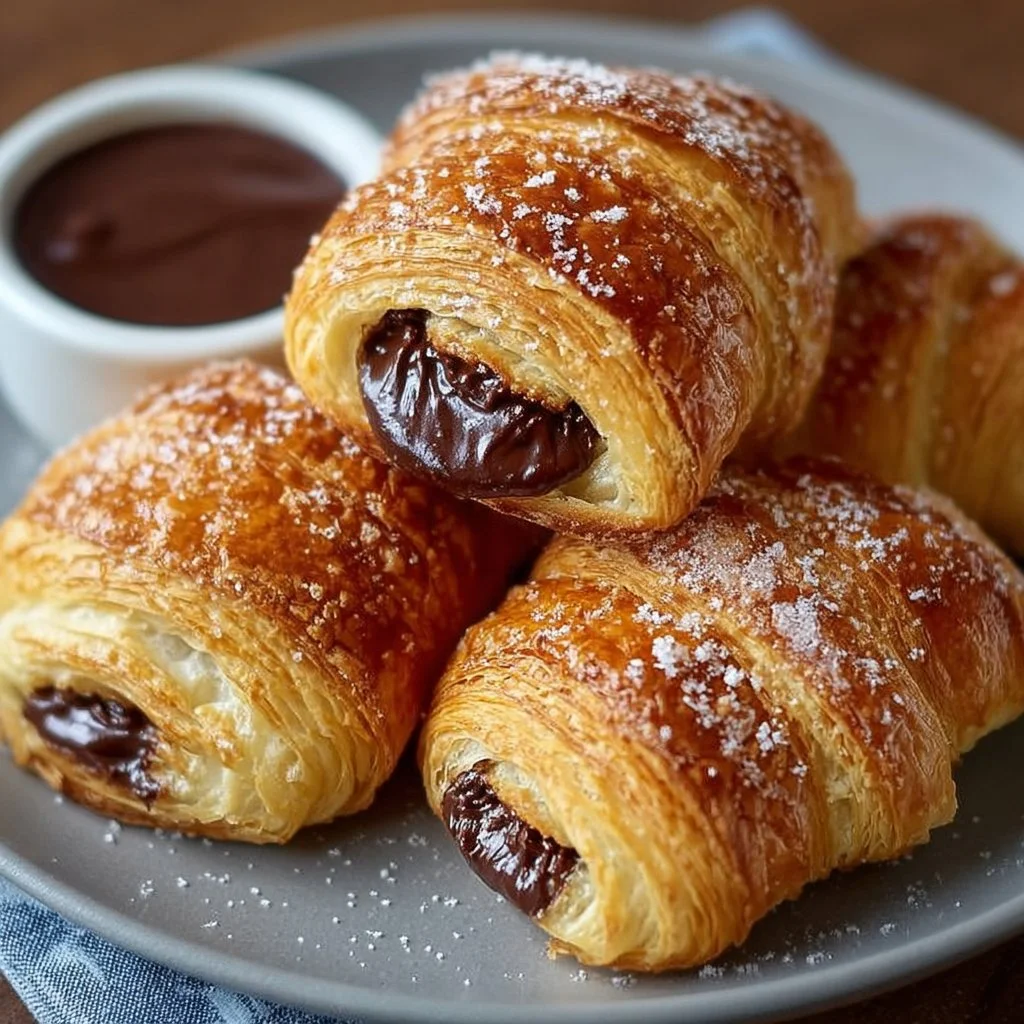
Serve warm so the chocolate is melty but not runny.
Pro Tip: If you like, dust with powdered sugar just before serving for a bakery-style look.

Expert Tips for Success
-
Temperature control is everything.
Keep the butter and dough cold during lamination; a warm kitchen will melt your butter and ruin the layers.
If your kitchen is warm, pop the dough in the fridge between each step. -
Use the right butter.
Higher-fat European-style butters give richer flavor and produce flakier layers.
Avoid light or low-fat butters which contain more water and can create steam pockets that behave unpredictably. -
Don’t overwork the dough.
Knead just until smooth and perform gentle turns during lamination.
Overworking develops too much gluten and leads to tough croissants. -
Watch proofing closely.
Over-proofed croissants will slump and fail to crisp; under-proofed ones will be dense.
Aim for a slight puff — they should be visibly relaxed but not doubled. -
Egg wash technique.
Brush gently; too much wash pools and burns, too little gives a dull finish.
For a darker sheen mix 1 teaspoon of milk or water into the beaten egg. -
Chocolate placement and size matter.
Use small batons or small-ish chopped pieces; too much chocolate will leak during baking.
If using chips, press them into the dough slightly and seal the edges well. -
Equipment suggestions.
A bench scraper helps manage dough and clean edges neatly.
A rolling pin with removable rings or a measured guide keeps thickness consistent. -
Troubleshooting butter leaks.
If butter squeezes out, chill the dough, scrape off excess butter, fold, and continue after cooling.
You can also reduce butter thickness slightly on the first few attempts until you find the right rhythm.
Storage & Freezing
Fridge: Store baked croissants in an airtight container for up to 2 days.
Reheat in a 350°F (175°C) oven for 5–8 minutes to restore flakiness.
Avoid microwaving; it makes pastry chewy.
Freezer: Freeze unbaked shaped croissants on a tray until solid, then transfer to a freezer bag for up to 1 month.
When ready, place frozen croissants on a tray, let proof at room temperature until puffy (this may take longer), then bake as directed.
You can also freeze baked croissants wrapped tightly and reheat in a 325–350°F oven for 8–12 minutes.
Make-ahead tip: Par-bake for 6–8 minutes, cool, then freeze. Finish baking directly from frozen for a near-fresh result.
Variations & Substitutions
Nutty: Add a thin smear of hazelnut or almond paste inside before placing the chocolate for a frangipane-style variation.
The paste adds richness and pairs beautifully with dark chocolate.
Fruit & chocolate: Add a few dried cherries or orange zest to the filling for a bright contrast.
Candied orange peel and dark chocolate is a classic combination.
Dairy-free: Substitute a high-quality dairy-free butter block designed for baking and use non-dairy milk for proofing.
Texture will be slightly different but still very satisfying.
Whole grain: Replace up to 25% of the all-purpose flour with whole wheat pastry flour.
This adds nuttiness; keep liquid slightly higher if the dough seems dry.
Frequently Asked Questions

Q: Can I make these without laminating perfectly?
A: Yes. The basic envelope method with three single folds (as in this recipe) produces good layers without commercial laminating tools.
Cold butter, short work sessions, and chilling between turns are the keys.
If you skip folds, the croissants will be more biscuit-like than flaky layers.
Q: How do I know if my yeast is still good?
A: Proof it in warm milk with a pinch of sugar for 5–10 minutes.
If it becomes frothy and smells yeasty, it’s active.
If nothing happens, discard and use fresh yeast.
Q: Can I use instant yeast instead of active dry?
A: Yes, you can.
If using instant yeast, you can mix it directly into the flour and reduce proofing time slightly, but the recipe as written works well with either — adjust hydration if needed.
Q: Why didn’t my croissants get layers?
A: Common causes are warm butter, insufficient folds, or overworking the dough.
Make sure butter stays cold and do the recommended number of turns, chilling between each.
Q: Can I make mini or larger croissants with the same recipe?
A: Absolutely.
Adjust baking time: smaller croissants bake faster (10–14 minutes), larger ones take longer (18–22 minutes).
Watch color and test for a golden, crisp exterior.
Final Thoughts
These homemade chocolate croissants reward patience with bakery-quality layers and molten chocolate centers.
If you try them, please leave a star rating in the recipe card below and pin this post to Pinterest so others can find it.
For more technique tips and variations, check my favorite walk-through at Homemade Chocolate Croissants (Pain au Chocolat) – Sally’s Baking, a step-by-step visual guide at Homemade Chocolate Croissants – Everyday Pie, and a quick simpler version at Easy Chocolate Croissants | The Cozy Apron.

Chocolate Croissants
Ingredients
Dough Ingredients
- 2 cups all-purpose flour Can substitute up to 25% with pastry flour for a more tender interior.
- 1/4 cup granulated sugar Adds sweetness to the dough.
- 1 teaspoon salt Balances the flavors.
- 1/2 cup unsalted butter, chilled and cubed Use high-fat European-style butter for better flavor.
- 1/2 cup milk, warm Temperature should be about 100–110°F (38–43°C).
- 1 1/2 teaspoons active dry yeast Proof in warm milk with a pinch of sugar.
- 1/2 cup chocolate (chocolate chips or chopped) Use quality chocolate you enjoy eating.
- 1 large egg For egg wash.
Instructions
Preparation
- In a mixing bowl, combine the warm milk, active dry yeast, and sugar. Let it sit for about 5 minutes until frothy.
- In another bowl, whisk together the flour and salt. Pour in the yeast mixture and stir until a shaggy dough forms.
- Turn the dough onto a lightly floured surface and knead until smooth, about 5–7 minutes. Roll it into a rectangle, wrap in plastic, and chill for 30 minutes.
Prepare the Butter Block
- Roll the chilled butter into a flat rectangle roughly half the size of the dough rectangle. Place the butter in the center of the dough and fold the dough over the butter.
Laminate
- Roll the dough over the butter into a larger rectangle, then fold it into thirds. Chill the folded dough for 20–30 minutes and repeat the roll-and-fold process two more times.
Shape the Croissants
- Roll the final dough out into a large rectangle, about 1/8–1/4 inch thick. Cut into triangles and place chocolate near the base of each triangle, then roll toward the point.
Proof and Bake
- Place the rolled croissants on a baking sheet lined with parchment and let rise for about 30 minutes. Preheat the oven to 400°F (200°C). Brush each croissant with beaten egg for a glossy finish, then bake for 15–20 minutes until golden brown.
Cool and Serve
- Remove from the oven and allow to cool slightly on a wire rack. Serve warm.