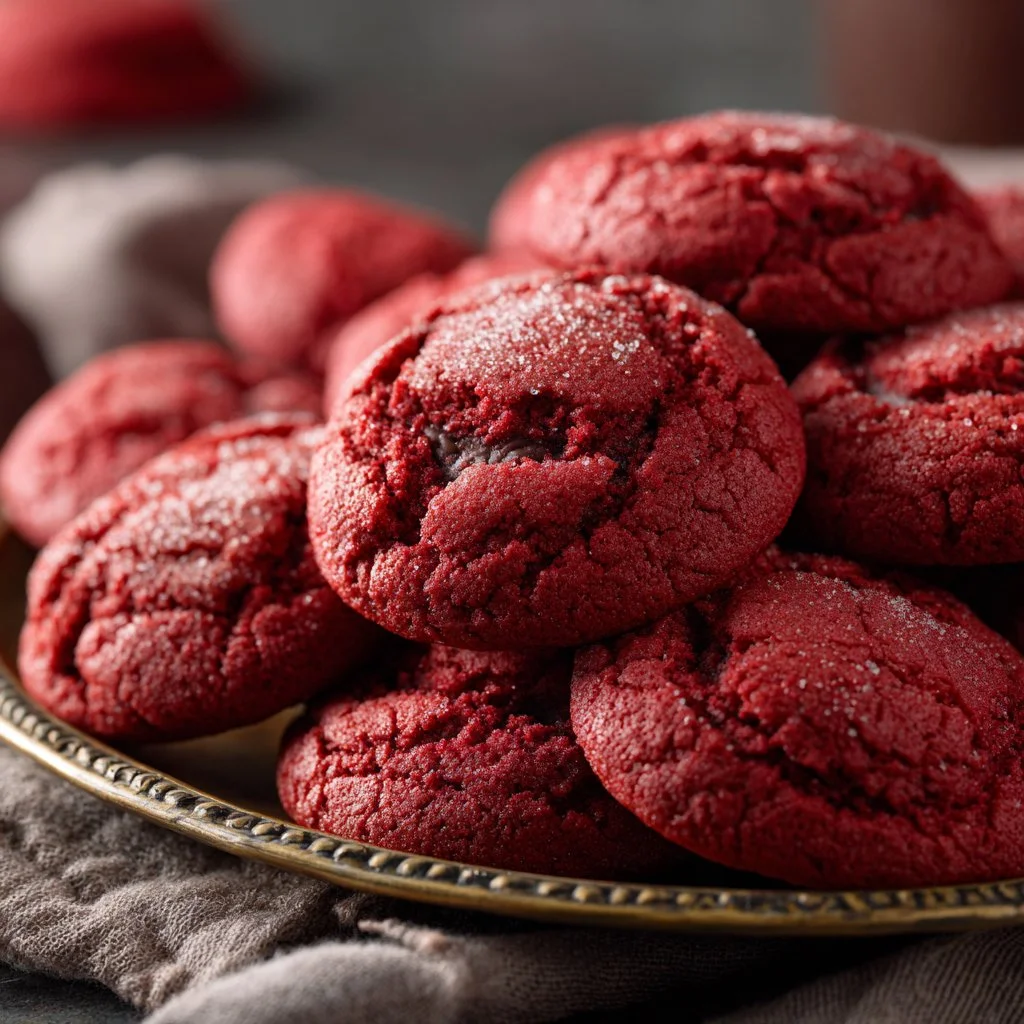
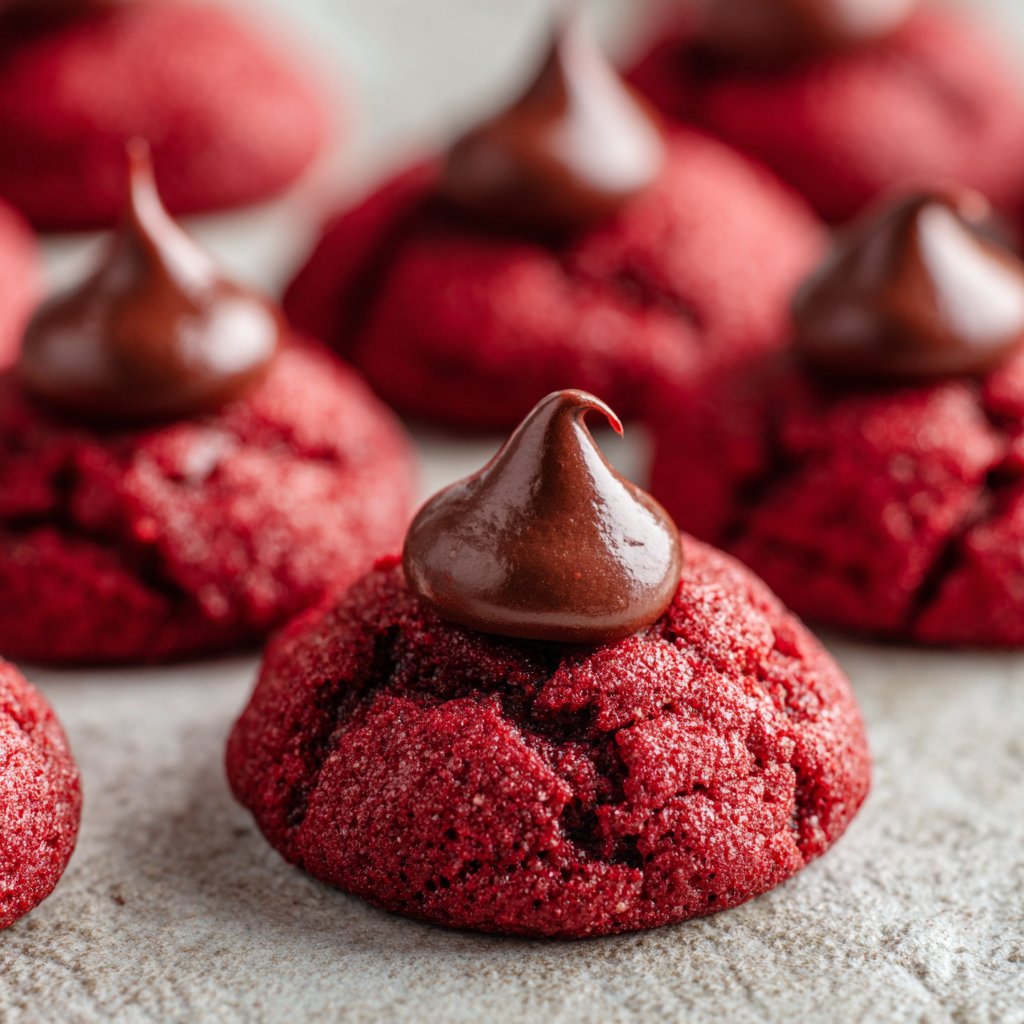
I first made these Hershey’s Red Velvet Blossoms for a school bake sale and they disappeared faster than I could pack the box. They’re essentially a soft red velvet cookie with a slightly fudgy crumb and a shiny Hershey’s Kiss nestling in the center. Bright, festive, and surprisingly simple, these cookies are perfect for holidays, classroom parties, or any time you want a pretty treat that’s also easy to pull together.
Why you’ll love this dish
This recipe pairs the classic cocoa-hinted red velvet flavor with the familiar chocolate center of a Hershey’s Kiss. It’s fast enough for weeknight baking but special enough for Valentine’s Day, Christmas cookie swaps, or a last-minute dessert. The dough is forgiving — you don’t need fancy equipment, and the cookies hold their shape while staying soft in the middle.
“Soft, vibrant, and so easy — everyone asked for the recipe. The Kiss gives them the perfect finish.” — A quick review from my holiday cookie table
Benefits at a glance:
- Kid-approved and visually festive.
- Uses pantry staples (just add red coloring and Kisses).
- Quick prep and short bake time.
- Great for gifting because they stack nicely when cool.
How this recipe comes together
You’ll start by combining the dry ingredients (flour, cocoa, soda, salt). Next, cream butter with both sugars until pale and fluffy, then add the egg, vanilla, and red coloring. Fold in the dry mix just until combined. Roll the dough into 1-inch balls, bake until the edges are set, and immediately press a Hershey’s Kiss into each warm cookie so it adheres and makes the classic blossom shape. A short rest on the baking sheet lets the cookie set, then move them to a rack to finish cooling.
This overview helps you picture the flow: mix dry, cream butter+sugars, combine, shape, bake, press chocolate, cool.
What you’ll need
- 2 1/2 cups all-purpose flour (spoon and level for accuracy; for a slightly airier cookie, sift once)
- 1 tablespoon cocoa powder (unsweetened)
- 1 teaspoon baking soda
- 1 teaspoon salt
- 1 cup unsalted butter, softened (room temperature for easy creaming)
- 1 1/2 cups granulated sugar
- 1/2 cup packed brown sugar (adds chew and depth)
- 1 tablespoon vanilla extract
- 1 large egg (use pasteurized if you’re worried about raw egg handling)
- 1 tablespoon red food coloring (gel works better for vibrant color with less liquid)
- Hershey’s Kisses, unwrapped (one per cookie — count on about 24–30 depending on yield)
Substitution notes:
- For a deeper red without extra liquid, use gel or paste food coloring.
- To make gluten-free, swap with a 1:1 gluten-free flour blend and add 1/4 teaspoon xanthan gum if your blend lacks it.
- Vegan swaps work (vegan butter + flax egg), but texture will be slightly different.
Step-by-step instructions
- Preheat the oven to 350°F (175°C). Line baking sheets with parchment paper or a silicone baking mat.
- In a medium bowl whisk together the flour, cocoa powder, baking soda, and salt. Set this dry mix aside.
- In a large bowl, cream the softened butter with the granulated and brown sugars until the mixture is light in color and fluffy (about 2–3 minutes with a mixer on medium).
- Beat in the egg, vanilla extract, and red food coloring until the color and texture are uniform.
- Add the dry ingredients gradually to the wet mixture. Mix on low speed or fold by hand until just combined — avoid overmixing.
- Roll the dough into 1-inch balls. Place them about 2 inches apart on the prepared baking sheets so they have room to spread.
- Bake for 10–12 minutes. Look for set edges and slightly soft centers — the cookies will continue to firm as they cool.
- Immediately after removing a tray from the oven, press an unwrapped Hershey’s Kiss into the center of each cookie. Press gently so the cookie doesn’t crack.
- Let the cookies cool on the baking sheet for 5 minutes to set the base, then transfer them to a wire rack to cool completely.
How to serve Hershey’s Red Velvet Blossoms
- Plate them on a festive platter, alternating Kisses with different foil colors for contrast.
- Pair with a simple hot drink: rich coffee, espresso, or hot cocoa complements the chocolate center.
- For parties, make bite-sized versions (use a smaller cookie scoop and mini Kisses) and arrange on a tiered tray.
- Box them in small bakery boxes or clear cellophane bags tied with ribbon for gifting — place parchment between layers to prevent sticking.
Storage and reheating tips
- Room temperature: Store in an airtight container for up to 4 days. Place a sheet of parchment between layers to keep Kisses from sticking.
- Fridge: Avoid refrigerating — cold air can dry the cookies and dull the chocolate sheen.
- Freezing: Freeze cooled cookies in a single layer on a tray until firm, then transfer to a freezer-safe bag or container for up to 3 months. Thaw at room temperature; if you want the Kiss glossy again, warm briefly in a 250°F oven for 3–5 minutes.
- Reheating: Microwave single cookies for 5–7 seconds to take the chill off (watch closely so the chocolate doesn’t melt too much). Oven method: 300°F for 4–6 minutes.
Food safety note: Baked cookies are safe, but avoid eating raw dough due to raw egg and raw flour risks. Use pasteurized eggs if you must taste raw dough.
Pro chef tips
- Use gel food coloring to avoid adding extra liquid that can change the cookie texture.
- Don’t overbake: remove when edges are set but centers still soft. They’ll finish cooking while cooling.
- If dough is sticky, chill for 15–20 minutes — it’s easier to roll and spreads less.
- Uniform cookie size ensures even baking; use a 1-tablespoon scoop for consistent results.
- Press the Kiss in right after baking. If you wait until the cookie cools, the chocolate won’t adhere properly.
Creative twists
- White chocolate blossoms: swap Hershey’s Kisses for white chocolate kisses and add 1/4 cup white chocolate chips to the dough.
- Peppermint variation: use peppermint Kisses or sprinkle crushed candy cane on the warm Kiss for a holiday touch.
- Cream cheese center: replace Kisses with a small chilled cream cheese dollop and top with a chocolate piece after baking.
- Chocolate overload: fold in 1/2 cup mini chocolate chips for extra fudginess.
- Dietary swaps: use vegan butter and a flax or chia “egg” for a dairy-free/egg-free version (texture will be slightly cakier).
Your questions answered
Q: How many cookies does this recipe make?
A: Expect about 24–30 cookies depending on the size of your dough balls. Using a 1-inch scoop keeps them uniform.
Q: Can I make the dough ahead of time?
A: Yes. You can refrigerate the dough for up to 48 hours or freeze portions for up to 3 months. If refrigerated, let it sit at room temperature for 10–15 minutes before shaping.
Q: What if my Kisses sink too far into the cookies?
A: Press gently and only once, immediately after removing from the oven. Don’t push hard — a light press is enough. If your oven runs hot, the cookies may be too soft; shorten bake time slightly.
Q: Can I use different chocolates instead of Hershey’s Kisses?
A: Absolutely. Mini truffles, Rolos, or even a teaspoon of thick ganache work well. Keep size and melting behavior in mind.
Q: Will the red color bleed or stain?
A: Gel coloring minimizes runny batter and reduces bleed. Some transfer to hands is normal; wash hands promptly to avoid stains on clothing.
Conclusion
If you want a reliable, crowd-pleasing holiday cookie, this version of Hershey’s Red Velvet Blossoms delivers vibrant color, a tender crumb, and the classic Hershey’s Kiss finish. For a slightly different approach or a visual walkthrough, check this easy reference on Easy Hershey’s Red Velvet Blossoms Cookies – Lifestyle of a Foodie. For another tested variation and tips on shaping and bake time, see Red Velvet Blossom Cookies • Sarahs Bake Studio.

Hershey's Red Velvet Blossoms
Ingredients
Dry Ingredients
- 2.5 cups all-purpose flour (spoon and level for accuracy; for a slightly airier cookie, sift once)
- 1 tablespoon cocoa powder (unsweetened)
- 1 teaspoon baking soda
- 1 teaspoon salt
Wet Ingredients
- 1 cup unsalted butter, softened (room temperature for easy creaming)
- 1.5 cups granulated sugar
- 0.5 cup packed brown sugar (adds chew and depth)
- 1 tablespoon vanilla extract
- 1 large egg (use pasteurized if you're worried about raw egg handling)
- 1 tablespoon red food coloring (gel works better for vibrant color with less liquid)
Toppings
- 24-30 pieces Hershey’s Kisses, unwrapped (one per cookie)
Instructions
Preparation
- Preheat the oven to 350°F (175°C) and line baking sheets with parchment paper or a silicone baking mat.
- In a medium bowl, whisk together the flour, cocoa powder, baking soda, and salt. Set this dry mix aside.
- In a large bowl, cream the softened butter with the granulated and brown sugars until light in color and fluffy (about 2–3 minutes).
- Beat in the egg, vanilla extract, and red food coloring until uniform in color and texture.
Mixing and Baking
- Gradually add the dry ingredients to the wet mixture, mixing on low speed or folding by hand until just combined — avoid overmixing.
- Roll dough into 1-inch balls and place them about 2 inches apart on the prepared baking sheets.
- Bake for 10–12 minutes, until the edges are set and the centers are slightly soft.
- Immediately after removing from the oven, press an unwrapped Hershey’s Kiss into the center of each cookie gently.
- Let cookies cool on the baking sheet for 5 minutes to set before transferring them to a wire rack to cool completely.