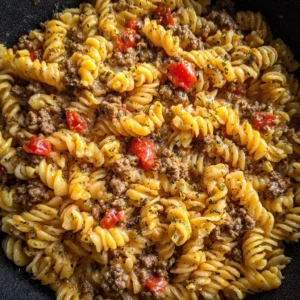
The first time I made these crispy pan-fried cabbage and savory noodle buns, my kitchen smelled like a street stall and a cozy diner at once.
They disappeared from the plate faster than I expected — a sure sign of a keeper.
Simple pantry staples transform into crunchy, savory patties that are surprisingly satisfying.
This recipe is quick to pull together on weeknights and flexible enough to adapt when guests drop by.
It’s a smart way to use leftover noodles and a whole cabbage.
Every bite has a contrast of textures: crisp outside, tender inside, with a toasty sesame-soy backnote.
Why You’ll Love This Recipe
- Fast weeknight dinner that comes together in about 30 minutes.
- Uses inexpensive, everyday ingredients and stretches a head of cabbage.
- Crispy exterior with a soft, flavorful noodle-cabbage interior.
- Easy to scale and great for meal prep or party appetizers.
The texture is the real star: the thin shreds of cabbage soften and release a little moisture, which helps the noodles bind, while the pan-frying creates a golden, crunchy shell. The soy sauce and sesame oil give a savory, slightly nutty lift that keeps the buns from tasting bland. With each bite you get a chewy noodle center, tender cabbage, and a satisfying crisp that makes these feel indulgent without complicated ingredients.
“Five stars — made these for dinner and my skeptical partner asked for seconds. Crispy edges, soft center, perfect with a little chili oil.” — Reader, Mara T.
Key Ingredients
Cabbage (1 head, shredded): Cabbage is the volume hero here. It wilts down as it cooks, adding bulk and a mild, sweet flavor. Choose a fresh, firm head — green or Napa both work — and shred finely so it cooks evenly and binds well with the noodles.
Cooked noodles (2 cups; egg or rice noodles): Leftover egg noodles stay chewy and add body; rice noodles give a lighter chew and handle gluten-free diets. Dry-cooked noodles should be rinsed and tossed with a little oil if sticky; slightly undercooked noodles hold up better in the pan.
Soy sauce (2 tablespoons) and sesame oil (1 tablespoon): Soy sauce brings umami and salt; use regular or low-sodium depending on preference. Sesame oil is a small addition but critical — it gives that toasty aroma and rounds the flavor. For soy, Kikkoman or a local naturally brewed brand works well; for sesame oil, buy a darker, toasted variety for maximum flavor.
Full ingredient list:
- 1 head of cabbage, shredded
- 2 cups of cooked noodles (egg noodles or rice noodles)
- 2 tablespoons soy sauce
- 1 tablespoon sesame oil
- 1 garlic clove, minced
- 1/2 teaspoon grated ginger
- Salt and pepper to taste
- Oil for frying (neutral oil like vegetable, canola, or sunflower)
- Green onions, chopped (for garnish)
Step-by-Step Instructions
Step 1: Heat the pan and soften the cabbage
Place a large pan over medium heat and add 1–2 tablespoons of neutral oil.
Add the shredded cabbage and cook, tossing occasionally, until softened and reduced in volume, about 5–7 minutes.
You’ll know it’s ready when the cabbage looks wilted, slightly glossy, and gives easily to the spatula.
Pro Tip: Use a wide skillet so the cabbage spreads out in a thin layer and steams off moisture instead of steaming in a heap.
Step 2: Add aromatics
Stir in the minced garlic and grated ginger, cooking for another 1–2 minutes until fragrant.
Keep the heat moderate so the garlic softens but doesn’t burn.
The aroma will become noticeably fragrant and slightly sweet.
Pro Tip: Mince garlic very fine or grate it — big chunks will char during the quick fry.
Step 3: Combine noodles and seasonings
In a bowl, toss cooked noodles with the soy sauce and sesame oil until evenly coated.
Add the cabbage mixture and season lightly with salt and pepper, then toss to combine.
The soy and sesame oil should perfume the noodles and start to bind the mix.
Pro Tip: If the mixture feels loose, squeeze a small handful — it should hold together slightly. Overly wet noodles mean you need to drain or pat them drier.
Step 4: Shape into buns or patties
Press the mixture into bun or patty shapes using your hands or a ring mold.
Compact them firmly so they hold together in the pan.
Aim for 2–3 inch rounds about 1/2–3/4 inch thick for even cooking.
Pro Tip: Wet your hands slightly or oil them to prevent sticking; don’t pack so tightly that the center won’t heat through.
Step 5: Pan-fry until golden and crispy
Add more neutral oil to the pan, enough to coat the bottom, and heat over medium-high.
Fry the formed buns until the bottoms are golden brown and crisp, about 3–4 minutes, then flip and cook the other side the same time.
You’ll know they’re done when each side is a deep golden brown and the bun releases easily from the pan.
Pro Tip: Don’t crowd the pan. Give each bun space so the oil stays hot and produces a crisp crust.
Step 6: Drain and garnish
Place buns on paper towels to drain excess oil.
Serve hot, garnished with chopped green onions.
These are best eaten immediately while the crust is still crisp.
Pro Tip: A squeeze of fresh lime or a drizzle of chili oil brightens the flavors just before serving.
Expert Tips for Success
- Temperature control matters: medium heat softens the cabbage without browning, while medium-high heat crisps the formed buns. If the oil smokes, reduce heat; if nothing browns after 3 minutes, increase heat slightly.
- Dry noodles are a common issue: when using freshly cooked noodles, spread them on a tray to cool and pat with a towel to remove excess moisture. Sticky, wet noodles will prevent a crisp crust.
- Binding without eggs: this recipe relies on the starch in the noodles and the cabbage’s natural moisture. If your mixture won’t stick together, add 1–2 tablespoons of plain flour or a slurry of cornstarch and water to help bind.
- Use the right oil: neutral high-smoke-point oils like canola, vegetable, or sunflower are ideal for frying. They allow the outside to crisp without imparting extra flavors.
- Flipping technique: slide a thin spatula under the bun edge and flip confidently. If it resists, wait 30 seconds — a crust usually forms and releases cleanly when ready.
- Make-ahead and reheat technique: you can form the buns ahead and refrigerate them briefly. For reheating, use a hot pan with a splash of oil to refresh the crisp without drying the interior.
- Season boldly: cabbage is mild. Taste the noodle-cabbage mix before forming and adjust soy, sesame, and salt so the final bites aren’t under-seasoned.
- Equipment note: a heavy-bottomed skillet (cast iron or stainless) helps develop even browning and maintains heat when you add cooler patties.
- Crowd control: fry in batches and keep cooked buns on a rack in a warm oven (200°F / 90°C) to stay crispy while you finish the rest.
- Visual cue for doneness: look for a uniform golden-brown color around the edge and a slightly translucent center where the noodles meet the cabbage.
Storage & Freezing
Fridge storage: Cool the buns completely before storing.
Place in an airtight container lined with paper towels to absorb excess oil and keep for up to 3 days.
Reheat in a skillet over medium heat for 2–3 minutes per side until warmed through and crisp.
Freezer storage: Freeze on a tray in a single layer until solid, about 1–2 hours.
Transfer the frozen buns to a freezer bag or container with parchment between layers.
They keep for up to 2 months.
Reheating from frozen: Reheat frozen buns in a preheated oven at 400°F (200°C) for 12–15 minutes, flipping halfway, or pan-fry over medium for 4–6 minutes per side.
Avoid microwaving from frozen — it makes them soggy.
Make-ahead tip: You can assemble and shape the buns a few hours ahead, refrigerate them on a tray, then fry just before serving to preserve the crisp texture.
Variations & Substitutions
Add protein: Stir in cooked ground pork, diced tofu, or shredded chicken to the noodle-cabbage mix for a heartier bun. Adjust seasoning and cook the protein first to render fat and develop flavor.
Spice it up: Mix a teaspoon of chili paste (gochujang or sambal oelek) into the soy-sesame dressing for a spicy kick. Serve with chili oil for dipping.
Gluten-free swap: Use rice noodles and tamari or a gluten-free soy sauce to keep this recipe gluten-free. Ensure all other condiments are certified GF.
Veggie boost: Fold in grated carrot, thinly sliced shiitake, or finely chopped bok choy during the cabbage-softening stage for more color and nutrients.
Cheesy twist: For indulgence, add a tablespoon of grated Parmesan or a small amount of grated cheddar into the mixture before shaping. The cheese helps with binding and adds richness.
Frequently Asked Questions
Q: Can I use raw cabbage without cooking it first?
A: I don’t recommend using raw cabbage. Cooking softens the cabbage and releases moisture that helps flavor and bind the mixture. Raw cabbage will remain crunchy and prevent the buns from holding together well.
Q: Which noodles are best — egg or rice?
A: Both work. Egg noodles give a slightly chewier, richer texture and hold together nicely. Rice noodles are lighter and make the buns a touch more delicate. Choose based on dietary needs and the texture you prefer.
Q: How do I prevent the buns from falling apart when flipping?
A: Pack them firmly, preheat the oil so it seals the outside quickly, and flip only once. If a bun sticks, give it a bit longer — the crust will release once it’s properly browned.
Q: Are these buns good cold or at room temperature?
A: They’re best hot and crisp. At room temperature they lose the contrast between crunchy and tender. If serving at a party, keep them warm in a low oven and re-crisp in a skillet for best texture.
Q: Can I bake these instead of frying?
A: Yes — brush lightly with oil and bake at 425°F (220°C) on a parchment-lined sheet for about 12–18 minutes, flipping halfway. They’ll be less crisp than pan-fried but still tasty and slightly healthier.

Final Thoughts
These crispy pan-fried cabbage and savory noodle buns are a simple, satisfying recipe you’ll reach for again and again.
They’re forgiving, adaptable, and perfect for turning small fridge odds and ends into something special.
Please leave a star rating in the recipe card below if you try them, and pin this recipe to Pinterest for later.
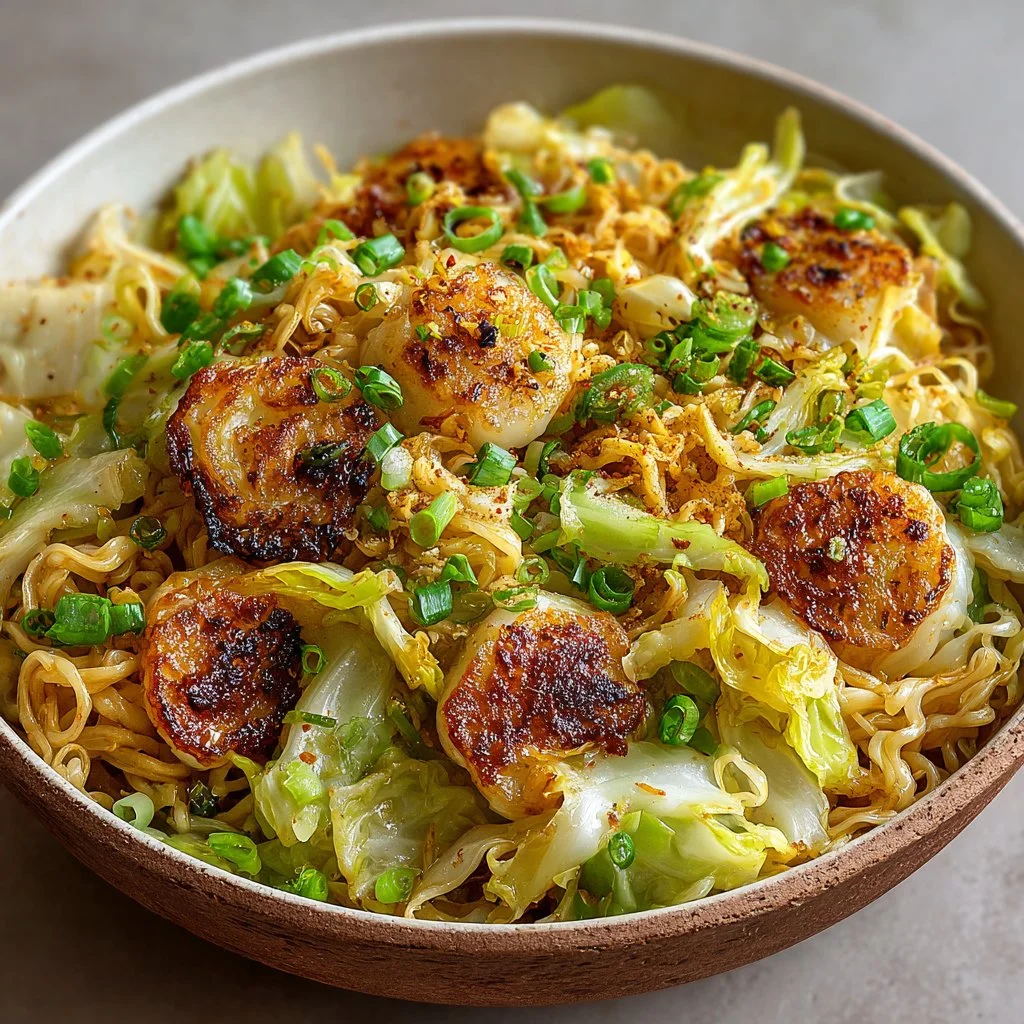
For extra technique inspiration on pan-frying buns, check out this detailed guide on pan-fried steamed buns (Sheng Jian Bao).
If you want a cabbage-and-noodle version with slightly different seasoning ideas, see the riff here: Pan-Fried Cabbage and Noodle Buns.
And for a different pan-fried bun technique using mochi, try this tutorial: how to make pan-fried mochi bun.

Crispy Pan-Fried Cabbage and Savory Noodle Buns
Ingredients
Vegetable Base
- 1 head cabbage, shredded Choose a fresh, firm head; green or Napa both work.
- 2 cups cooked noodles (egg or rice noodles) Use leftover egg noodles for a chewier texture or rice noodles for gluten-free.
Flavoring
- 2 tablespoons soy sauce Use regular or low-sodium.
- 1 tablespoon sesame oil Opt for a darker, toasted variety for maximum flavor.
- 1 clove garlic, minced Minced finely or grated.
- 1/2 teaspoon grated ginger
- Salt and pepper to taste
For Frying
- Oil for frying (neutral oil like vegetable, canola, or sunflower)
- Green onions, chopped (for garnish)
Instructions
Preparation
- Heat a large pan over medium heat and add 1–2 tablespoons of neutral oil.
- Add the shredded cabbage and cook, tossing occasionally, until softened and reduced in volume, about 5–7 minutes.
Aromatics
- Stir in the minced garlic and grated ginger, cooking for another 1–2 minutes until fragrant.
Combine Mixture
- In a bowl, toss cooked noodles with the soy sauce and sesame oil until evenly coated.
- Add the cabbage mixture and season lightly with salt and pepper, then toss to combine.
Forming Buns
- Press the mixture into bun or patty shapes using your hands or a ring mold.
Pan-Frying
- Add more neutral oil to the pan, enough to coat the bottom, and heat over medium-high.
- Fry the formed buns until the bottoms are golden brown and crisp, about 3–4 minutes, then flip and cook the other side the same time.
Serving
- Place buns on paper towels to drain excess oil and serve hot, garnished with chopped green onions.