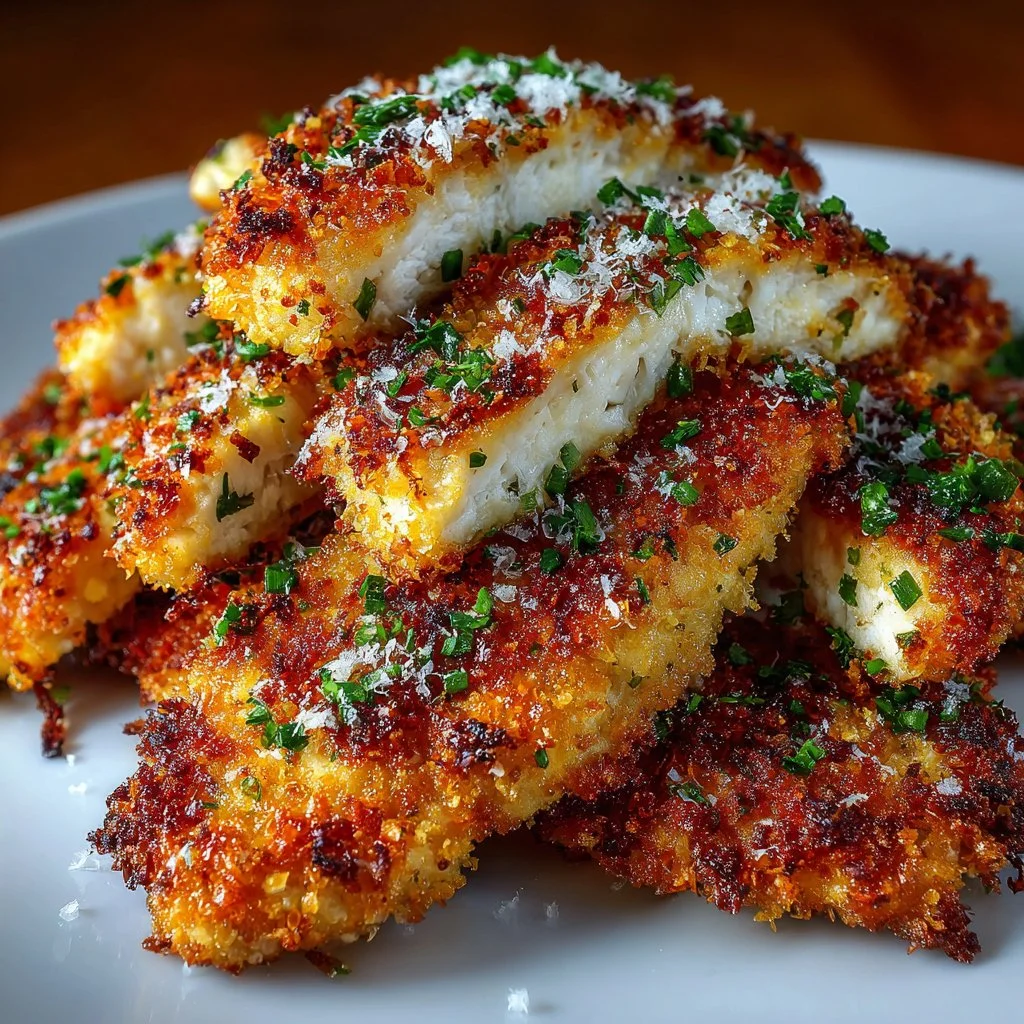
The first time I made these crispy baked chicken breast tenders, my picky nephew asked for seconds before dinner was even finished.
They’re simple, fast, and deliver a crunch that doesn’t feel like you sacrificed your oven for deep-fried results.
If you want a family-friendly weeknight hero that reheats well and plays nice with any dipping sauce, this is it.
Why You’ll Love This Recipe
- Quick prep and a short bake time make these perfect for weeknights.
- A crunchy, golden exterior without the mess or calories of frying.
- Versatile: serve with salads, in wraps, or on a kid’s lunchbox menu.
- Uses pantry-stable ingredients and adapts easily to flavor swaps.
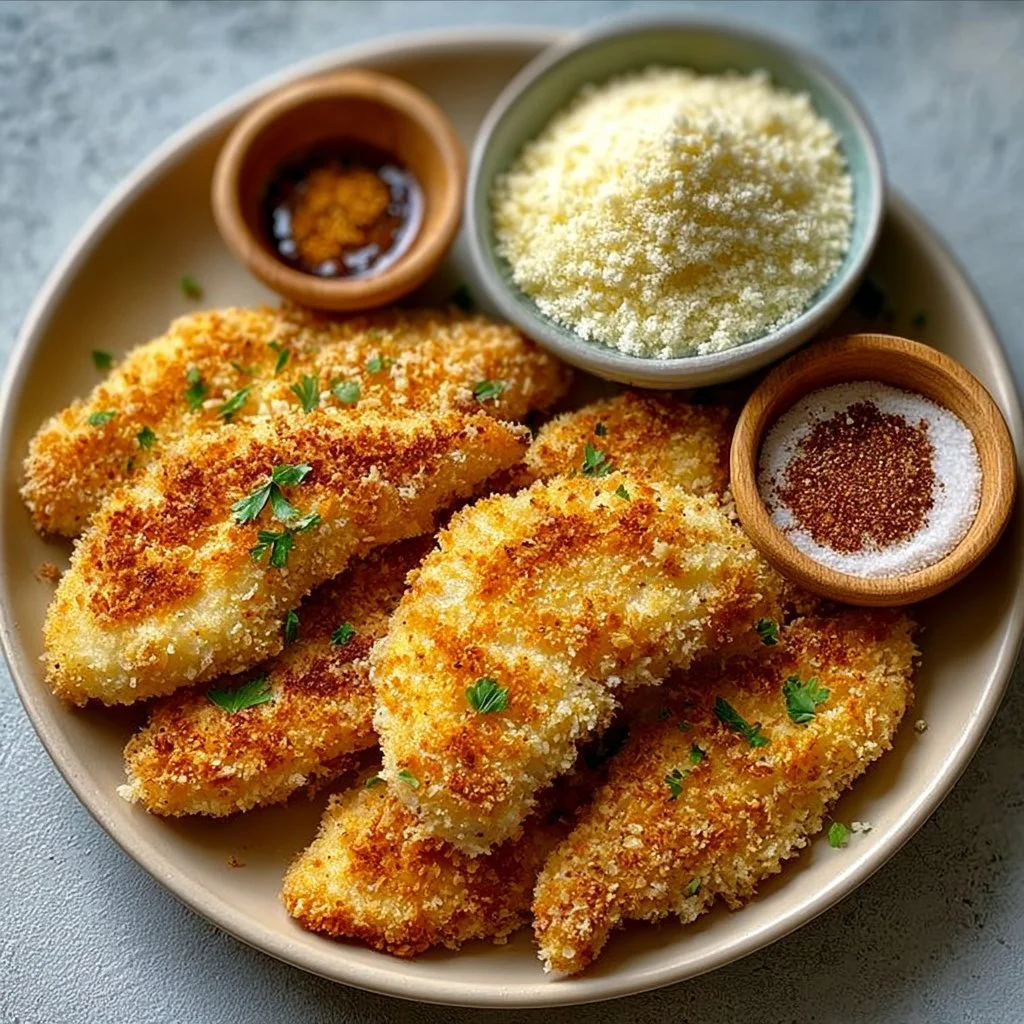
The coating here gives a thin, satisfying crunch while the interior stays juicy because the tenders are thin and cook quickly.
Parmesan adds a savory umami lift that browns beautifully, while the seasoning keeps the flavor familiar yet interesting.
This is the kind of tender that pleases both adults and kids, staying moist even when reheated.
“Made these for my kids and they devoured them. Crisp outside, juicy inside — such an easy go-to.” — Jenna, reader
Key Ingredients
Chicken breast tenders: These are the lean hero of the dish.
Tenders cook evenly and fast, which helps the outer crust set before the interior dries.
If all you have are full chicken breasts, slice them into 1/2-inch strips for similar results.
Breadcrumbs: The texture of the crumbs defines the crunch.
Panko gives the lightest, airiest crunch; regular fine breadcrumbs yield a tighter, more uniform crust.
For extra flavor choose seasoned breadcrumbs or pulse dry stale bread in a food processor for homemade crumbs.
Grated Parmesan cheese: Parmesan does two jobs: flavor uplift and color.
It adds salty, nutty depth and promotes faster browning because of its low moisture.
Use freshly grated Parmigiano-Reggiano if you can; pre-grated works but may not brown as evenly.
Large eggs: Eggs create the adhesive layer that binds flour to crumbs.
They also add a bit of richness so the crumbs cling and form a continuous crust.
Lightly beat them and, for an extra-tender result, add a tablespoon of water or milk to the eggs.
Full ingredient list:
- 1 pound chicken breast tenders
- 1 cup breadcrumbs (panko or regular)
- 1/2 cup grated Parmesan cheese
- 1 teaspoon garlic powder
- 1 teaspoon paprika
- Salt and pepper to taste
- 1/2 cup flour
- 2 large eggs
- Cooking spray or olive oil for baking
Step-by-Step Instructions
Step 1: Preheat and prep your workspace
Preheat your oven to 400°F (200°C).
Line a baking sheet with parchment paper or a silicone mat for easy cleanup.
Set a wire rack on the sheet if you want more even air circulation and crisper bottoms.
Pro Tip: The oven must be hot when the tenders go in — that initial blast sets the crust and prevents sogginess.
Step 2: Mix the breadcrumb coating
In a shallow bowl, combine the breadcrumbs, grated Parmesan cheese, garlic powder, paprika, and a pinch of salt and pepper.
Stir so the Parmesan distributes evenly and the spices coat all the crumbs.
Pro Tip: Smell the mix — the aroma tells you if the garlic and paprika are balanced. Adjust now rather than after baking.
Step 3: Build a breading station
Set out three shallow bowls: flour in one, beaten eggs in the second, and the breadcrumb mixture in the third.
This station makes breading fast and keeps hands and surfaces organized.
Pro Tip: Use two forks or tongs to move pieces between bowls if you want to avoid raw-hand contact.
Step 4: Bread the tenders
Dredge each chicken tender in flour, shaking off excess.
Dip it into the beaten eggs, letting any extra drip back into the bowl.
Press the tender into the breadcrumb mixture, coating completely and pressing the crumbs to adhere.
Pro Tip: For an extra-thick crust, double-dip: back into the egg and crumbs a second time. You’ll know they’re ready when no bare chicken shows through the crumbs.
Step 5: Arrange and oil
Place the coated tenders on the prepared baking sheet or on the wire rack, leaving space between each piece.
Spray lightly with cooking spray or drizzle a little olive oil over the tops to help browning.
Pro Tip: A light, even mist is better than puddles of oil — you want surface crisping, not greasiness.
Step 6: Bake and flip
Bake at 400°F (200°C) for 20–25 minutes, flipping once halfway through so both sides brown evenly.
The tenders are done when they’re golden brown and the internal temperature reaches 165°F (74°C).
Pro Tip: Visual cues matter — look for an even golden color and juices that run clear when one is sliced.
Step 7: Rest and serve
Let the tenders rest a few minutes after baking so the juices redistribute.
Serve warm with your favorite dips or as an easy protein addition to salads and sandwiches.
Pro Tip: Resting keeps the meat juicier and prevents the crust from tearing when cut.
Expert Tips for Success
- Temperature control: Use an oven thermometer to confirm 400°F. Oven dials are often off by 25°F, and that affects browning and cook time.
- Panko vs. regular breadcrumbs: Panko yields lighter, flakier crunch. If using regular crumbs, add a tablespoon of melted butter to the crumbs for better browning.
- Dry the chicken: Pat tenders dry with paper towels before breading. Moisture is the enemy of crispness and will create steam under the crust.
- Pressing crumbs: Press the crumbs onto the tender firmly but not hard enough to compress the meat. Firm pressure ensures the crumbs adhere and form a unified crust.
- Rack vs. direct sheet: Elevating tenders on a wire rack placed over the sheet promotes airflow and crisper undersides. If you don’t have a rack, flip halfway and use more oil to help the bottom crisp.
- Oil spray: Use a neutral oil spray or a light brushing of extra-virgin olive oil. Too much oil will make the crust oily; too little and the breadcrumbs can stay pale.
- Monitor internal temperature: The safest way to know doneness is a meat thermometer at 165°F (74°C). Overcooking quickly dries thin tenders.
- Make-ahead crumb mix: You can mix the breadcrumb-Parmesan-spice blend ahead and store in an airtight container for up to a week to speed weeknight prep.
- Gluten-free swap: Replace flour and breadcrumbs with a 1:1 gluten-free flour and gluten-free panko alternative; add an extra egg wash for adhesion.
- Crisp refresh: To revive leftover tenders, 8–10 minutes in a 375°F (190°C) oven or toaster oven will restore crunch better than microwaving.
Storage & Freezing
Fridge storage: Cool tenders completely before packing.
Store in an airtight container with a paper towel layer to absorb excess moisture.
They keep well for 3–4 days.
Freezer: Flash-freeze tenders on a baking sheet until solid, then transfer to a freezer bag or airtight container.
Label with date; they keep well for up to 3 months.
Freeze raw-breaded tenders on the sheet first if you want to bake from frozen later.
Reheating from fridge: Reheat on a wire rack in a 375°F (190°C) oven for 8–10 minutes until warmed through and crisp.
Reheating from frozen: Bake at 400°F (200°C) for 15–20 minutes from frozen, flipping halfway, until internal temperature reaches 165°F (74°C).
Avoid the microwave unless you accept a softened crust; if you must, microwave for a short time then crisp in a hot oven or skillet for a minute each side.
Variations & Substitutions
Spicy lemon: Add 1/2 teaspoon cayenne and the zest of one lemon to the breadcrumb mix for brightness and heat.
Herb-parmesan: Mix 2 tablespoons chopped fresh parsley and 1 teaspoon dried oregano into the crumbs for an herby crust.
Gluten-free: Use gluten-free panko and rice flour for dredging; almond flour can add nuttiness but may brown faster so watch closely.
Whole-wheat or oat option: Swap regular breadcrumbs for finely ground oats or whole-wheat panko for a heartier bite and a fiber boost.
Frequently Asked Questions
Q: Can I use whole chicken breasts instead of tenders?
A: Yes. Slice breasts into 1/2-inch strips or pound to an even thickness so they cook quickly and evenly. Thicker whole breasts need longer baking and are more at risk of drying out.
Q: Do these stay crispy without oil?
A: Minimal oil is important — it helps the Parmesan and crumbs brown. Totally oil-free methods produce a paler crust that won’t have the same crunch. Brushing or spraying lightly is sufficient.
Q: How do I prevent the breading from falling off?
A: Ensure three things: dry the chicken first, shake off excess flour before the egg wash, and press crumbs firmly into the egg-coated meat. Letting the breaded tenders sit in the fridge for 10 minutes before baking helps set the coating.
Q: Can I prepare these ahead for a party?
A: Yes. Bread the tenders and place them on a sheet pan covered tightly; refrigerate for up to 24 hours before baking. For large batches, you can freeze already-breaded tenders and bake from frozen when guests arrive.
Q: How do I make them extra crispy like fried tenders?
A: Use panko, bake on a wire rack, and finish at the end with a high-heat blast — raise the oven to 425°F (218°C) for the last 3–4 minutes while watching carefully to avoid burning.

Final Thoughts
This recipe is a dependable, crispy dinner that works for kids, meal prep, and dinner parties.
Give the breadcrumb mix a personal twist and you’ll have a rotating crowd-pleaser.
Please leave a star rating in the recipe card below and pin this recipe to your Pinterest boards if you loved it.
Conclusion
If you’re looking for ideas to tweak the technique or want alternative tried-and-true methods, this version from Truly Crispy Oven Baked Chicken Tenders – RecipeTin Eats is a great comparison for achieving extra crunch.
For a slightly different breadcrumb approach and helpful tips, see the method at EXTRA Crispy Oven Baked Chicken Tenders | Don’t Go Bacon My ….
And for another take with bright flavor pairings, check Crispy Baked Chicken Tenders | The Lemon Apron.

Crispy Baked Chicken Breast Tenders
Ingredients
Main Ingredients
- 1 pound chicken breast tenders Lean hero of the dish; can substitute with full chicken breasts cut into 1/2-inch strips.
- 1 cup breadcrumbs (panko or regular) For a lighter crunch, use panko; for a tighter crust, use regular fine breadcrumbs.
- 1/2 cup grated Parmesan cheese Use freshly grated for best results.
- 1 teaspoon garlic powder
- 1 teaspoon paprika
- to taste salt and pepper
- 1/2 cup flour
- 2 large eggs Lightly beaten; add a tablespoon of water or milk for extra tenderness.
- as needed cooking spray or olive oil For baking.
Instructions
Preparation
- Set a wire rack on the sheet for better air circulation.
- In a shallow bowl, combine breadcrumbs, grated Parmesan cheese, garlic powder, paprika, and a pinch of salt and pepper.
- Set out three shallow bowls: flour in one, beaten eggs in the second, and the breadcrumb mixture in the third.
- Dredge each chicken tender in flour, then dip into the beaten eggs, and finally press into the breadcrumb mixture.
- Place the coated tenders on the prepared baking sheet or wire rack, spray lightly with cooking spray or drizzle with olive oil.
Cooking
- Bake at 400°F (200°C) for 20–25 minutes, flipping once halfway through, until golden brown and the internal temperature reaches 165°F (74°C).
- Let the tenders rest for a few minutes before serving.