The first time I made this sandwich it disappeared in under ten minutes at a weeknight dinner for four.
It’s quick, forgiving, and the kind of comfort food that hits like a warm hug.
If you’re looking for an easy shuffle-from-fridge-to-table meal that still tastes like you fussed, this Chicken Cheese Steak Sandwich is your new go-to.
Why You’ll Love This Recipe
- Ready in about 20 minutes for weeknights.
- Minimal ingredients but maximum flavor from simple caramelization.
- Flexible: swap bread, cheese, or peppers without ruining the outcome.
- Crowd-pleaser for kids and adults alike.
- Clean-up is fast—one skillet and a cutting board.
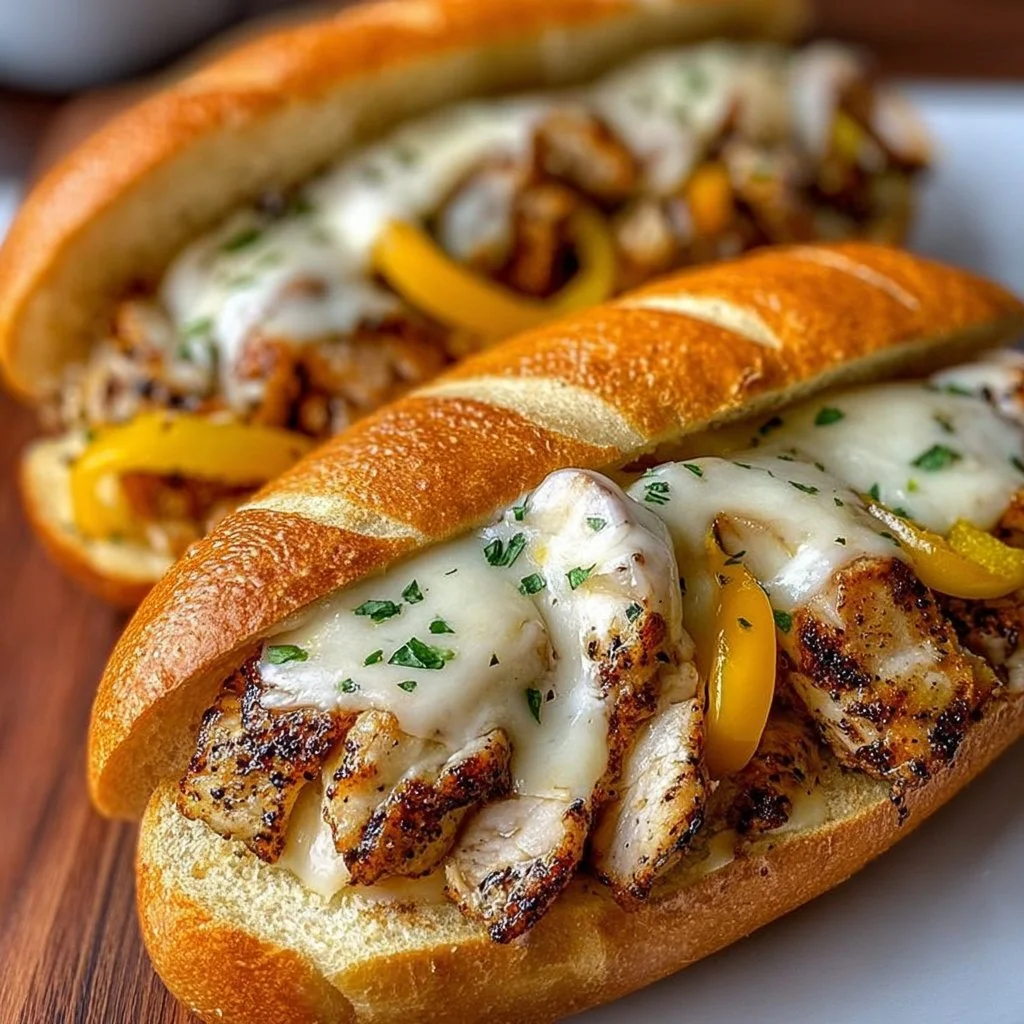
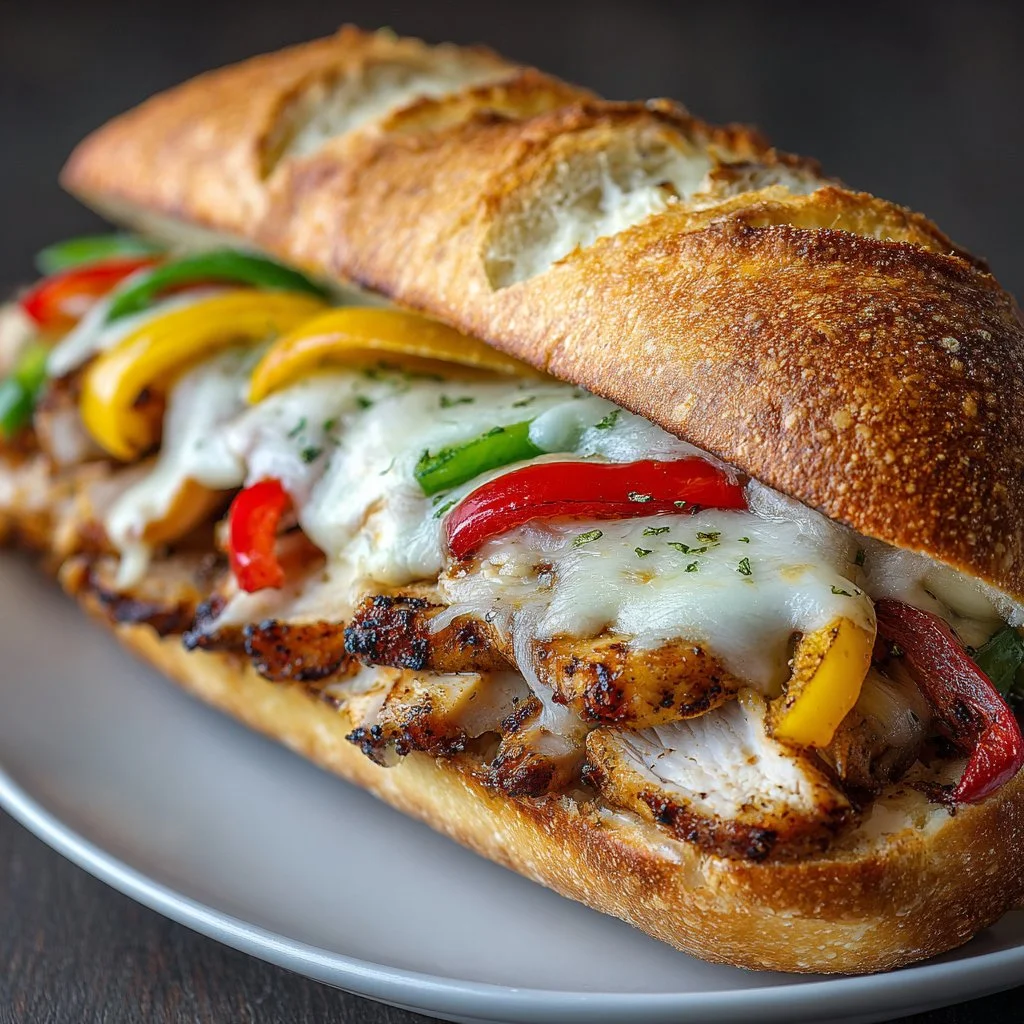
The texture balances tender, juicy chicken with sweet-soft peppers and onions, all wrapped in gooey melted cheese and a slightly crisp toasted hoagie roll. The contrast between the warm filling and the light crunch of the roll makes each bite satisfying and layered. Fat from the cheese and olive oil carries flavor, while the pepper and onion bring brightness and a faint sweetness that keeps the sandwich from feeling heavy.
“Five stars—this was the easiest, most reliable sandwich I’ve made. My husband asked for it twice in one week!” — Kelly, reader
Key Ingredients
Chicken breasts (2, sliced)
Chicken is the star here and using boneless, skinless breasts keeps prep straightforward. Slice them thinly against the grain so each piece cooks fast and remains tender; thin slices also mimic the classic “cheesesteak” mouthfeel. If you can, choose fresh poultry from a trusted brand or the butcher counter for better texture and flavor.
Cheese (4 slices, provolone or American)
The cheese melts into everything and defines the sandwich’s comfort-food soul. Provolone adds mild, slightly tangy depth and stretches nicely; American melts the creamiest and gives that diner-style nostalgia. Use a high-quality provolone for flavor, or classic processed slices for the gooey experience.
Hoagie rolls (4)
A soft but sturdy roll is crucial: it needs to take a quick toast and hold the filling without turning soggy. Look for rolls labeled “Italian sandwich” or “hoagie” at your bakery. If the store rolls are thin, buy slightly larger ones so you get a balanced bread-to-filling ratio.
Bell pepper (1, sliced)
Bell pepper lends a sweet crunch and color contrast. I prefer a red or orange pepper for sweetness, but green works if you like an earthier bite. Slice into thin strips so they cook through in the same time as the chicken.
Full ingredient list:
- 2 chicken breasts, sliced
- 1 bell pepper, sliced
- 1 onion, sliced
- 1 tablespoon olive oil
- Salt and pepper to taste
- 4 slices of cheese (provolone or American)
- 4 hoagie rolls
Step-by-Step Instructions
Step 1: Heat the skillet and oil
Pour 1 tablespoon of olive oil into a large skillet and warm it over medium heat.
You want the oil shimmering but not smoking before anything goes in.
Pro Tip: The oil is ready when it flows easily across the pan and you can smell a faint olive aroma.
Step 2: Sear the chicken
Add the sliced chicken to the hot skillet in a single layer to get even browning.
Give the chicken a minute undisturbed to let it caramelize, then toss or flip to finish cooking.
Pro Tip: Thin slices cook in about 4–6 minutes total; you’ll know they’re done when the juices run clear and there’s no pink in the center.
Step 3: Add vegetables and season
Toss in the sliced bell pepper and sliced onion with the chicken, then season with salt and pepper.
Sauté, stirring occasionally, until the vegetables are tender but still have a little bite.
Pro Tip: The onions should turn translucent and just start to brown at the edges—this adds a sweet, savory note.
Step 4: Melt the cheese
Arrange the 4 slices of cheese over the chicken and veggie mixture.
Cover the skillet for 1–2 minutes so the cheese melts uniformly into gooey ribbons.
Pro Tip: If your skillet lid doesn’t seal, add a splash of water to the pan and cover briefly to create steam for faster melting.
Step 5: Toast the hoagie rolls
While the cheese melts, split your hoagie rolls and toast them on a dry skillet or under the broiler until lightly browned.
A quick toast gives structure and a pleasant crunch.
Pro Tip: Brush the inside lightly with olive oil or softened butter before toasting for extra flavor and a golden crust.
Step 6: Assemble and serve
Scoop generous portions of the hot chicken, pepper, onion, and cheese mixture into each toasted roll.
Serve immediately so the cheese is still melty and the bread maintains its texture.
Pro Tip: Add a few shakes of hot sauce or a handful of fresh arugula if you want peppery brightness.
Expert Tips for Success
- Use uniform slices for even cooking. Cutting the chicken, pepper, and onion into similar-sized strips ensures everything finishes at the same time and you avoid overcooking the chicken or undercooking the vegetables.
- Don’t overcrowd the pan. If too many pieces are added at once, the ingredients steam instead of sear. Work in batches if needed to keep good browning on the chicken.
- Control your heat. Medium heat gives a golden crust without burning the onion or drying out the chicken. If the pan starts to smoke or the edges char too quickly, lower the heat a touch.
- Pick the right cheese. Provolone delivers a slightly tangy, melty finish that resembles Philly-style sandwiches, whereas American cheese provides ultra-creamy stretch. Slices are easiest; shredded cheese can be used but will melt a little differently.
- Toast strategically. Toasting the cut side of the hoagie on a hot pan for 30–60 seconds improves texture and prevents a soggy bottom from the hot filling. Don’t skip this step unless you want a softer sandwich.
- Season at multiple points. Season the chicken lightly when it hits the pan and taste the finished filling before stuffing the roll. A final pinch of salt or a grind of black pepper can make a big difference.
- Add a finishing acid. A squeeze of lemon or a few dashes of vinegar-based hot sauce brightens the whole sandwich and cuts through the richness.
- Use residual heat for melting. After turning the heat off, topping the mixture with cheese and covering the pan traps enough heat to melt the cheese without any additional stove time.
- Equipment note: a heavy-bottomed skillet or cast iron gives the best sear and even heat. Nonstick works fine but won’t develop the same fond for flavor.
- For smoky depth, add a teaspoon of smoked paprika to the chicken while cooking, or use a poblano pepper in place of a bell pepper.
Storage & Freezing
Fridge storage:
Cool the filling to room temperature before storing.
Keep the chicken and pepper mixture in an airtight container in the fridge for up to 3–4 days.
Reheating:
Reheat gently on the stovetop over low heat with a splash of water or broth to loosen any dried juices.
For a sandwich, assemble and toast briefly in a skillet with a lid to re-melt the cheese and crisp the roll.
Freezer storage:
Freeze cooked filling in a freezer-safe container or zip-top bag for up to 2 months.
Lay flat in the freezer for quicker thawing and easier storage.
Thawing & reheating from frozen:
Thaw overnight in the refrigerator, then reheat on low in a skillet with a tablespoon of water or broth.
If reheating from frozen, defrost in the microwave using short intervals, then finish on the stovetop to revive texture.
Tips to prevent soggy bread when storing:
Store bread separately from the filling.
Toast the roll just before serving for best texture.
Variations & Substitutions
Spicy version:
Add sliced jalapeños or a smear of chipotle mayo to the roll.
Swap American for pepper jack cheese for a spicy, melty finish.
Italian-style:
Use provolone, add a few torn basil leaves, and spoon on a touch of marinara before serving.
Consider swapping hoagies for ciabatta rolls for a rustic Italian feel.
Low-carb or gluten-free:
Skip the roll and serve the filling over a bed of mixed greens or wrapped in large lettuce leaves.
Use any gluten-free hoagie or baguette alternative for a close match.
Vegetarian swap:
Replace chicken with sautéed king oyster mushrooms or seitan strips and cook the same way.
Mushrooms give a meaty texture and soak up the same caramelized flavor.
Frequently Asked Questions
Q: Can I use chicken thighs instead of breasts?
A: Yes. Boneless skinless thighs are juicier and more forgiving and will handle a little longer cooking without drying. Cut into thin strips and cook until the internal color changes and juices run clear. Thighs have more fat, which adds flavor and richness to the sandwich.
Q: What’s the best cheese for melting and flavor?
A: Provolone and American are both excellent. Provolone gives a slightly sharper, almost nutty flavor and melts smoothly; American cheese gives the creamiest, stretchiest melt. If you want a bolder taste, try mild cheddar blended with provolone.
Q: Can I make the filling ahead for meal prep?
A: Absolutely. Cook the filling, cool it, and store in the fridge for up to 4 days. Reheat on the stovetop with a splash of broth to revive moisture. Toast rolls right before assembly for the best texture.
Q: How do I avoid dry chicken?
A: Slice the chicken thinly and cook it over moderate heat for a short time. Don’t overcook—remove from heat as soon as the chicken turns opaque. Adding the vegetables and covering to melt the cheese uses residual heat to finish cooking gently.
Q: Can I add other vegetables?
A: Yes. Thin strips of mushrooms, zucchini, or even spinach are tasty options. Add ingredients that cook quickly or sauté them first so they finish at the same time as the chicken.
Final Thoughts
This Chicken Cheese Steak Sandwich is a dependable weeknight winner that’s easy to scale and easy to love.
Give it a try tonight and tweak the mix-ins to make it your family’s signature sandwich.
Please leave a star rating in the recipe card below to let me know how it turned out, and don’t forget to pin this sandwich to Pinterest for your next quick dinner plan.
Conclusion
If you want another take on a chicken-based Philly-style sandwich, check out this helpful variation in the Chicken Philly Sandwich Recipe – A Flavor Journal.
For a quick fifteen-minute approach with different tips on technique and timing, see the Chicken Cheesesteak Recipe: Made in just 15! -Baking a Moment.

Chicken Cheese Steak Sandwich
Ingredients
Main ingredients
- 2 pieces chicken breasts, sliced Boneless and skinless for best results.
- 1 piece bell pepper, sliced Red or orange preferred for sweetness.
- 1 piece onion, sliced
- 1 tablespoon olive oil For cooking.
- 4 slices cheese (provolone or American) Use high-quality or classic processed cheese.
- 4 pieces hoagie rolls Look for sturdy rolls labeled 'Italian sandwich' or 'hoagie'.
- to taste salt and pepper For seasoning.
Instructions
Preparation
- Pour 1 tablespoon of olive oil into a large skillet and warm it over medium heat until it shimmers.
- Add the sliced chicken in a single layer, allowing it to caramelize for 1 minute before flipping to cook through for a total of 4-6 minutes.
- Toss in the sliced bell pepper and onion, then season with salt and pepper, sautéing until tender but still crisp.
- Arrange 4 slices of cheese over the mixture and cover the skillet for 1-2 minutes to melt the cheese.
- While the cheese melts, split and toast your hoagie rolls in a separate skillet or under the broiler until lightly browned.
- Assemble the sandwich by scooping the chicken, pepper, and cheese mixture into each toasted roll. Serve immediately.