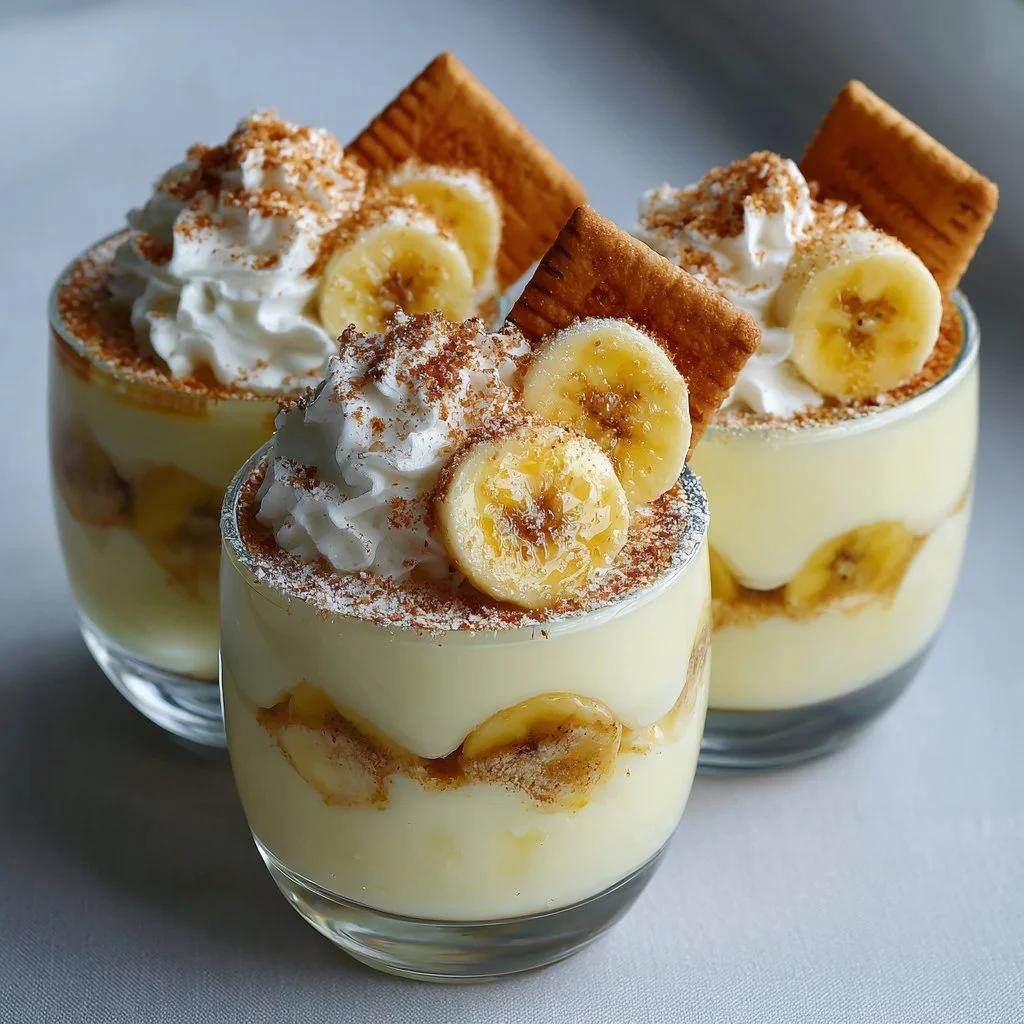
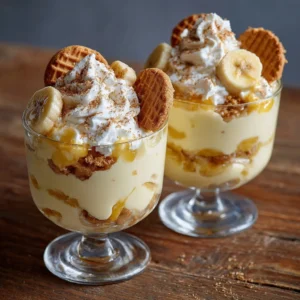
I make these banana pudding cups whenever I want a dessert that feels nostalgic but looks special — individual jars, creamy pastry cream, pillowy whipped cream, and crunchy Nilla wafers all layered with ripe banana slices. It’s the kind of dessert people ask for seconds of at potlucks, simple enough for a weeknight treat, and elegant enough for a casual dinner party. If you like banana-forward sweets, this is a must-try; it sits somewhere between classic Southern banana pudding and a light, custardy trifle. For more banana dessert inspiration, check out this take on banana bread cookies that pairs the same cozy flavors in cookie form.
What makes this recipe special
This recipe turns traditional banana pudding into individual cups that are easy to portion, pretty to serve, and delightful in texture — creamy pastry cream, whipped cream folded in for airiness, fresh bananas for brightness, and Nilla wafers for that nostalgic crunch. It’s excellent for summer gatherings because you can assemble ahead and chill, and it’s kid-approved for its sweet, familiar flavors.
“A perfect blend of silky custard and crunchy wafers — makes weeknight dessert feel like a celebration.”
If you’re bringing a dish to a family gathering or need a make-ahead dessert for a BBQ, these cups beat a flimsy box mix every time. And if you enjoy layered banana desserts too, you might like the crowd-pleasing simplicity of this banana split dump cake for larger crowds.
The cooking process explained
Overview: First you’ll make a vanilla pastry cream (an eggy custard thickened with cornstarch). Chill it until completely cold. Next, whip cream to medium-stiff peaks and fold half into the pastry cream to lighten it. Assemble layers of broken Nilla wafers, pudding, and banana slices in individual cups. Chill for at least two hours to let flavors meld and wafers soften slightly.
This is a hands-on, stovetop custard followed by simple assembly; total active cooking time is moderate, but chilling gives the best texture. If you’re comfortable with custards, this one is forgiving — constant whisking and a fine-mesh strain are your friends. For a banana-bread–forward dessert inspiration to serve alongside, consider this moist banana-zucchini bread.
What you’ll need
- 6 large egg yolks
- ½ cup (108g) granulated sugar
- 3 Tablespoons (28g) cornstarch
- 2 teaspoons vanilla bean paste (or pure vanilla extract)
- ¼ teaspoon salt
- 2 cups (480mL) whole milk
- 3 Tablespoons (42g) unsalted butter, cut into cubes
- 1½ cups (360mL) heavy cream
- ¼ cup (30g) powdered sugar
- 1 teaspoon vanilla extract
- 4 medium, ripe bananas
- 11-ounce box Nilla wafers
Notes and substitutions:
- Swap vanilla bean paste for 2 teaspoons pure vanilla extract if needed.
- Use half-and-half or 2% milk for a lighter custard, but whole milk gives the best richness.
- For a quicker shortcut, you could fold in stabilized whipped cream (add 1 tsp gelatin dissolved in 2 Tbsp warm water to the cream before whipping) to keep layers firmer. If you love banana and chocolate together, try pairing with a slice of chocolate chip banana bread for a brunch spread.
Step-by-step instructions
Vanilla pastry cream
- In a medium saucepan, whisk together 6 egg yolks, ½ cup granulated sugar, 3 Tbsp cornstarch, 2 tsp vanilla bean paste, and ¼ tsp salt until pale and smooth.
- Warm 2 cups whole milk in a separate saucepan or in the microwave until just warm (do not boil).
- Slowly stream the warm milk into the egg mixture while whisking constantly to temper the yolks.
- Return the mixture to the saucepan and cook over low heat. Whisk continuously until the custard thickens and begins to bubble, about 10–15 minutes.
- Remove from heat. Strain the custard through a fine-mesh sieve into a clean bowl to remove any bits.
- Stir in 3 Tbsp unsalted butter until melted and incorporated. Press plastic wrap directly onto the surface and chill until completely cold.
Whipped cream and folding
- When ready to assemble, pour 1½ cups heavy cream, ¼ cup powdered sugar, and 1 tsp vanilla extract into a chilled mixing bowl.
- Whip on low speed to combine, then increase to medium-high until medium-stiff peaks form. Don’t overwhip.
- Reserve about half of the whipped cream for topping. Fold the remaining whipped cream gently into the chilled pastry cream using a rubber spatula until uniform and light.
Assembly
- Slice 4 ripe bananas just before assembling to avoid browning.
- In individual cups or jars, place a layer of broken Nilla wafers to cover the bottom.
- Spoon a scoop of the pudding mixture over the cookies.
- Add a layer of sliced bananas.
- Add another scoop of pudding to cover the bananas.
- Top each cup with a dollop of the reserved whipped cream.
- Chill the cups for at least 2 hours so the flavors meld and the wafers soften to the right texture. Before serving, garnish with extra Nilla wafers for crunch.
For more bananas-and-chocolate inspiration or to plan a dessert spread, I often pair these cups with a dense loaf like chocolate espresso banana bread.
Best ways to enjoy it
Serve these chilled straight from the fridge. They’re perfect as:
- Single-serve desserts at dinner parties.
- A make-ahead option for potlucks — assemble the night before.
- A sweet treat for kids’ lunches (keep chilled until serving).
Pair with: a cup of strong coffee, a light sparkling wine for celebration, or fresh berries for a tart counterpoint. For casual gatherings, present them in mason jars with spoons tucked into twine for a rustic touch.
Keeping leftovers fresh
Refrigeration: Store leftovers covered in the refrigerator for up to 3 days. The bananas will brown and the wafers will become softer over time, so for best texture eat within 48 hours.
Freezing: Not recommended — freezing changes the texture of the custard and whipped cream. If you must freeze, do so unassembled: freeze the pastry cream in an airtight container for up to 1 month, then thaw overnight in the fridge and re-whip the cream before folding.
Food safety: Because this recipe uses cooked egg yolks, it’s safe when the custard is cooked properly (bring to a simmer and thicken). Keep chilled and do not leave at room temperature for more than 2 hours.
Pro chef tips
- Whisk constantly and keep heat low when cooking the custard to avoid scrambled bits. If you see tiny curds, strain the custard to salvage it.
- Press plastic wrap directly onto the pastry cream’s surface to prevent a skin from forming.
- Slice bananas right before assembling and toss with a little lemon juice (½ tsp) if you won’t serve immediately to slow browning.
- For extra flavor, brown the butter before adding to the custard for a toasty note — cool slightly before folding in.
- Use chilled bowls and beaters for the whipped cream to reach peaks faster and more stably.
Creative twists
- Chocolate banana: Fold in 2–3 Tbsp sifted cocoa powder into the pastry cream for a chocolate layer.
- Banana foster-style: Macerate banana slices briefly with a tablespoon of brown sugar and a splash of rum for a boozy twist. Omit alcohol for kids.
- Gluten-free: Replace Nilla wafers with gluten-free vanilla cookies or crushed graham crackers.
- Lighter version: Use Greek yogurt folded into the pastry cream to cut richness, or swap half the heavy cream for mascarpone for a silkier finish.
- Individual parfaits: Alternate pudding with fruit compotes (strawberry or blueberry) for a fruitier variation.
Your questions answered
Q: How long does the pastry cream need to chill before assembling?
A: Chill until completely cold, at least 2 hours. Chilling firms the custard so the layers hold and flavors meld.
Q: Can I make this ahead?
A: Yes. Make the pastry cream up to 2 days ahead and keep chilled. Whip the cream and assemble the cups up to a day in advance for best texture.
Q: My custard curdled — can I fix it?
A: Strain it through a fine-mesh sieve immediately. If it’s slightly grainy, blending briefly with an immersion blender can smooth it before chilling.
Q: Can I use store-bought pudding?
A: You can, but homemade pastry cream gives a richer, less artificial flavor and a better texture when combined with whipped cream.
Q: Are raw eggs used?
A: No. The egg yolks are cooked into the custard until it thickens and begins to bubble, which makes the mixture safe to eat once cooled.
Conclusion
If you want a nostalgic dessert upgraded for today’s table, these banana pudding cups strike the perfect balance of creamy custard, light whipped cream, fresh banana, and wafer crunch. For additional versions and serving ideas, see this reader-favorite take on Banana Pudding Cups – Kim’s Cravings, a similar homemade approach at Homemade Banana Pudding Cups – Barley & Sage, and another trusted recipe example from Banana Pudding Cups – Ambers Kitchen Cooks.
Banana Pudding Cups
Ingredients
For the Vanilla Pastry Cream
- 6 large large egg yolks
- ½ cup granulated sugar
- 3 Tablespoons cornstarch
- 2 teaspoons vanilla bean paste (or pure vanilla extract)
- ¼ teaspoon salt
- 2 cups whole milk
- 3 Tablespoons unsalted butter, cut into cubes
For the Whipped Cream and Assembly
- 1½ cups heavy cream
- ¼ cup powdered sugar
- 1 teaspoon vanilla extract
- 4 medium ripe bananas
- 11 ounce box Nilla wafers
Instructions
Vanilla Pastry Cream
- In a medium saucepan, whisk together egg yolks, granulated sugar, cornstarch, vanilla bean paste, and salt until pale and smooth.
- Warm whole milk in a separate saucepan or in the microwave until just warm (do not boil).
- Slowly stream the warm milk into the egg mixture while whisking constantly to temper the yolks.
- Return the mixture to the saucepan and cook over low heat. Whisk continuously until the custard thickens and begins to bubble, about 10–15 minutes.
- Remove from heat. Strain the custard through a fine-mesh sieve into a clean bowl to remove any bits.
- Stir in unsalted butter until melted and incorporated. Press plastic wrap directly onto the surface and chill until completely cold.
Whipped Cream and Folding
- When ready to assemble, pour heavy cream, powdered sugar, and vanilla extract into a chilled mixing bowl.
- Whip on low speed to combine, then increase to medium-high until medium-stiff peaks form. Don’t overwhip.
- Reserve about half of the whipped cream for topping. Fold the remaining whipped cream gently into the chilled pastry cream using a rubber spatula until uniform and light.
Assembly
- Slice ripe bananas just before assembling to avoid browning.
- In individual cups or jars, place a layer of broken Nilla wafers to cover the bottom.
- Spoon a scoop of the pudding mixture over the cookies.
- Add a layer of sliced bananas.
- Add another scoop of pudding to cover the bananas.
- Top each cup with a dollop of the reserved whipped cream.
- Chill the cups for at least 2 hours so the flavors meld and the wafers soften to the right texture. Before serving, garnish with extra Nilla wafers for crunch.