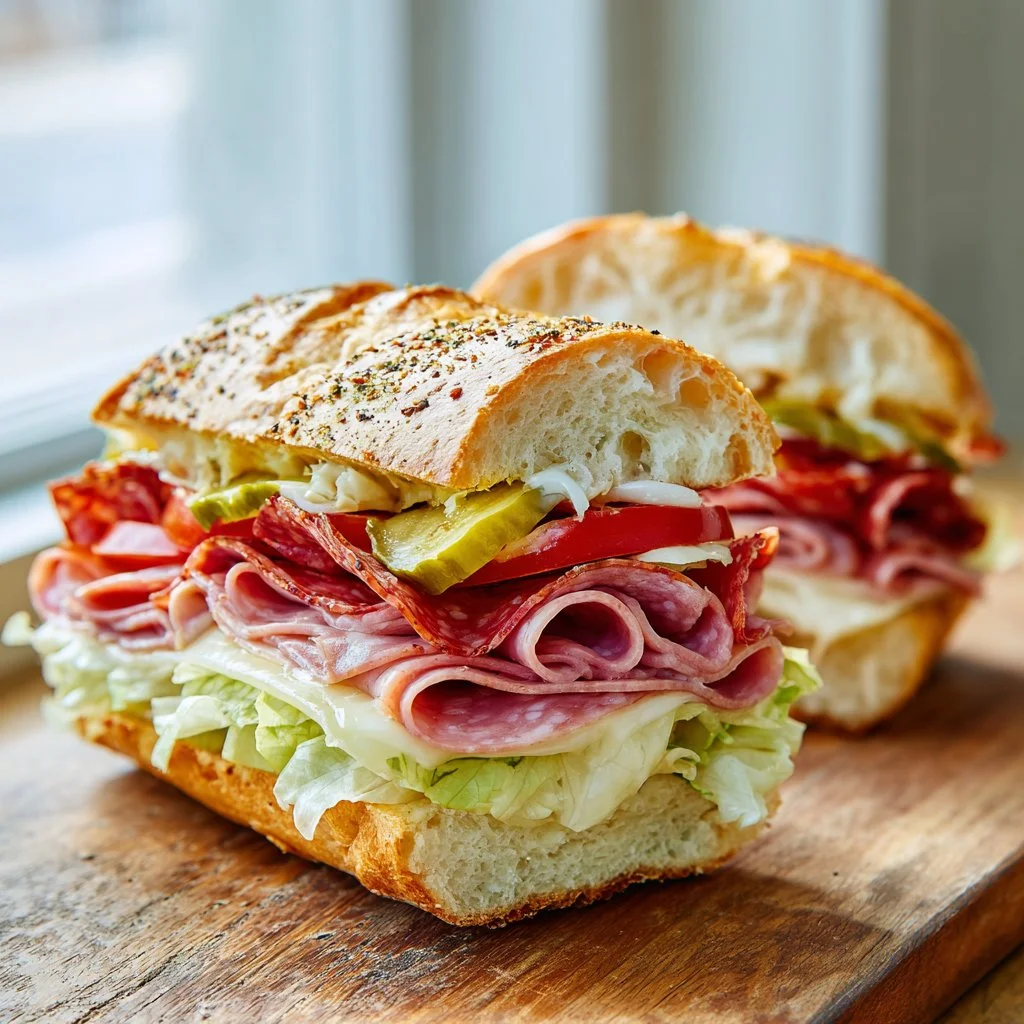
The first time I made this baked Italian sub sandwich was for a potluck, and every last sandwich disappeared within minutes.
It’s the kind of recipe that takes deli classics, gives the cheese a gooey hug in the oven, and turns ordinary subs into something homey and irresistible.
If you’re looking for an easy weeknight winner or a make-ahead party sandwich, this method simplifies assembly and delivers consistent melty results every time.
For hearty sides, I sometimes serve these with an air-fried baked potato for a no-fuss meal that still feels special — try my favorite recipe for pairing ideas: air fryer baked potatoes.
Why You’ll Love This Recipe
- Melty cheese without soggy bread: wrapping in foil keeps the roll crisp enough while ensuring cheeses melt perfectly.
- Hands-off oven finish: assemble quickly and let the oven do the heavy lifting for even heat and no grill fuss.
- Customizable and crowd-pleasing: swap meats, add spicy peppers, or make mini versions for parties.
- Fast prep and easy cleanup: foil-wrapped bakes mean no pans to scrub and easy transport.
This sandwich balances textures: a slight chew from a toasted hoagie roll, silky melted provolone and mozzarella, and the satisfying snap and salt from cured meats. The olive oil and Italian seasoning lightly dress the fillings so they taste bright instead of heavy. When the sandwich comes out of the oven, the top roll steams just enough to be tender, while the bottom stays supportive—perfect for grabbing and biting without collapse or mess.
“Five stars — I made these for game day and they were gone in 20 minutes. The cheese oozed just right and the seasoning made every bite sing.” — Maria, reader
Key Ingredients
Italian hoagie rolls
Choose rolls with a slightly crisp crust and soft crumb. A denser roll (not too airy) keeps the sandwich from turning into a soggy mess after baking. Local bakeries or a good supermarket bakery often have the best texture compared with pre-sliced supermarket sub rolls.
Sliced provolone and sliced mozzarella cheese
Provolone brings that classic Italian deli flavor and melts into a slightly tangy blanket. Mozzarella adds creamy, stringy meltiness. Use deli-sliced blocks or high-quality pre-sliced cheeses; avoid shredded blends that can become greasy.
Sliced salami, ham, and pepperoni
The mix of salami, ham, and pepperoni provides a balance of salt, fat, and cured spice. If you prefer a less fatty sandwich, choose leaner ham or reduce the pepperoni proportion. For stronger flavor, use Genoa salami or spicy soppressata.
Olive oil and Italian seasoning
A drizzle of good extra-virgin olive oil lightly wets the sandwich and helps the seasoning stick while adding freshness. Italian seasoning is a shortcut to oregano, basil, and rosemary notes; fresh torn basil could be used instead for a brighter finish.
Full ingredient list:
- Italian hoagie rolls
- Sliced salami
- Sliced ham
- Sliced pepperoni
- Sliced provolone cheese
- Sliced mozzarella cheese
- Lettuce
- Tomato, sliced
- Olive oil
- Italian seasoning
- Red pepper flakes (optional)
- Zesty toppings (e.g., banana peppers, pickles)
Step-by-Step Instructions
Step 1: Preheat and prep
Preheat the oven to 350°F (175°C).
Line a baking sheet with foil or parchment for easy cleanup.
Pro Tip: Use an oven thermometer if yours runs hot or cold; 350°F is forgiving, but consistent oven temperature gives even melting.
Step 2: Split the rolls
Slice the hoagie rolls in half lengthwise, keeping the two sides intact.
Open each roll like a book so the bottom can hold the fillings.
Pro Tip: If your rolls are very thick, hollow the softest part of the crumb out slightly so fillings sit lower and won’t overflow.
Step 3: Layer meats and cheeses
Layer the sliced salami, ham, and pepperoni on the bottom half of each roll.
Top the meats with slices of provolone and mozzarella, overlapping for even coverage.
Pro Tip: Build from salty to mild—meats first, then the melty cheeses—so each bite has balanced flavor. You’ll know it’s right when the cheese covers the meat edge to edge.
Step 4: Add fresh toppings
Add lettuce, sliced tomato, and any zesty toppings like banana peppers or pickles on top of the cheese or beneath the top roll.
If you add wet toppings (tomato or pickles), keep them thinly sliced to avoid excess moisture.
Pro Tip: For less sogginess, place lettuce under the cheese or add tomatoes right before serving. The visual cue to stop is a single thin layer of tomato slices—not a pile.
Step 5: Season and oil
Drizzle each assembled sandwich lightly with olive oil. Sprinkle Italian seasoning and red pepper flakes to taste.
The oil forms a protective layer that carries aromatics and helps the cheese fuse to the bread.
Pro Tip: Aim for a thin, even drizzle; too much oil pools and makes the roll oily. A light sheen is perfect.
Step 6: Wrap and bake
Place the top half of the rolls on, wrap each sandwich tightly in aluminum foil, and arrange them on the baking sheet.
Bake in the preheated oven for 15–20 minutes, until the cheese is melted and sandwiches are heated through.
Pro Tip: For slightly crisper tops, unwrap sandwiches for the last 2 minutes and broil briefly—watch carefully to avoid burning. You’ll know they’re done when cheese is visibly melted and fillings are steaming.
Step 7: Rest and slice
Remove from the oven and let sandwiches rest wrapped for 1–2 minutes. Unwrap, slice, and serve warm.
Resting lets juices settle so the sandwich slices hold together.
Pro Tip: Slice with a serrated knife using a gentle sawing motion to avoid squashing the sandwich. Serve warm for best texture.
Expert Tips for Success
- Choose the right roll: A roll with a thin, slightly crisp crust and dense interior is best for holding melted cheese and moist toppings. Soft sandwich rolls can collapse.
- Stack strategically: Place wetter items (tomato, pickles) next to the top bun or add them after baking to prevent sogginess. Keeping cheese closest to the meat ensures a molten barrier that protects the bread.
- Use full slices of cheese: Pre-sliced cheese or thinly sliced block cheese melts more predictably than shredded blends and won’t separate or get greasy.
- Moderate oven time: 15–20 minutes at 350°F melts cheese thoroughly without drying the meats. If your oven runs cool, add 3–5 minutes; if hot, check at 12 minutes.
- Foil wrapping technique: Wrap tightly so steam melts the cheese, but not so tight that the sandwich is steamed flat. Loosely tent for a fluffier top.
- Make-ahead assembly: You can assemble and wrap sandwiches in foil up to 24 hours ahead; refrigerate and bake directly from chilled, adding 5 minutes to the bake time.
- To crisp the bottom: Place sandwiches on a preheated baking sheet so the base hits a hot surface and gains a bit of crust.
- For party servings: Make mini subs using slider rolls; adjust bake time to 10–12 minutes. Consider baking on two sheets for even airflow.
- Troubleshooting separation: If cheese pools, it’s often from over-shredded or too-high-fat cheese; switch to sliced provolone/mild mozzarella.
- Flavor boost: Finish with a light balsamic drizzle or a smear of mustard for complexity; these strong flavors should be used sparingly to avoid overpowering the cured meats.
- Equipment note: A rimmed baking sheet works best; avoid overcrowding which can trap steam and make bread soggy.
- Visual readiness cue: When cheese is uniformly melted and the edges start to glisten, the sandwiches are ready to remove.
Storage & Freezing
Fridge: Wrap cooled sandwiches tightly in foil or plastic wrap and refrigerate for up to 3 days. Reheat in the oven at 325°F (160°C) for 10–12 minutes, still wrapped, to prevent drying. For faster reheating, unwrap for the last 1–2 minutes to refresh the crust.
Freezer: Assemble and wrap each sandwich in foil, then place in a freezer-safe bag. Freeze for up to 2 months. Thaw overnight in the refrigerator before baking, or bake from frozen at 350°F (175°C) for 25–30 minutes, checking at 20 minutes to avoid overcooking.
Reheating tips: To keep bread from getting soggy when reheating, unwrap for the last few minutes of oven time or finish on a hot skillet for 30–60 seconds per side to restore crunch. Microwaving will melt the cheese quickly but often yields limp bread; if using a microwave, crisp in a skillet briefly afterward.
Variations & Substitutions
Vegetarian version: Replace meats with grilled eggplant slices, marinated roasted peppers, and extra provolone or a plant-based cheese. Add a smear of pesto for depth. For inspiration on baked vegetarian sides, you might enjoy this baked apples pairing idea: baked apples with feta, honey, and cranberries.
Spicy Italian: Swap regular salami for soppressata or add sliced hot cherry peppers and extra red pepper flakes. A swipe of Calabrian chili paste works wonders sparingly.
Cheese-forward: Double up on provolone and mozzarella, or add a few thin slices of fontina for a nuttier melt. For an indulgent party version, pair with a baked brie appetizer for a decadent spread: baked brie phyllo wreath.
Low-carb swap: Use sturdy lettuce wraps and assemble without the top roll, then bake gently wrapped in foil on a baking sheet to warm fillings. Be mindful that lettuce won’t insulate like bread; reduce bake time accordingly.
Seafood twist: For a coastal take, swap meats for Italian-seasoned grilled shrimp and substitute provolone with a mild white cheese; see this baked cod recipe for ideas on pairing seafood with oven techniques: baked cod in coconut lemon cream sauce.
Frequently Asked Questions

Q: Can I assemble these ahead of time?
A: Yes. You can assemble and wrap the sandwiches up to 24 hours ahead and refrigerate. Bake directly from chilled, adding about 5 extra minutes to ensure everything heats through. For longer storage, freeze wrapped sandwiches and thaw overnight before baking.
Q: Will the rolls get soggy in the oven?
A: Proper roll selection and layering minimize sogginess. Use denser hoagie rolls, keep sliced tomatoes thin or add them after baking, and place cheese between meat and bread to form a moisture barrier. Wrapping in foil traps steam to melt cheese but doesn’t saturate the roll if assembled correctly.
Q: Can I make these gluten-free?
A: Yes. Use a sturdy gluten-free hoagie roll that can hold fillings and withstand baking. Note that many gluten-free breads lack the same structural integrity, so consider reducing bake time slightly and using a preheated baking sheet to add bottom support.
Q: What’s the best way to reheat leftover subs?
A: The oven gives the best results: wrap in foil and reheat at 325°F (160°C) for 10–12 minutes. Unwrap for the last minute to refresh the crust. Avoid microwaving unless you re-crisp in a skillet afterward.
Q: Can I use different cheeses or meats?
A: Absolutely. This is a flexible template. Swap in provolone alternatives like fontina or Gouda, or try different cured meats. Balance salty, fatty, and milder elements to preserve the sandwich’s flavor profile.
Final Thoughts
This baked Italian sub method is effortless yet impressive, perfect for weeknight dinners, parties, and make-ahead meals.
If you try it, please leave a star rating in the recipe card below and pin this to your sandwich boards on Pinterest.
For more inspiration and other baked sub takes, check out this classic version on Baked Italian Subs – 12 Tomatoes, a hearty grinder twist at Baked Italian Grinder Recipe – The Life Jolie, and another popular oven-baked sub from Baked Italian Subs – Tornadough Alli.

Baked Italian Sub Sandwich
Ingredients
Main Ingredients
- 4 pieces Italian hoagie rolls Choose rolls with a slightly crisp crust and soft crumb.
- 8 ounces Sliced salami Provides a balance of salt and flavor.
- 8 ounces Sliced ham Use leaner ham for a lower fat option.
- 8 ounces Sliced pepperoni For a spicier flavor, use a little less.
- 4 ounces Sliced provolone cheese Melts into a slightly tangy blanket.
- 4 ounces Sliced mozzarella cheese Adds creamy, stringy meltiness.
- 1 cup Lettuce For freshness.
- 1 medium Tomato, sliced Keep thinly sliced to avoid excess moisture.
- 2 tablespoons Olive oil Helps seasoning stick and adds freshness.
- 1 teaspoon Italian seasoning Or use fresh torn basil for flavor.
- 1 teaspoon Red pepper flakes (optional) Add to taste.
- to taste Zesty toppings (e.g., banana peppers, pickles) Add for extra flavor.
Instructions
Preparation
- Preheat the oven to 350°F (175°C) and line a baking sheet with foil or parchment.
- Slice the hoagie rolls in half lengthwise, keeping the two sides intact.
- Layer the sliced salami, ham, and pepperoni on the bottom half of each roll.
- Top the meats with slices of provolone and mozzarella, overlapping for even coverage.
- Add lettuce, sliced tomato, and any zesty toppings on top of the cheese.
- Drizzle each assembled sandwich lightly with olive oil and sprinkle with Italian seasoning and red pepper flakes.
- Wrap each sandwich tightly in aluminum foil and arrange them on the baking sheet.
- Bake in the preheated oven for 15–20 minutes, until cheese is melted and sandwiches are heated through.
- Remove from the oven, let sandwiches rest wrapped for 1–2 minutes, unwrap, slice, and serve warm.